
upload photo | donate | calendar
 |
my profile |
register |
faq |
search upload photo | donate | calendar |
|
|
#1 |
|
Lifer
Lifetime Forum Patron Join Date: Feb 2009
Location: ...on the 'ol Erie Canal...
Posts: 8,183
Thanks: 1,400
Thanked 4,442 Times in 2,330 Posts
|
Some years back, I bought a book by George Nonte called Pistolsmithing. It is a compilation of many of his articles from various magazines. One comment was of particular interest, and concerned the M1896 Mauser.
I was intrigued by this, and decided to do a re-barrel of my own, on a shot-out C96 'Broomhandle' Mauser. I obtained a spare barrel extension from Gunbroker.com, and a 30 caliber rifled blank, and set out on my quest!  Re-barreling an M1896 Mauser (Part One) OK, this is a quick & dirty pictorial on re-barreling a C96. Not every step is shown; not every step makes sense. It's actually drawn from several re-barreling projects, including one long-barrel .256 caliber wildcat. First I saw off the barrel. I part the receiver at the point where the M30 'Broomhandle' barrel has its 'step'. I've read that this was a popular way to re-barrel C96's 'back in the day', and this was where the old-time gunsmiths cut the barrel off. 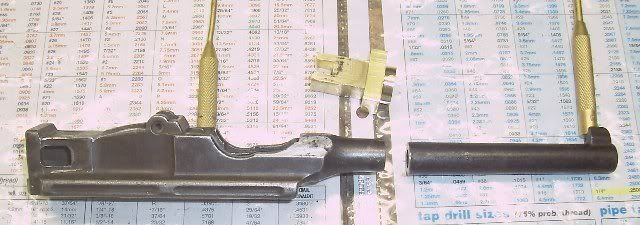 Now I face off the stub. Here I'm using a live center in the existing bore as my center, and a custom made receiver mandrel to center the rear of the receiver. 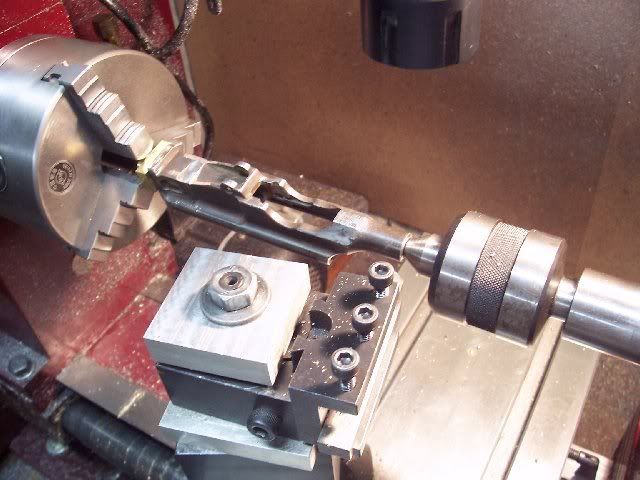 Custom turned mandrel in lathe chuck, mounted extension on angle block, leveled and squared to chuck... 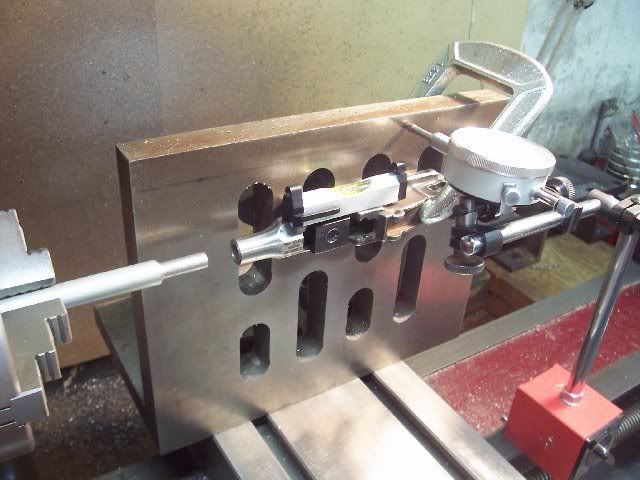 Drilling out the extension stub... 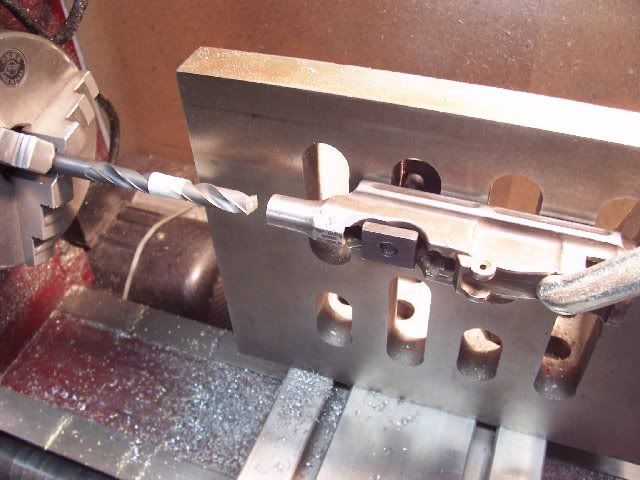 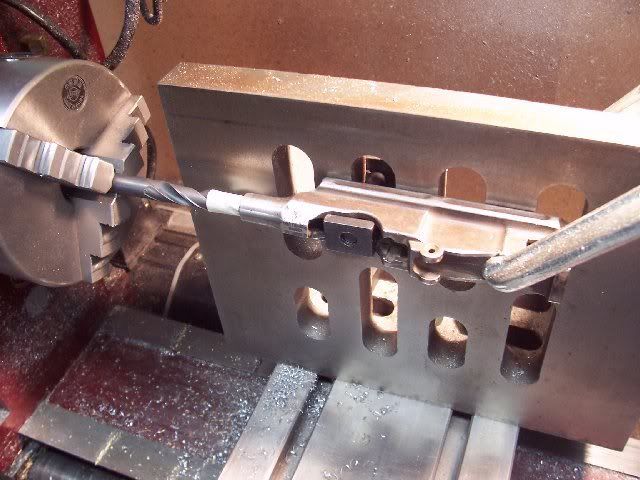 Tapping the stub. I turn the tap by hand; the chuck is just to steady the tap and keep it on center... 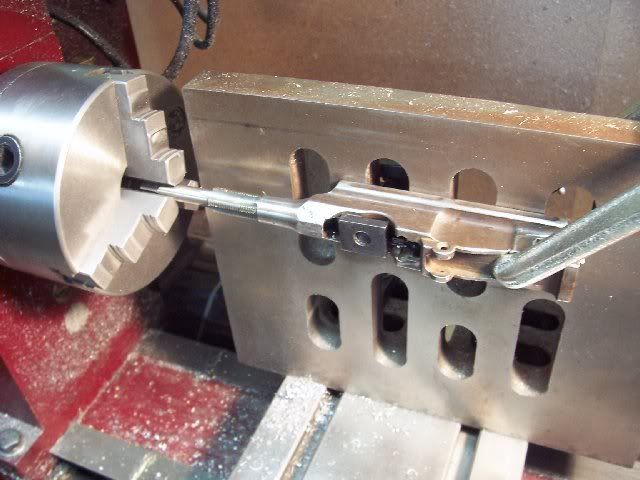 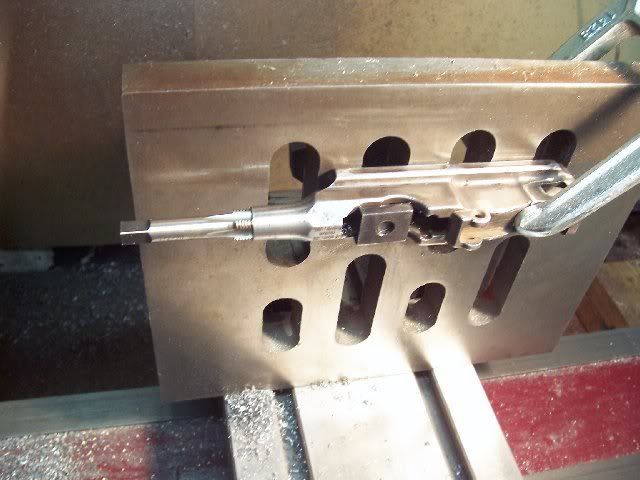 Receiver/extension stub tapped and ready for barrel... 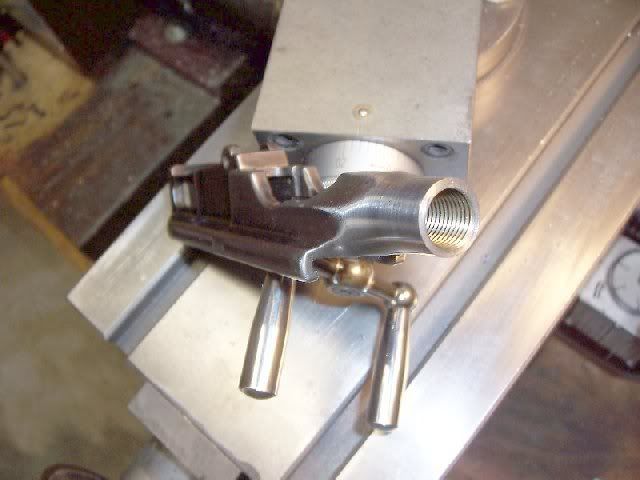 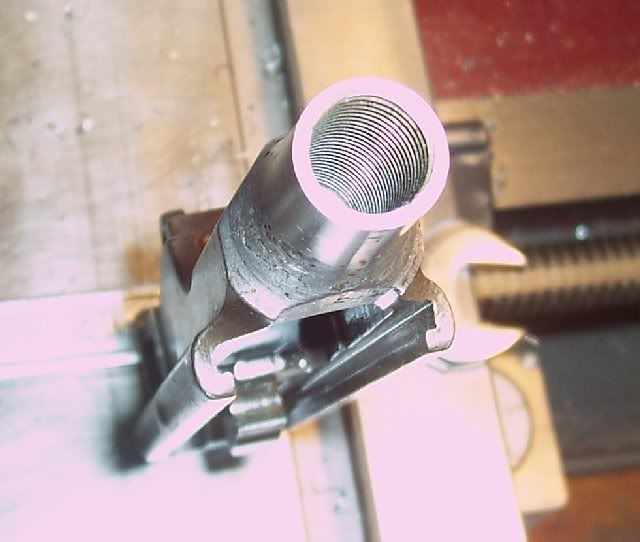 Now we go to the barrel blank... 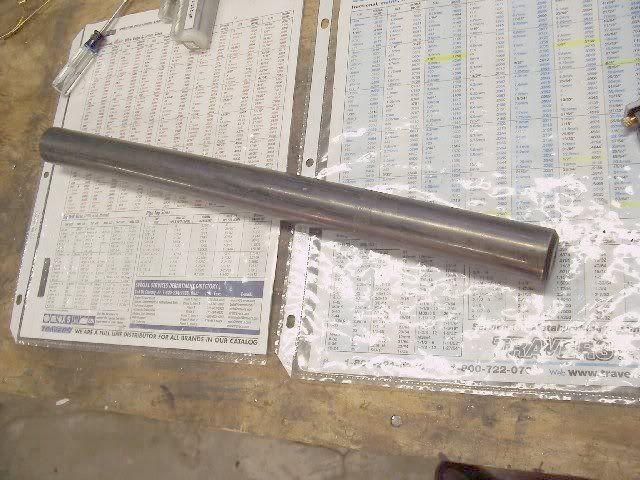 Sawed to length and turned to approximate diameter... 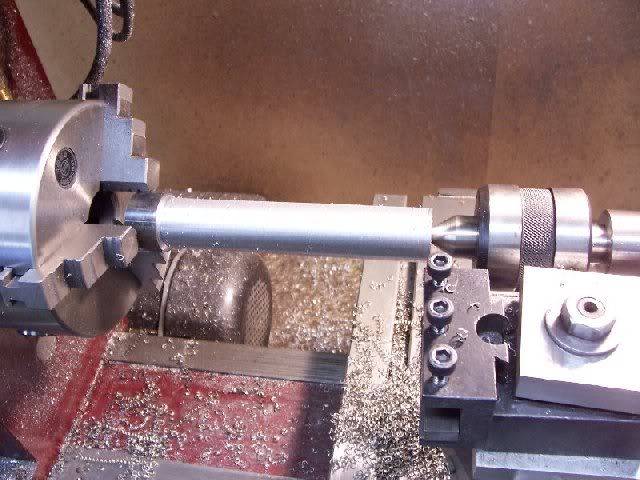 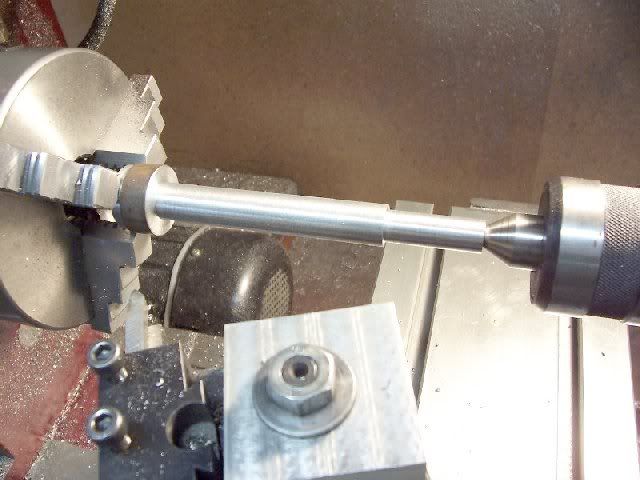 Chamber end threaded; snug fit on receiver. Front sight end left unfinished... 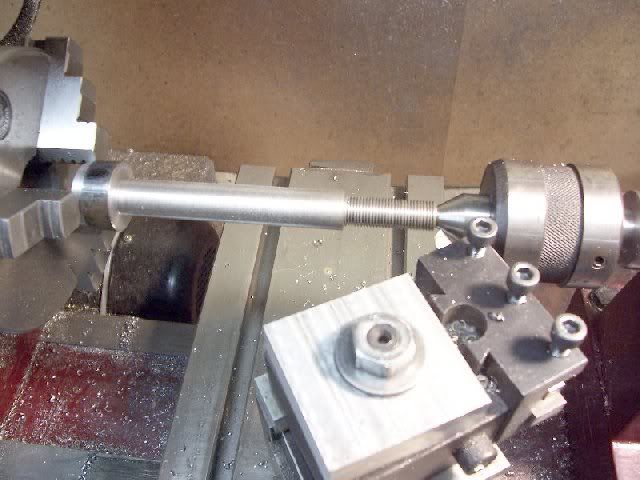 Barrel and receiver... 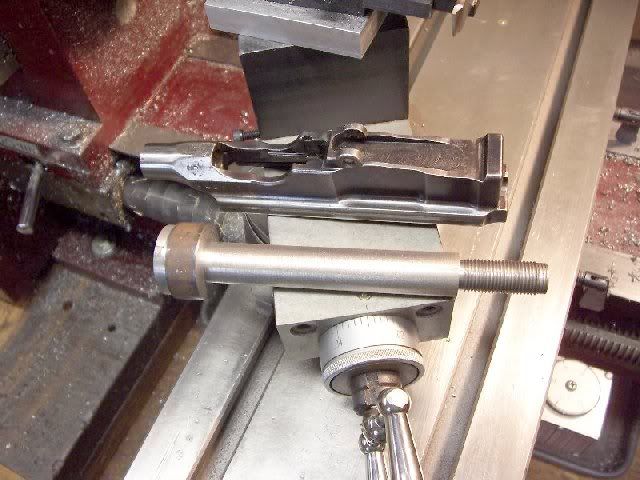 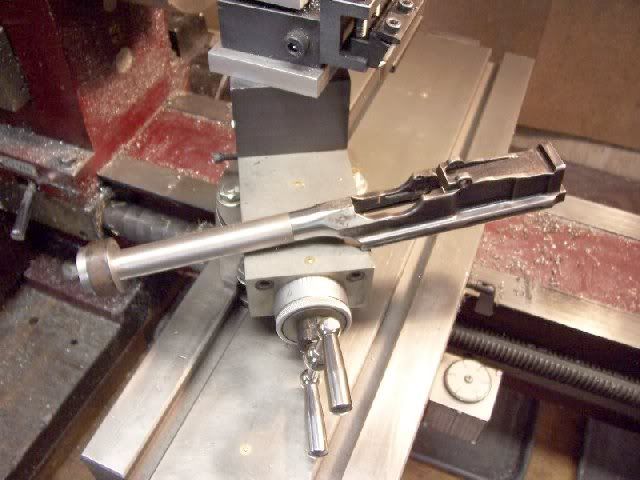 Front sight end being worked... 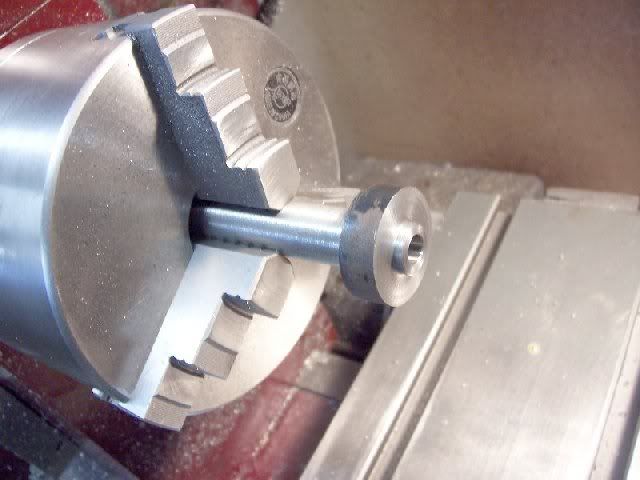 Barrel mounted and torqued; now being tapered. Jacobs chuck inadvertedly left in mill quill [D'OH!!!}... 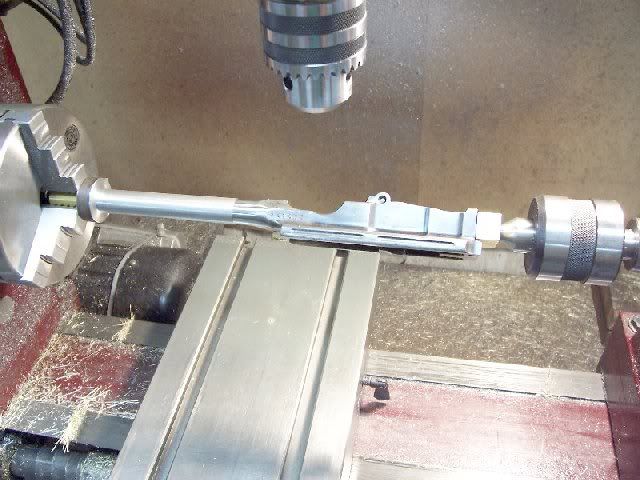 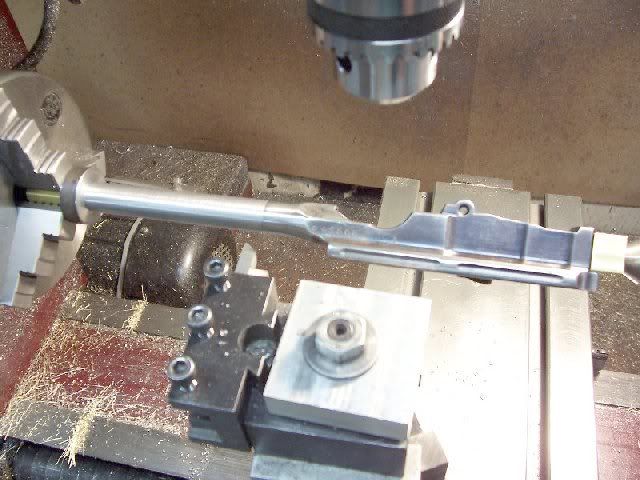 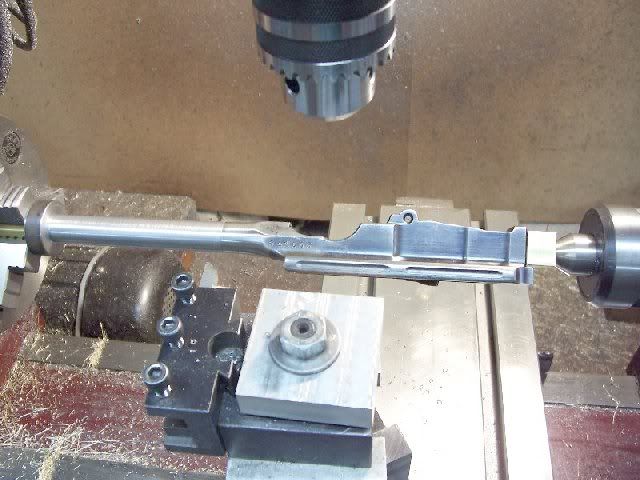 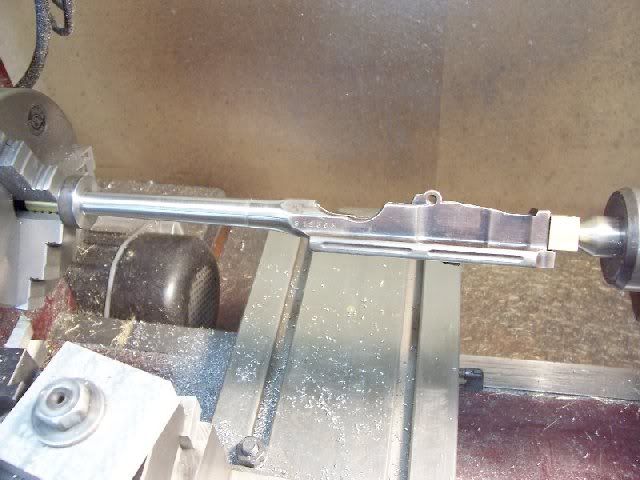 Getting there... 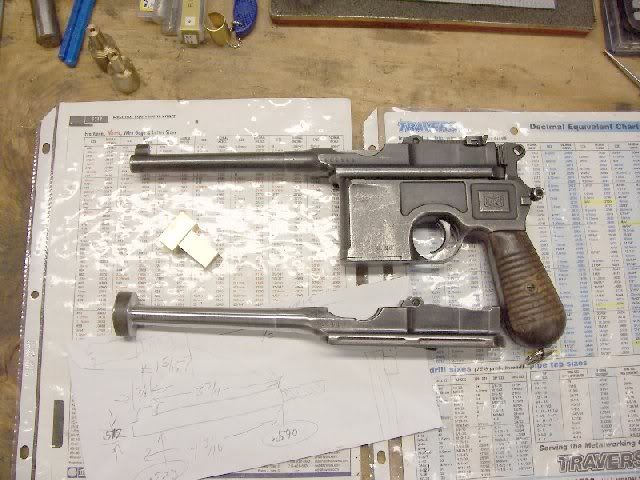 Rough milling the sides & bottom of front sight. 4x4 & 2x4 blocks used as shims to steady unsupported receiver; otherwise, it would vibrate.... 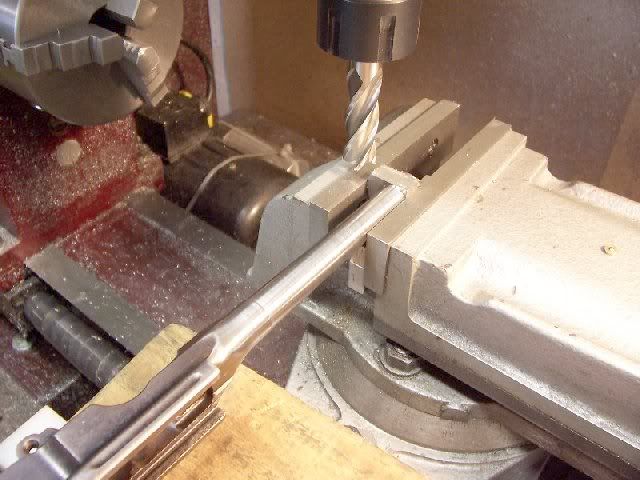 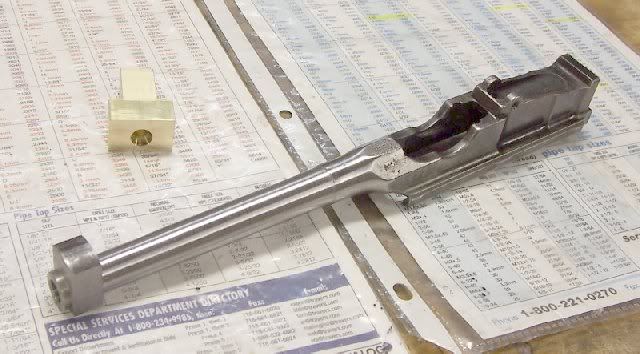 Barrel in rotary indexing head; cutting front sight blade. Threaded sleeve used to protect barrel threads. 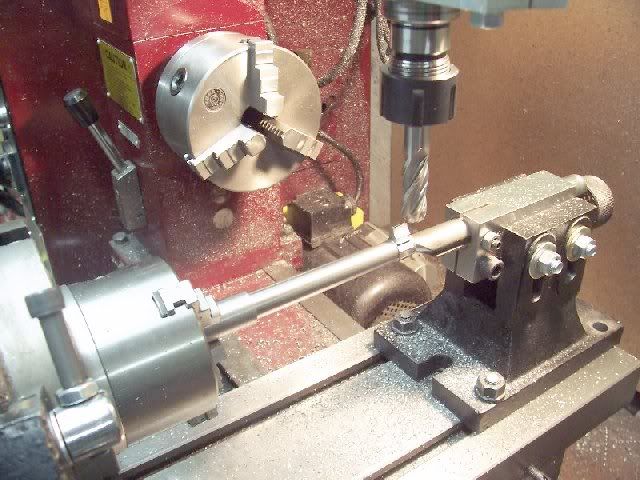 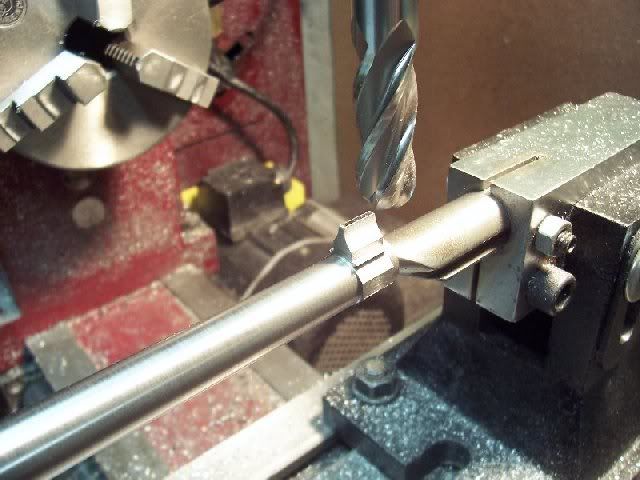 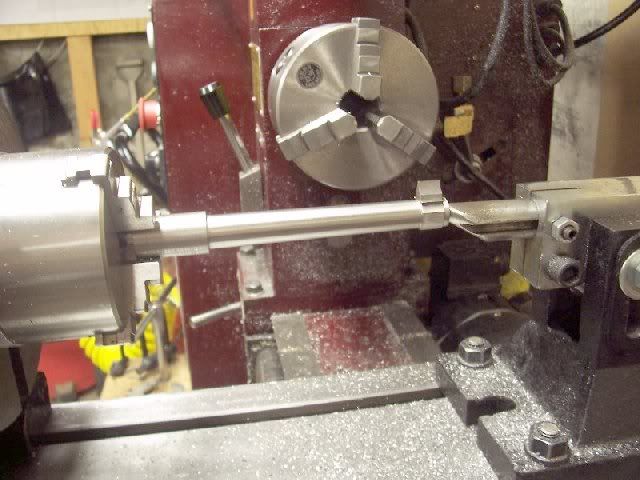 Cutting the barrel/front sight sides & bottom; 4º at a time... 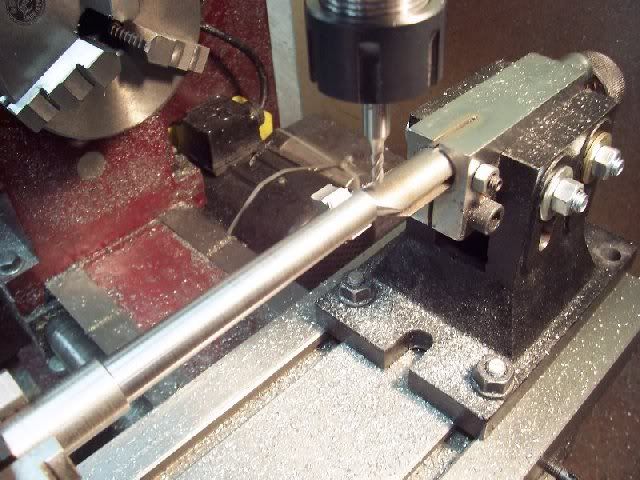 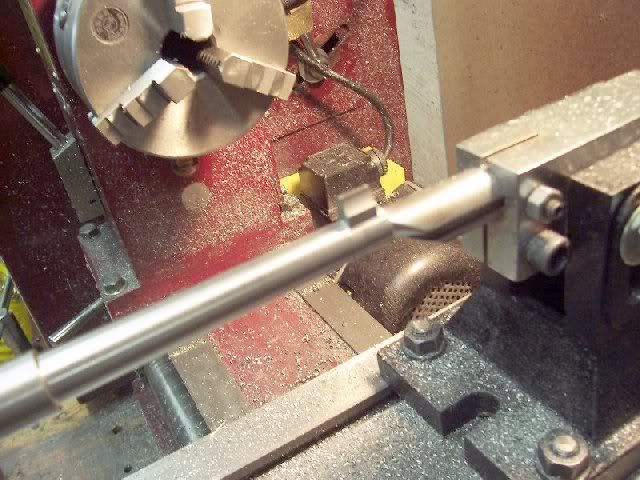 Nearly finished barrel & receiver/extension... 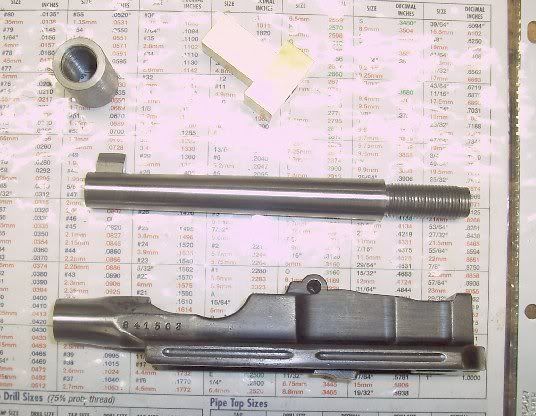 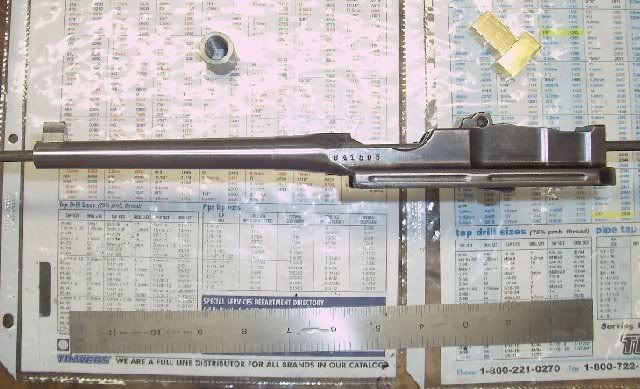 I'll ream the chamber in Part Two...
__________________
I like my coffee the way I like my women... ...Cold and bitter... 
Last edited by sheepherder; 09-08-2014 at 07:04 PM. |
|
|

|
| The following 14 members says Thank You to sheepherder for your post: |
|
|
#2 |
|
Lifer
Lifetime Forum Patron Join Date: Feb 2009
Location: ...on the 'ol Erie Canal...
Posts: 8,183
Thanks: 1,400
Thanked 4,442 Times in 2,330 Posts
|
Re-barreling an M1896 Mauser
(Part two) Reaming the C96 barrel for a .256 bottleneck cartridge (This part presupposes that you have already installed a .256 caliber barrel blank on your Broomhandle). I'll be forming a wildcat cartridge out of .223 Rem unprimed brass, using shortened RCBS .256 Win Mag dies to make a .256 caliber bottleneck cartridge with the same OAL as the 30 Mauser cartridge.. First, we have to make the cartridge. I used a set of .256 Win Mag dies, shortened .185". I used a carbide cutter, low speed, and low feed. Shown is a finished brass cartridge, the dies before shortening, and a loaded cartridge with 60 gr soft nose bullet. 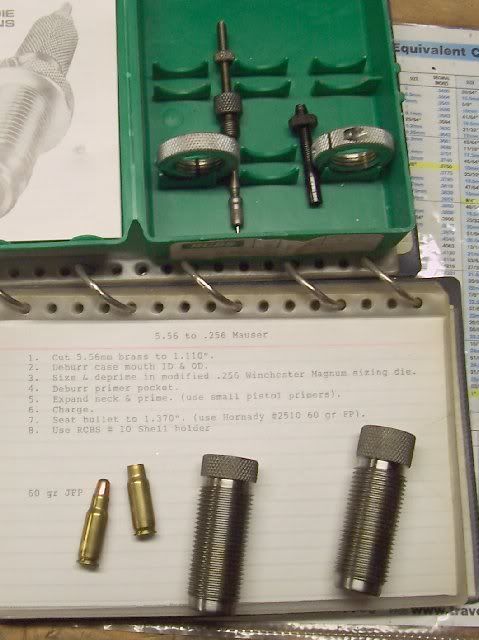 Cutting down the die; removing three threads as OEM RCBS die set... 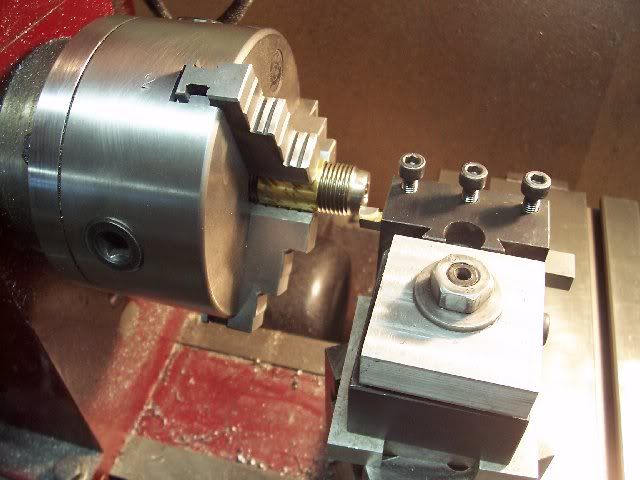 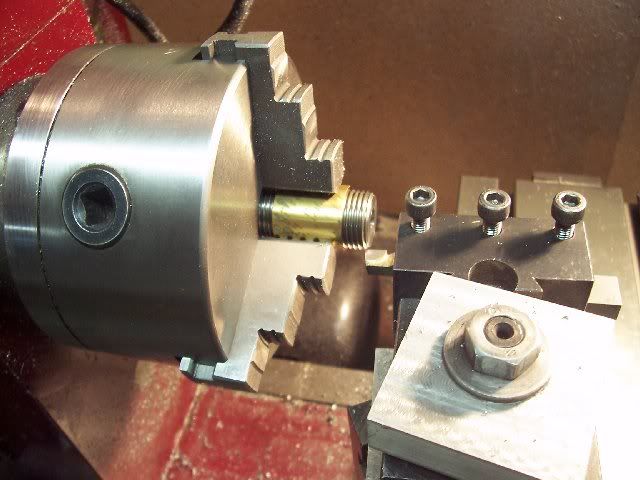 Chamfering the base of the die with a 'fine' grit pyramid stone... 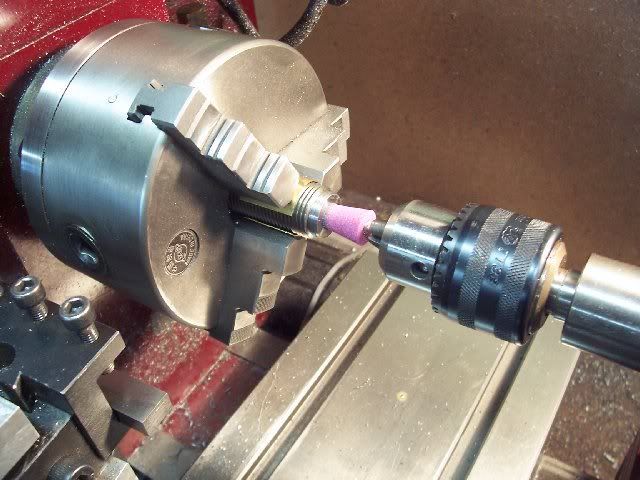 The finished shortened dies, and the shortening steps in the .223 Rem cartridges we're forming with them... 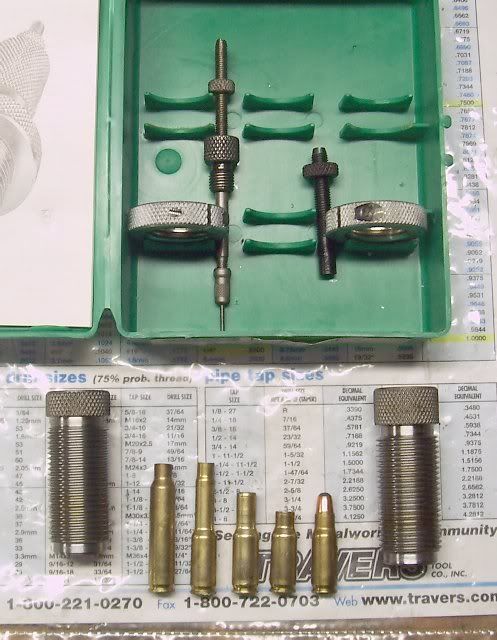 Now that I have a cartridge, I can ream out the barrel. I'm going to do it a bit backwards from my usual practice, with the reamer/extension/floating reamer holder held in the chuck and the barrel extension clamped to an angle plate. Plate is squared and extension leveled and centered to the reamer/chuck center. Reamer shown in position. Solid pilot Clymer .256 Win Mag straight flute chamber finishing reamer. 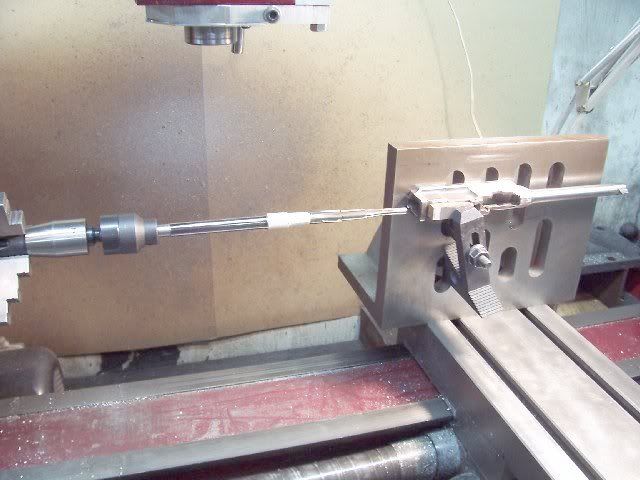 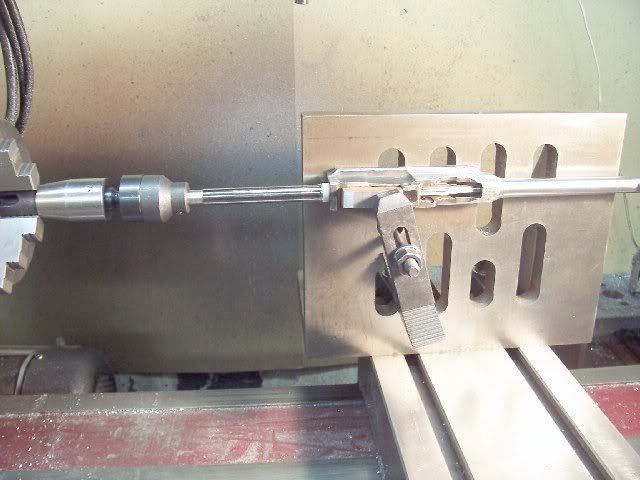 Starting the cuts...1/32" at a time, using high-Sulphur content cutting oil; squirt oil in, back out, blow off chips, repeat... 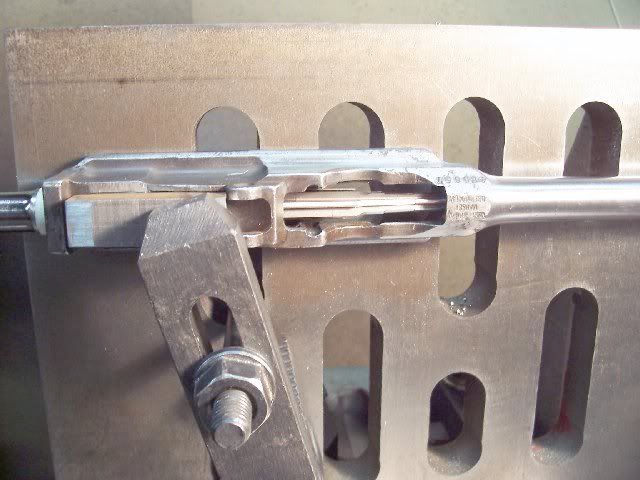 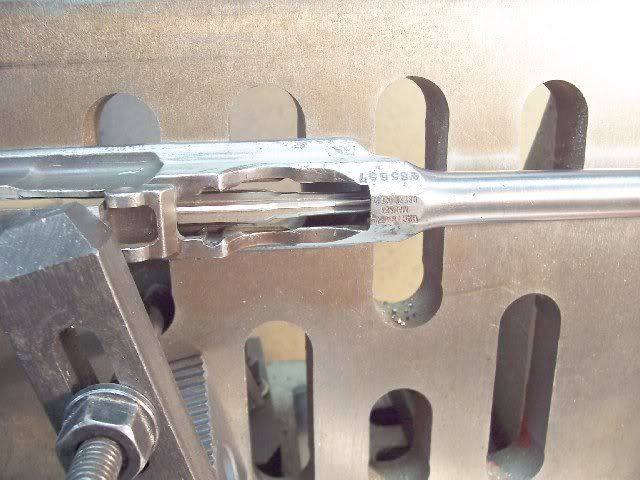 Taking a rough measurement, using stripped bolt and finished/formed unprimed dud cartridge... 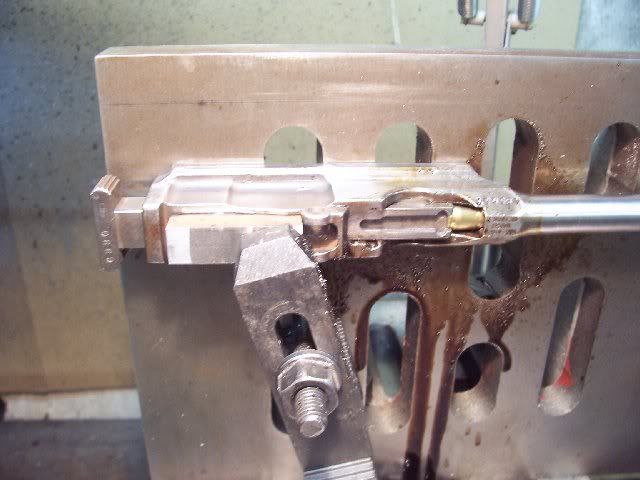 Cutting some more... 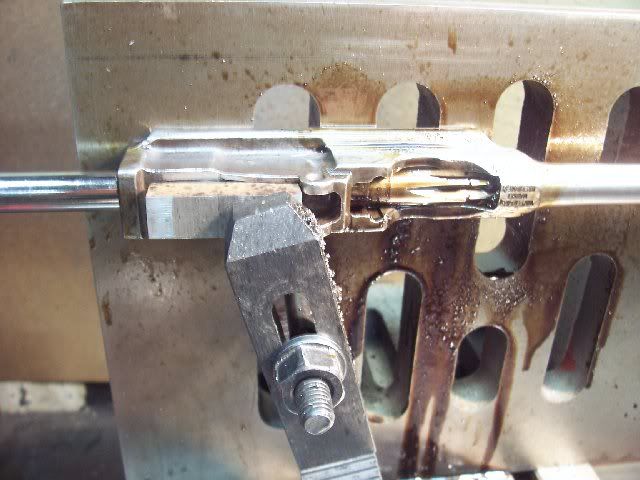 Now I'm down to .050" from zero headspace...Lots of oil and chips... 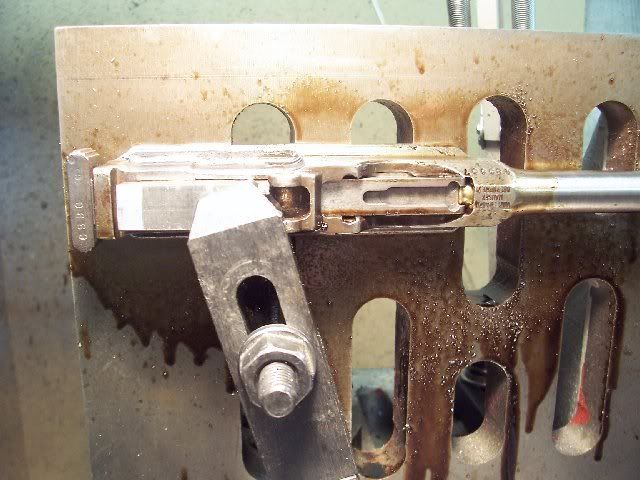 Down to zero headspace. Now I run the reamer in an additional .004"... 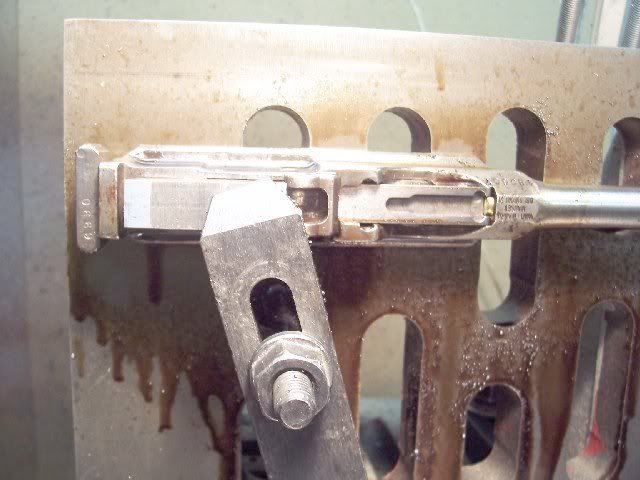 A box of headspace dots, punched out of plastic shim stock... 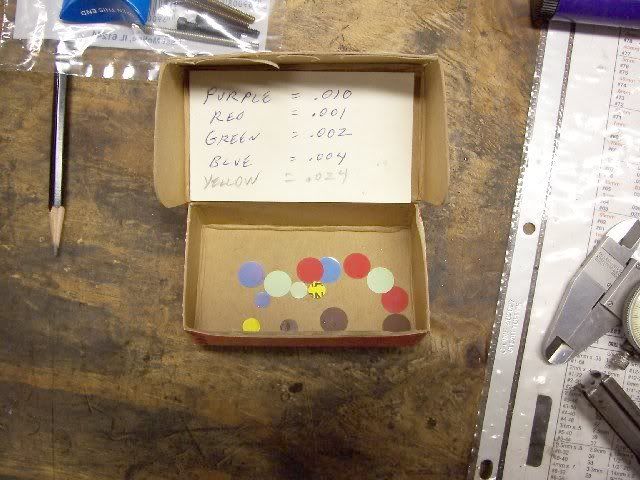 The .004" dot on the bolt face. It's a blue dot; the flash makes it look white. I don't have any white dots... 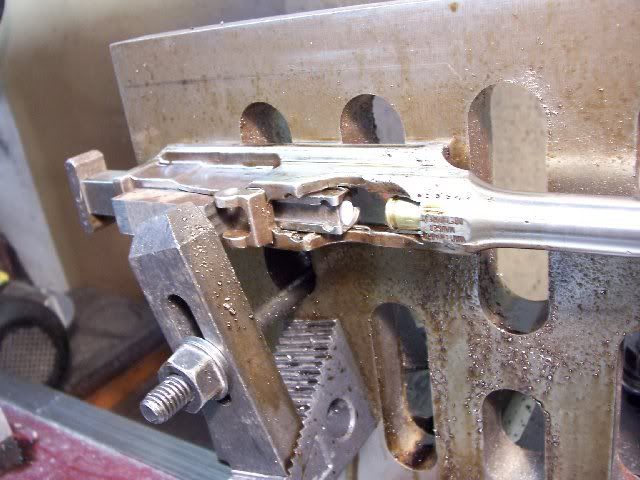 And with the .004" dot in place, I have no movement. Reaming is done. Barrel is headspaced. Some pics of the finished chamber... 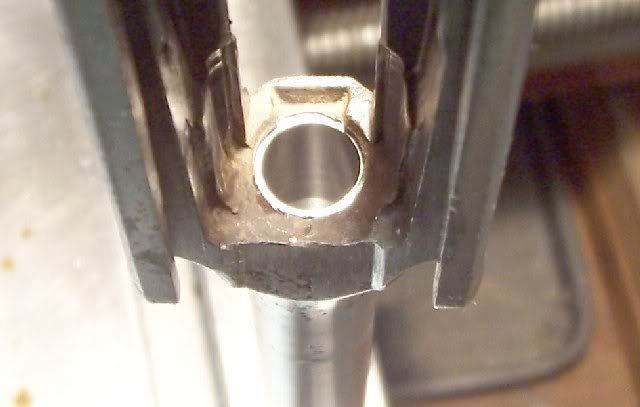 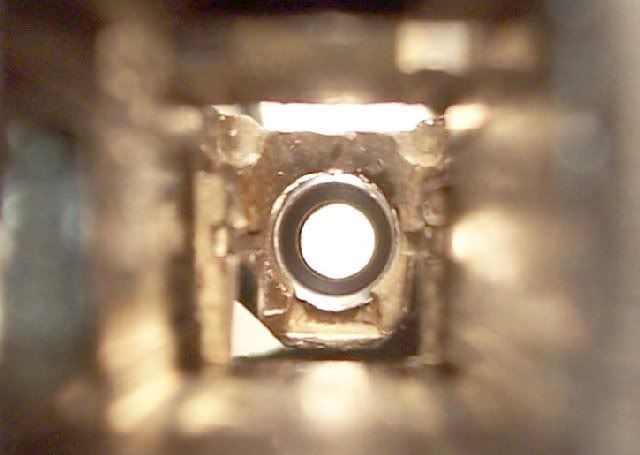 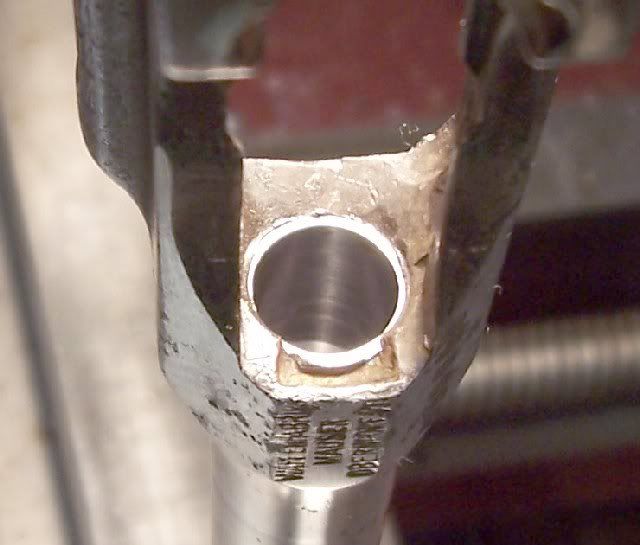 Overall view... 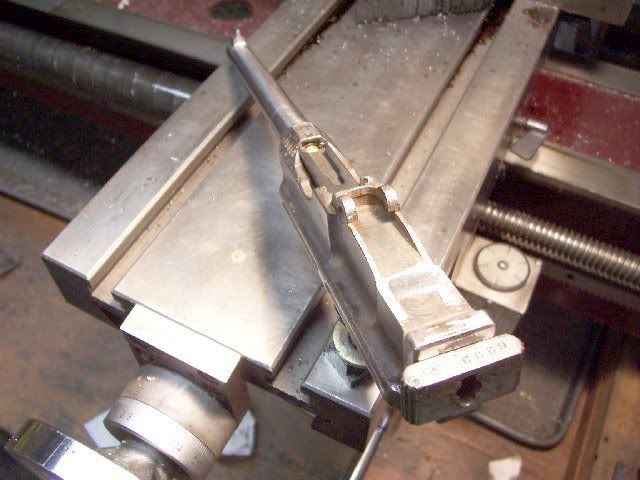 And a pic of the old/long .256 barrel stub, showing how much supported tube is threaded into the extension... 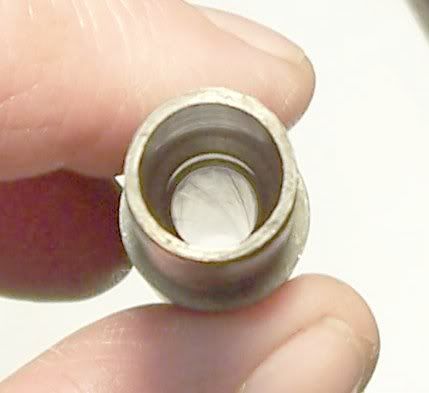 The new chamber still needs to have the extractor notch cut, and the feedramp cut & smoothed. I did a similar long-barrel/re-barrel in .256 caliber some years ago...I really liked it, but finding a shoulder stock the long-barreled Mauser will fit into has been unsuccessful...
__________________
I like my coffee the way I like my women... ...Cold and bitter... 
Last edited by sheepherder; 09-08-2014 at 07:05 PM. |
|
|

|
| The following 7 members says Thank You to sheepherder for your post: |
|
|
#3 |
|
Lifer
Lifetime Forum Patron Join Date: Feb 2009
Location: ...on the 'ol Erie Canal...
Posts: 8,183
Thanks: 1,400
Thanked 4,442 Times in 2,330 Posts
|
Case forming steps -
__________________
I like my coffee the way I like my women... ...Cold and bitter... 
|
|
|

|
| The following 5 members says Thank You to sheepherder for your post: |
|
|
#4 |
|
User
Join Date: Jul 2003
Location: FRANCE
Posts: 908
Thanks: 42
Thanked 469 Times in 197 Posts
|
What a nice job , why are you in the USA and not near my house !!!
__________________
Best regards from France...Patrice https://www.fichier-pdf.fr/2016/03/1...nd-snail-drum/ |
|
|

|
|
|
#5 |
|
User
Join Date: Jun 2002
Location: ILL
Posts: 686
Thanks: 36
Thanked 452 Times in 198 Posts
|
I got a couple FEDORD rebuilds from the 80s.
They chopped off the old barrel and put on 9mms. There is a ring of brazing material showing at the joint. I wonder how much of a job they did. Yours looks really good. |
|
|

|
| The following member says Thank You to MikeP for your post: |
|
|
#6 |
|
User
Join Date: Jul 2014
Location: Springfield, IL
Posts: 49
Thanks: 0
Thanked 21 Times in 4 Posts
|
Extremely interesting. All totaled, how much time is invested from start to finish?
__________________
Michael D. Berk SFC, USA Ret. |
|
|

|
|
|
#7 |
|
RIP
Join Date: Feb 2011
Posts: 101
Thanks: 0
Thanked 17 Times in 6 Posts
|
|
|
|

|
|
|
#8 |
|
User
Join Date: Jun 2002
Location: Seattle, WA
Posts: 301
Thanks: 170
Thanked 88 Times in 64 Posts
|
Wow, Bill. Wish we could all have 'junk' boxes filled with prizes like that!
Rich - Thanks for sharing and it's pretty amazing what you've posted recently!
__________________
Michael Nos morituri te salutant - Supposed saying of the gladiators to the emperor ('We, who are about to die, salute you.') 'We are the lantern bearers, my friend; for us to keep something burning, to carry what light we can forward into the darkness and the wind' - From Rosemary Sutcliff's The Lantern Bearers |
|
|

|
|
|
#10 |
|
User
Join Date: Feb 2010
Location: Tennessee
Posts: 1,149
Thanks: 159
Thanked 663 Times in 318 Posts
|
Impressive, as usual!
 You think it would it be safe to do a conversion 9mm? I have a sad looking Bolo that's begging for a project, so a new 9mm barrel might be the way to go. I have been eyeballing the chamber area, but there seems to be very little meat for drilling, threading and all that. I was planning to cut it further back, just in front of the chamber, and maybe sweat and pin it to leave as much steel as possible intact. Another idea I have been tinkering with is to convert it to .22 Mag. I think it could make a fun and accurate plinker, but it may be a bit sacrilegious. |
|
|

|
| The following member says Thank You to Olle for your post: |
|
|
#11 |
|
Lifer
Lifetime Forum Patron Join Date: Feb 2009
Location: ...on the 'ol Erie Canal...
Posts: 8,183
Thanks: 1,400
Thanked 4,442 Times in 2,330 Posts
|
I really don't add up the time. If I did, and charged by the hour, it would be prohibitive. I spend a lot of time measuring, jotting down notes, setting up jigs/fixtures/vise, cleaning those items, cutting blanks to approx length, looking up tooling in catalogs, ordering tooling, other boring stuff. At some jobs I've worked, we charged ALL our time to the customer. I don't do that. I also have lower standards now than when I was younger. Back then, if I wasn't happy with how something came out, I'd start over. Now, if it's 'good enough', then it ships.
I cut my threads [M&F] as close to 100% thread depth as possible, rather than 75%. I also make my fits 'snug', so that it's not possible for me to comfortably thread it on by hand. I have to use a special spanner or even the barrel vise. Because of that I feel that for all practical purposes I have not removed any metal that has not been replaced. I don't plan on doing any 9mm C96/M30 barrel conversions; I'm not interested in 9mm for this handgun. I'm a snob.  I've done a couple 256 barrel conversions (256 WinMag bullet on a wildcat 30 Mauser case) and liked it. If you do a 9mm C96 and just bore & silver solder, I would think it would hold. I've never tried it. Still not displacing any metal that you're not replacing. 
__________________
I like my coffee the way I like my women... ...Cold and bitter... 
|
|
|

|
|
|
#12 |
|
RIP
Join Date: Feb 2011
Posts: 101
Thanks: 0
Thanked 17 Times in 6 Posts
|
|
|
|

|
|
|
#13 | |
|
User
Join Date: Feb 2010
Location: Tennessee
Posts: 1,149
Thanks: 159
Thanked 663 Times in 318 Posts
|
Quote:
That looks scary thin, I might have to give up on the 9mm idea. BTW, I sent you an e-mail a while back, think it's about time to get together and talk projects? I have been swamped with boring customer jobs, so there hasn't been much time to work on my own guns. It's about time to do something fun and creative. 
|
|
|
|

|
|
|
#14 |
|
User
Join Date: Feb 2010
Location: Tennessee
Posts: 1,149
Thanks: 159
Thanked 663 Times in 318 Posts
|
This kind of joint could actually be stronger, as there's no torque induced "pre-stress" in the steel. I was thinking that a slip fit and solder would work, and a pin should help as well. The AK-47 barrels are pressed and pinned, and a silver solder joint should be just as strong (probably stronger) than a press fit. It would also make it easy to index the barrel, and if you don't get it right you can just reheat and adjust.
|
|
|

|
|
|
#15 |
|
RIP
Join Date: Feb 2011
Posts: 101
Thanks: 0
Thanked 17 Times in 6 Posts
|
Olle: sent you a PM. Bill
|
|
|

|
|
|
#16 |
|
User
Join Date: Nov 2009
Location: Vermont
Posts: 64
Thanks: 14
Thanked 45 Times in 15 Posts
|
You guys are an inspiration!
|
|
|

|
|
|
#17 |
|
Lifer
Lifetime Forum Patron Join Date: Feb 2009
Location: ...on the 'ol Erie Canal...
Posts: 8,183
Thanks: 1,400
Thanked 4,442 Times in 2,330 Posts
|
Like Tennbill2 (and probably Olle) I also have a 'junk box'...Actually several boxes...And a cabinet...And about 12 plastic storage drawers full of unfinished projects...Some are waiting for special tooling, some waiting for expensive parts, and a few waiting for bluing...
Here's a 10 year old project...80% M1911A1 frames...left to right - 80% frame, machined finished frame, and finished assembled frame + Brazilian army surplus slide (and Sarco junk parts kit!  ). Can't find a local bluer who will blue them without buffing the crap out of them. ). Can't find a local bluer who will blue them without buffing the crap out of them.  I explain...I like tool marks...I don't want a shiny mirror finish...I want a mild acid rinse & hot dip...To no avail...The stampings get buffed off and all edges get rounded or no deal...  So they sit...  Shipping them to someone outside my immediate area is prohibitive...It would cost $120 minimum to have just one shipped out & back; and that's not including the cost of the 'hot dip'... Yes...Boo hoo to me... 
__________________
I like my coffee the way I like my women... ...Cold and bitter... 
|
|
|

|
| The following member says Thank You to sheepherder for your post: |
|
|
#18 |
|
User
Join Date: Feb 2010
Location: Tennessee
Posts: 1,149
Thanks: 159
Thanked 663 Times in 318 Posts
|
|
|
|

|
|
|
#19 |
|
RIP
Join Date: Feb 2011
Posts: 101
Thanks: 0
Thanked 17 Times in 6 Posts
|
Sheepherder, I'm studying your info and have a problem with my conversion. The 'original' shotout re-barrel on mine appears to have been threaded slightly off. I threaded my 9mm blank to 1/2-18 which matches the old barrels threads.....I think a rather unusual thread. I've ordered a tap so as to re-thread the receiver straight. My question: Got a close-up pic of the rear receiver mandrel you made or, an explanation? The rear striker hole with the bolt inserted may, or may not, be a proper way to line it up. Any help appreciated! Bill
|
|
|

|
|
|
#20 | |||
|
Lifer
Lifetime Forum Patron Join Date: Feb 2009
Location: ...on the 'ol Erie Canal...
Posts: 8,183
Thanks: 1,400
Thanked 4,442 Times in 2,330 Posts
|
Quote:
 Quote:
 I know Travers has that size (they have pretty much any size) but that is definitely a special size... I know Travers has that size (they have pretty much any size) but that is definitely a special size...  How is your receiver thread not straight??? Off-center or angled??? Quote:
First way uses an internally-tapered aluminum vise insert (made especially for the barrel used), second uses a long drill to spot-mark the brass plug, take it out & center drill it, re-insert and drill it through, then reverse it & center drill the other end... FWIW, I used way #1. 
__________________
I like my coffee the way I like my women... ...Cold and bitter... 
Last edited by sheepherder; 10-04-2014 at 09:22 PM. |
|||
|
|

|
| The following member says Thank You to sheepherder for your post: |
 |
| Tags |
| blivet |
|
|