
upload photo | donate | calendar
|
my profile |
register |
faq |
search upload photo | donate | calendar |
 08-14-2018, 10:16 PM
|
#1 |
|
User
Join Date: Dec 2016
Location: Kansas City
Posts: 214
Thanks: 324
Thanked 249 Times in 66 Posts
|
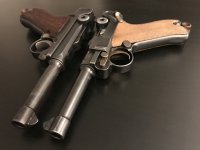
I have a question for all the experts here:
I am in the process of making a mainspring guide for my baby Luger. Instead of forming a new hook on the end by hand I have elected to cut a section out of the guide and get it micro tig welded back together. I dropped it off at my welder tonight and was wondering if I should temper it when he is finished? If so how exactally? I have tempered small parts in the past but want to make sure I get this right. Here is a photo of the guide before welding. I believe he is going to grind the edges of the cut to get a full pen weld. Thanks to all who respond! |

|

|
|
08-15-2018, 08:32 AM
|
#2 |
|
User

Join Date: Apr 2015
Location: near Charlotte NC
Posts: 4,677
Thanks: 1,439
Thanked 4,347 Times in 2,038 Posts
|
I'd polish it and then draw to a bright blue; which should remove any "strain" left from the welding.
Depending on how he welds it, it may not show but 1/4" of "heating" on either side of the weld. Please post a picture when it is returned before you do anything to it.
__________________
03man(Don Voigt); Luger student and collector. Looking for DWM side plate: 69 ; Dreyse 1907 pistol K.S. Gendarmerie |
|
|
|
| The following member says Thank You to DonVoigt for your post: |
|
08-15-2018, 10:18 AM
|
#3 |
|
User
Join Date: Dec 2016
Location: Kansas City
Posts: 214
Thanks: 324
Thanked 249 Times in 66 Posts
|
Thanks Don,
I will post an after weld photo as you suggested. After heating the part to a bright blue should I quench it in oil or just let it cool naturally? |
|
|
|
|
08-15-2018, 10:21 AM
|
#4 |
|
Lifer
Lifetime Forum Patron 
Join Date: Feb 2009
Location: ...on the 'ol Erie Canal...
Posts: 8,181
Thanks: 1,398
Thanked 4,438 Times in 2,327 Posts
|
It's interesting the way different minds work.
 Just for my own curiosity, why did you decide to cut & weld an old part rather than make a new short guide from drill rod???
__________________
I like my coffee the way I like my women... ...Cold and bitter... 
|
|
|
|
|
08-15-2018, 10:31 AM
|
#5 | |
|
Lifer
Lifetime Forum Patron 
Join Date: Jun 2002
Location: The Capital of the Free World
Posts: 10,150
Thanks: 3,003
Thanked 2,304 Times in 1,096 Posts
|
Quote:
the amount of work to dress the weld seems to be less than the precision needed to form the hook properly. Just my $0.02 
__________________
regards, -John S "...We hold these truths to be self-evident that ALL men are created EQUAL and are endowed by their Creator with certain UNALIENABLE rights, and among these are life, LIBERTY, and the pursuit of happiness..." |
|
|
|
|
| The following member says Thank You to John Sabato for your post: |
|
08-15-2018, 11:22 AM
|
#6 |
|
User
Join Date: Dec 2016
Location: Kansas City
Posts: 214
Thanks: 324
Thanked 249 Times in 66 Posts
|
Well, I don't know how I could make this part out of a drill rod, but you have a much more advanced skill-set than me so i'm sure it would be simple for you to whip one up.
The whole idea with this new part is to have a better hook on the end than one formed by hand. GT helped me out by supplying a NOS Mauser or Swiss part that has more of a hook on the end when compared to an original part. All in all this project should only cost me 20 bucks for the weld and a couple hours of my time. |
|
|
|
|
08-15-2018, 11:45 AM
|
#7 |
|
Lifer
Lifetime Forum Patron Join Date: Jun 2002
Location: Chandler Arizona
Posts: 3,485
Thanks: 1,283
Thanked 3,581 Times in 989 Posts
|
Hi to all, The guide Miles chose to modify is a pretty neat and unique design? It has more full circle bearing area on the recoil lever end and I have never seen such a part on a war time Luger or before? I am assuming it is new Mauser parabellum or perhaps Swiss, as those are the outfits that could, would, most likely make something like that? Does anyone know for sure the origin?.. I would like to know myself... best to all, til...lat'r....GT
|
|
|
|
|
08-15-2018, 11:55 AM
|
#8 |
|
User
Join Date: Dec 2016
Location: Kansas City
Posts: 214
Thanks: 324
Thanked 249 Times in 66 Posts
|
Here is a better photo of the "hook" end.
|
|
|
|
|
08-15-2018, 03:13 PM
|
#9 |
|
Moderator
2010 LugerForum Patron 
Join Date: Jun 2002
Location: Santa Teresa New Mexico just outside of the West Texas town of El Paso
Posts: 6,986
Thanks: 1,065
Thanked 5,088 Times in 1,674 Posts
|
I notice a "rib" on this guide, looks almost like it was cast?
__________________
If it's made after 1918...it's a reproduction |
|
|
|
|
08-15-2018, 04:48 PM
|
#10 |
|
User
Join Date: Dec 2016
Location: Kansas City
Posts: 214
Thanks: 324
Thanked 249 Times in 66 Posts
|
Ron,
I noticed that as well. I was wondering if it is perhaps a metal injection molded part? In any case, my welder just called and the part has been welded. I am headed to his house after work and will post a photo of the result. |
|
|
|
|
08-15-2018, 05:05 PM
|
#11 |
|
Moderator
2010 LugerForum Patron
Join Date: Jun 2002
Location: Santa Teresa New Mexico just outside of the West Texas town of El Paso
Posts: 6,986
Thanks: 1,065
Thanked 5,088 Times in 1,674 Posts
|
Metal injection is probably a much better description than cast.
Ron
__________________
If it's made after 1918...it's a reproduction |
|
|
|
|
08-15-2018, 05:50 PM
|
#12 |
|
User
Join Date: Dec 2016
Location: Kansas City
Posts: 214
Thanks: 324
Thanked 249 Times in 66 Posts
|
Here is the part post welding.
The length is right on the money. The one the gun came with was 51.77 mm and this one is exactly 51.77 mm. Last edited by milesc2; 08-15-2018 at 06:41 PM. |
|
|
|
|
08-15-2018, 08:14 PM
|
#13 |
|
User
Join Date: Apr 2015
Location: near Charlotte NC
Posts: 4,677
Thanks: 1,439
Thanked 4,347 Times in 2,038 Posts
|
Smooth up the weld and polish it, draw to blue and let air cool. No quench.
I'm not sure how well the "sintered" parts weld- the line indicates a "cast, injected, sintered" part- made in a mold. Rich would have made the part from a drill rod using his lathe and milling machine!
__________________
03man(Don Voigt); Luger student and collector. Looking for DWM side plate: 69 ; Dreyse 1907 pistol K.S. Gendarmerie |
|
|
|
| The following member says Thank You to DonVoigt for your post: |
|
08-15-2018, 08:44 PM
|
#14 |
|
User
Join Date: Dec 2016
Location: Kansas City
Posts: 214
Thanks: 324
Thanked 249 Times in 66 Posts
|
It works!!!
Just fired three rounds with no issue. Thanks for all of your help, especially GT and Don. |
|
|
|
| The following 3 members says Thank You to milesc2 for your post: |
|
08-15-2018, 09:32 PM
|
#15 |
|
User
Join Date: Apr 2015
Location: near Charlotte NC
Posts: 4,677
Thanks: 1,439
Thanked 4,347 Times in 2,038 Posts
|
Fire it another 100 rounds to break it in!
__________________
03man(Don Voigt); Luger student and collector. Looking for DWM side plate: 69 ; Dreyse 1907 pistol K.S. Gendarmerie |
|
|
|
| The following member says Thank You to DonVoigt for your post: |
|
08-16-2018, 10:31 AM
|
#16 |
|
Lifer
Lifetime Forum Patron
Join Date: Jun 2002
Location: The Capital of the Free World
Posts: 10,150
Thanks: 3,003
Thanked 2,304 Times in 1,096 Posts
|
Congrats on the successful function test of your "baby"

__________________
regards, -John S "...We hold these truths to be self-evident that ALL men are created EQUAL and are endowed by their Creator with certain UNALIENABLE rights, and among these are life, LIBERTY, and the pursuit of happiness..." |
|
|
|
| The following member says Thank You to John Sabato for your post: |
 |
|
|


 Linear Mode

