
upload photo | donate | calendar
|
my profile |
register |
faq |
search upload photo | donate | calendar |
|
|
 01-17-2014, 08:43 AM
|
#1 |
|
Lifer
Lifetime Forum Patron 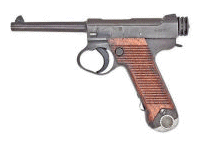
Join Date: Feb 2009
Location: ...on the 'ol Erie Canal...
Posts: 8,181
Thanks: 1,398
Thanked 4,438 Times in 2,327 Posts
|
One of my interests is cartridge conversions. This can be for pistols/rifles that are 'obsolete' and no one makes ammunition for them, or 'wildcats' that are not made at all except by enthusiasts. Conversions are not everyone's choice, but I find them fun & interesting.
Disclaimer: I am not responsible for any damage or injury incurred by these procedures. Wear safety glasses at all times; do not operate machinery while impaired. Approach any listed reloading data with caution. I am not soliciting work or services, and am not advertising anything for sale. There are many ways to do these cartridge conversion operations, this is just one of them. I encourage any interested parties to experiment and add your own experiences/conclusions. 8mm Nambu ammunition is hard to find. Making your own is the easiest way to get it. I decided that I needed a donor cartridge case at least 7/8" long, straight sided, and with a base diameter of ~.407". My local gun shop has a box of 'range dug-ups' of all kinds. I took my vernier down and picked out some likely candidates. I'll start with the rimless first, since they're the 'easiest'. Here is my assortment. All fired at least once; all old & dirty. [first pic] First order of business is de-priming them. I use the primer pocket to locate my cutting measurements from, so I use a 44 Magnum sizing die with a 22-250 de-capper. I don't want to stretch or squeeze the cases yet; this is the easiest way (with the assorted die sets I have) to de-prime the cases. The 44 sizing die does not come in contact with the case but holds the decapping pin in place. [second pic] Now I fit the case with a mandrel (just a drill bit that fits snugly in the case neck) and chuck it in the lathe. The tailstock has a live center and is set up so that pushing the case up against the tailstock/live center [set at 0] and then tightening the chuck will hold the case cutter right at 7/8". [pics 3 & 4] I break all sharp edges and de-burr in & out. [pics 5 & 6] Now we need to swage these cut down cases to size. These cases were all right at the ~.415" base measurement; I want .407" - .410". A member on another forum mentioned that by forcing rimless brass into a 30-30 Winchester sizing die, Nambu cases could be formed. The 30-30 die has the correct taper...IF you jam it in approximately 3/8" past the die rim. So to start, we run the cutdowns into the 30-30 sizing die as per normal fashion. Lubed generously. [pic 7] The next step is to remove the 30-30 die and invert it in my arbor press with a case inserted. I run the ram down until it is flush with the die. [pics 8 & 9] Now I position a plug to ram the case further into the 30-30 die, and press it in until it is flush. The case can just barely be seen after this operation. [pic 10] To get the swaged case out, I flip the die over and press it out with a 1/4" rod. Here's a closeup of the die-to-press adapter, the plug, and the rod along with the 30-30 die and a compressed case. It is now ~.409" at the base. [pic 11] At this point I load all these cases into my tumbler and let it run overnight using crushed walnut shell media.
__________________
I like my coffee the way I like my women... ...Cold and bitter... 
Last edited by sheepherder; 01-29-2014 at 09:52 AM. |

|

|
| The following 4 members says Thank You to sheepherder for your post: |
|
01-17-2014, 08:44 AM
|
#2 |
|
Lifer
Lifetime Forum Patron
Join Date: Feb 2009
Location: ...on the 'ol Erie Canal...
Posts: 8,181
Thanks: 1,398
Thanked 4,438 Times in 2,327 Posts
|
There are several sites with mention of using 38 Special cases to make 8mm Nambu cartridges. RCBS even makes a conversion die set. I decided to make some of my own 8mm cases from 38 Special.
Using once fired cases, I de-primed them using my 44 Special sizing die with the 22-250 decapping pin. The rim needs to be turned down to ~.415", so I mount a case on a 9mm drill bit and clamp it in my lathe chuck. Using a parting tool I turn the 38 Special case rim down to ~.415" [pic 12] Next step is to cut the extractor groove, again using a parting tool, but smaller. I cut it to .357" dia. [pic 13] After grooving, I cut a chamfer on the forward edge of the extractor groove, using the wider parting tool again. [pic 14] After the chamfer is cut and before releasing the case from the chuck, I run a file against the outer edge of the rim to facilitate the extractor engaging the case when feeding. Cases are now ready for forming.
__________________
I like my coffee the way I like my women... ...Cold and bitter...
|
|
|
|
| The following 3 members says Thank You to sheepherder for your post: |
|
01-17-2014, 08:45 AM
|
#3 |
|
Lifer
Lifetime Forum Patron
Join Date: Feb 2009
Location: ...on the 'ol Erie Canal...
Posts: 8,181
Thanks: 1,398
Thanked 4,438 Times in 2,327 Posts
|
I also made up some 38 Special cases without cutting the extractor groove. But I needed to expand the cases, as the OD was [IMHO] excessive for the 8mm chamber - Something like .030" smaller. I've been told that unexpanded 38 Special case used for 8mm Nambu could/would split when fired. To counter this I made up my own 'expanding die' out of 1" steel rod.
[pic 1] Turned down to ~ 7/8" diameter. The die body was also drilled & internally threaded to 1/2" x 20tpi for my 'ram'. The die body was also drilled for 3/4 of its length to 27/64" to contain cases expansion. [pic 2] Threading the die body OD to 7/8" x 14tpi. [pic 3 and 4] Turning the 'ram' out of a 1/2" x 4" SHCS. [pic 5] Expanding die in RCBS press, cranking out expanded 38 Special cases. [pic 6] Close-up of expanding die. [pic 7] Some expanded cases. [pic 8] One of our members mentioned having reloaded 8mm Nambu ammunition that was made from 40 S&W brass. I was able to filch some once-fired 40 S&W cases out of the brass barrel at my local club for conversion. Using the fired cases, I de-primed them using my 44 Special sizing die with the 22-250 decapping pin. I left the case rim and extractor grrove alone. I've read of extraction problems with the 40 S&W case conversions. The 40 S&W case is oversize for the 8mm Nambu specs, so I swage these cases. These cases were all right at the ~.415" base measurement; I want .407" - .410". I use the 30-30 Winchester sizing die again to resize the cases, same procedure as described previously for oversize cases. My 40 S&W cases are now ready for neck forming.
__________________
I like my coffee the way I like my women... ...Cold and bitter...
Last edited by sheepherder; 01-20-2014 at 06:02 PM. |
|
|
|
| The following 2 members says Thank You to sheepherder for your post: |
|
01-17-2014, 08:46 AM
|
#4 |
|
Lifer
Lifetime Forum Patron
Join Date: Feb 2009
Location: ...on the 'ol Erie Canal...
Posts: 8,181
Thanks: 1,398
Thanked 4,438 Times in 2,327 Posts
|
Here are the cases that have been swaged or expanded. They are -
38 Special 375 Winchester & 30-30 Winchester 25 Remington & 32 Remington 40 S&W These are now all straight-walled cases. The next step is to form the case necks in the RCBS 8mm Nambu sizing die.
__________________
I like my coffee the way I like my women... ...Cold and bitter...
Last edited by sheepherder; 01-20-2014 at 06:02 PM. |
|
|
|
| The following 2 members says Thank You to sheepherder for your post: |
|
01-17-2014, 08:47 AM
|
#5 |
|
Lifer
Lifetime Forum Patron
Join Date: Feb 2009
Location: ...on the 'ol Erie Canal...
Posts: 8,181
Thanks: 1,398
Thanked 4,438 Times in 2,327 Posts
|
Forming the neck.
RCBS 8mm Nambu 3-die reloading set. This is an older set, and the seller included an RCBS #25 shell holder. Nothing special here; lube the case liberally and run it through the RCBS 8mm Nambu sizing die with de-priming pin removed. [Pic 1]. 40 S&W in press. [pic 2] 38 Special in press. [Pic 3]. Trimming OAL to ~.862". [Pic 4] The various cases neck-formed but not yet trimmed. [pic 5] An experiment using a suggestion by a member in another thread (which I can't find now; sorry!), to power trim the cases. [pic 6]. Finished 40 S&W case converted to 8mm Nambu and ready to reload. [pic 7] Notes - The 375 and 30-30 Winchester cases were the most difficult to form & neck - The 375 and 30-30 cases need the primer pocket reamed; the rest don't - Winchester brass is softer than Remington, R-P, and military - The rifle brass has thicker case walls, thicker base, and large primer - 38 ACP/38 Super cases could also be expanded to form 8mm Nambu in the same way as the 38 Special. No groove need be cut and the rim need not be trimmed. I did not have any so there are no pics/comments. - I test fit about 1 in 10 in my Type 14 Nambu; they all fit; bolt closes; extractor engages. Conclusions While many cartridges can be used to convert to 8mm Nambu, I found the 40 S&W to be the easiest. The RCBS 36404 3-die set seems to be the best for forming & reloading. In a surprise move, the president of our gun club presented me with a bag of 40 S&W once-fired brass last night. What a guy!
__________________
I like my coffee the way I like my women... ...Cold and bitter...
Last edited by sheepherder; 01-17-2014 at 03:53 PM. |
|
|
|
| The following 2 members says Thank You to sheepherder for your post: |
|
01-17-2014, 09:32 PM
|
#6 |
|
User
Join Date: Dec 2012
Posts: 44
Thanks: 0
Thanked 9 Times in 6 Posts
|
now that Starline now makes 41 colt brass, it can be used to make 8mm nambu brass. Neck to bottleneck and turn rim off and you are in business. I read this in an old Handloaders Digest, I forget the number, however. I do not own a nambu, but might buy one in the future.
|
|
|
|
|
01-17-2014, 11:03 PM
|
#7 |
|
Lifer
Lifetime Forum Patron
Join Date: Feb 2009
Location: ...on the 'ol Erie Canal...
Posts: 8,181
Thanks: 1,398
Thanked 4,438 Times in 2,327 Posts
|
Just reading on another forum about some Type 14 Nambus being able to use 357 Sig and 40 S&W cases without turning down the rim (or swaging them using the 30-30 Winchester sizing die)...My Type 14 will not take any rim over .417" and at that size it is tight...
Here is a comparison of the three...
__________________
I like my coffee the way I like my women... ...Cold and bitter...
Last edited by sheepherder; 01-20-2014 at 06:05 PM. |
|
|
|
|
01-17-2014, 11:52 PM
|
#8 |
|
User
Join Date: Jul 2003
Location: New York, NY
Posts: 1,575
Thanks: 2,124
Thanked 400 Times in 249 Posts
|
Hi,
Great post!!! I also enjoy shooting the Japanese Nambu Type 14, and own several of them. Though not a "Luger", they are really of quite good design and are quite accurate when handloaded properly. You should know that the .40 S&W has a rim that is too thick for the extractor of the Type 14. In fact, given the inferior metal these extractors are made of, they will often "spring" when fired with the .40 brass, leaving you no choice but to repair or replace them. As parts are generally not available, this can be troublesome. I have some Federal brass originally made for the 8mm Nambu I obtained sometime in the early 80s. They were going to market with it, but the project was canceled, naturally. Fred Huntington ended up buying all of this brass and selling some of it to me, just by chance. Just a few thoughts on a the very fine article above. Sieger |
|
|
|
|
01-18-2014, 08:59 AM
|
#9 | |
|
Lifer
Lifetime Forum Patron
Join Date: Feb 2009
Location: ...on the 'ol Erie Canal...
Posts: 8,181
Thanks: 1,398
Thanked 4,438 Times in 2,327 Posts
|
Quote:
 I had noticed that it was thicker. On the cases that I had to cut an extractor groove, I also cut a bit off the rim. On the 40 S&W cases, I have manually stuck them in the bore and then racked the slide and they did flip out, so I left the rim alone. I am not too far gone yet that I can't thin the rims on the 40 S&W cases. I see .042" rim thickness on the print. I'll check my 'test' cases and see how much needs to come off. I recall seeing an ad or post somewhere about modified extractors for the Type 14 that would accept thick rims. Might have been Don Schlickman...I'll have to check his price list. I sent him a MO for a repro firing pin several weeks ago, maybe I can add an extractor to the buy... Edit: Checking my 27 'test' 40 S&W cases, I'm seeing .052" rim thickness. The print I have shows .055". I'll rig up my parting tool bit and see what I can do to get it down to .042"... Pic of the bag my gun club president dropped on me. I should be able to get several hundred out of these.  I forgot to mention that the conversion process does have a failure rate...About 1 in 15 or so is crushed or split during the neck forming operation... 
__________________
I like my coffee the way I like my women... ...Cold and bitter...
|
|
|
|
|
| The following 2 members says Thank You to sheepherder for your post: |
|
01-18-2014, 12:47 PM
|
#10 |
|
Lifer
Lifetime Forum Patron
Join Date: Feb 2009
Location: ...on the 'ol Erie Canal...
Posts: 8,181
Thanks: 1,398
Thanked 4,438 Times in 2,327 Posts
|
I turned ~.010" off the rims on the 40 S&W conversion cases...I tried for .042"; I'm close to it...
")
__________________
I like my coffee the way I like my women... ...Cold and bitter...
|
|
|
|
| The following member says Thank You to sheepherder for your post: |
|
01-18-2014, 04:33 PM
|
#11 | |
|
Lifer
Lifetime Forum Patron
Join Date: Feb 2009
Location: ...on the 'ol Erie Canal...
Posts: 8,181
Thanks: 1,398
Thanked 4,438 Times in 2,327 Posts
|
Quote:
I still can't get any of the powder I'd like [4895, W231] but I have some Red Dot and Blue Dot left from before the freeze... Do you have any loads for the 102gr FMJ Nambu bullet using Red or Blue Dot??? I was going to try a load for the 93gr 30 Cal Luger using Red Dot from a 1970 Lyman manual in my Nambu conversion cases...They list a low end of 3.9gr and max of 4.3...I may try 4.8gr to start, just a few to see if it cycles or if the primer flattens...Couldn't find any Red Dot data for the Nambu on the net... 
__________________
I like my coffee the way I like my women... ...Cold and bitter...
|
|
|
|
|
|
01-19-2014, 04:18 PM
|
#12 |
|
Lifer
Lifetime Forum Patron
Join Date: Feb 2009
Location: ...on the 'ol Erie Canal...
Posts: 8,181
Thanks: 1,398
Thanked 4,438 Times in 2,327 Posts
|
Bob/Sieger's comment about the rim got me thinking, and I ran my 40 S&W cases on the lathe and turned the rim down to approx .042"...(from approx .052")...But when I ran my mixed bag of other brands/calibers, there was some variation, as much as +/-.004"...
 I was using a live center and locating off the edge of the primer pocket...But they weren't all the same...Some had a tapered edge, some not so much...So my 'zero' wasn't quite right... So to make a better 'zero' I turned a piece of Nylon down to fit in my tailstock Jacobs chuck with a small primer 'nub' [.175"] on one end and a large primer 'nub' [.210"] on the other end... Now I clamp this mandrel in the Jacobs chuck, set it at zero, push a case up onto the mandrel and then clamp the neck in the lathe chuck...Case is centered and rim base is up against the mandrel...And now I can cut my rim... Works much better! Variation is cut down to approx +/-.001"... I would rather use Teflon for my mandrel...But I'm all out...
__________________
I like my coffee the way I like my women... ...Cold and bitter...
|
|
|
|
| The following 2 members says Thank You to sheepherder for your post: |
|
01-19-2014, 11:51 PM
|
#13 | |
|
User
Join Date: Jul 2003
Location: New York, NY
Posts: 1,575
Thanks: 2,124
Thanked 400 Times in 249 Posts
|
Quote:
Also, start low with your above load, say 3.5 grains of Red Dot or so, and work up until the action will just stay open. By doing so, you will have established the bottom load of your relevant range. Carefully work up one tenth of a grain from there and note accuracy. Also, a hot load is not usually an accurate one, in most cases. Go ahead and try the same 3.5 gr starting load with your Blue Dot powder, working up until the hold open catches to find the bottom of your range as note above. Blue Dot for me has always been a flame thrower, but with bottle neck cases it may perform a bit better. Sieger |
|
|
|
|
| The following 2 members says Thank You to Sieger for your post: |
|
01-20-2014, 11:01 AM
|
#14 |
|
Lifer
Lifetime Forum Patron
Join Date: Feb 2009
Location: ...on the 'ol Erie Canal...
Posts: 8,181
Thanks: 1,398
Thanked 4,438 Times in 2,327 Posts
|
I ran across this powder chart for the 8mm Nambu in another forum...It was supposedly copied from the Midway site some years back...
I haven't seen anything like that on Midway now...
__________________
I like my coffee the way I like my women... ...Cold and bitter...
Last edited by sheepherder; 01-20-2014 at 06:08 PM. |
|
|
|
|
01-20-2014, 05:32 PM
|
#15 |
|
Patron
LugerForum Patron 
Join Date: Mar 2011
Location: Az.
Posts: 2,270
Thanks: 2,686
Thanked 958 Times in 704 Posts
|
I am not too sure how well the Blue Dot powder will work for you, but it is sure worth a try since you have some in hand. Blue Dot really shines when you load it up near or at max loadings. It is a magnum powder and likes to be loaded hot. I use Blue Dot in 357 Sig brass, and it produces superb velocity and accuracy. The only down side(to some at least) is the flash/bang that it produces. It is quite impressive!!!
|
|
|
|
|
02-10-2014, 09:15 PM
|
#16 | |
|
User
Join Date: Jul 2003
Location: New York, NY
Posts: 1,575
Thanks: 2,124
Thanked 400 Times in 249 Posts
|
Quote:
Given my memory from 10 years ago or so, I doubt the Unique Powder load suggestions in your chart will even operate a T-14's action properly (hold open activated on last round). If this is so, keep adding 1/10 of a grain, to the minimum load listed, until the action just holds open. You have then established your lower end base load, and can work up, very carefully, from there. The gun rags have repeated, over and over and over again, that the 8mm Nambu is a sissy. Perhaps, it had to be loaded as a sissy, so that the inferior and weakly designed Type 94 Nambus wouldn't, simply, blowup. Though it's certainly not a 9mm Parabellum, I'm not yet convinced that it needs to be a sissy when shot from a good, sound, Type 14 pistol, and would expect similar performance from it as from its European contemporaries (from which it was obviously, copied). Sieger Last edited by Sieger; 02-11-2014 at 02:24 PM. |
|
|
|
|
|
01-28-2014, 02:49 AM
|
#17 |
|
User
Join Date: Jul 2003
Location: New York, NY
Posts: 1,575
Thanks: 2,124
Thanked 400 Times in 249 Posts
|
Hi All,
Well, while we are at it, what are your opinions on the strength of the T-14 Nambu design, as it is always called "weak" by all of those armchair experts out there; you know, the same crowd that claims that lead bullets won't shoot straight out of a 9mm. Sieger |
|
|
|
|
01-28-2014, 10:03 AM
|
#18 | |
|
Lifer
Lifetime Forum Patron
Join Date: Feb 2009
Location: ...on the 'ol Erie Canal...
Posts: 8,181
Thanks: 1,398
Thanked 4,438 Times in 2,327 Posts
|
Quote:
I thought the opening at the rear under the cocking knob was odd; and the inability to get a feeler gauge in the receiver to measure headspace is annoying...It's also somewhat distracting to pull the trigger and see the trigger bar emerging from the bottom of the receiver... I was particularly interested in the barrel itself, and the almost exact similarity to the 120mm 30 cal Luger 'pencil' barrel...I am tempted to try to find an old shot-out Nambu barrel/extension and drill & tap it for a 30 Luger 'pencil' barrel... 
__________________
I like my coffee the way I like my women... ...Cold and bitter...
|
|
|
|
|
|
01-28-2014, 08:34 PM
|
#19 | |
|
User
Join Date: Jul 2003
Location: New York, NY
Posts: 1,575
Thanks: 2,124
Thanked 400 Times in 249 Posts
|
Quote:
I don't know what the armchair experts were commenting on, but a WAG would be the lockup, specifically, the locking block. The Nambu is a much heavier pistol than a Luger, and its parts don't look weakly designed to me. Your thoughts? Sieger |
|
|
|
|
|
01-29-2014, 07:18 AM
|
#20 |
|
User
Join Date: Jun 2010
Posts: 312
Thanks: 335
Thanked 93 Times in 70 Posts
|
The statements and warnings put out there about not using older loading data may stem from the fact certain powders produced today at one time were produced by different companies.
__________________
Dave |
|
|
|
| The following member says Thank You to Patronen for your post: |
 |
| Tags |
| blivet |
|
|


 Hybrid Mode
