
upload photo | donate | calendar
|
my profile |
register |
faq |
search upload photo | donate | calendar |
 12-05-2012, 08:46 PM
|
#21 |
|
User

Join Date: Feb 2010
Location: Tennessee
Posts: 1,149
Thanks: 159
Thanked 663 Times in 318 Posts
|
Ok, this should hopefully make the process more obvious
Heres the tool, a contraption of milled steel, drill rod and screws:  and heres the blank, with the ends turned down:  The head has a cap that you attach with two screws, this is whats holding the blank and supposedly keeps it straight between the two 90 degree bends. You can see that the tool is pretty small, so I had to use 4-40 screws. I have also inserted pieces of hardened drill rod to make the tool last longer:  The bearing surfaces inside the tool are filed down to a roundover, this makes the tool a bit smoother to work and prevents gouges on the outside of the loop:  I insert the blank in the tool and tighten the screws  and its ready to press:  The head comes out the other side:   The cap comes off, and the loop is done:  and heres a few prototypes: 
|

|

|
| The following 2 members says Thank You to Olle for your post: |
|
12-05-2012, 09:54 PM
|
#22 |
|
User
Join Date: Oct 2012
Location: Washington State
Posts: 99
Thanks: 67
Thanked 20 Times in 9 Posts
|
What grade drill rod? There are several typical harnesses. Have you tried finding a softer one? The proto types look great and the die should work really well. What part isn't right? Or is it just the hardness in general making it a pain?
|
|
|
|
|
12-05-2012, 10:06 PM
|
#23 | |
|
User
Join Date: Feb 2010
Location: Tennessee
Posts: 1,149
Thanks: 159
Thanked 663 Times in 318 Posts
|
Quote:
To the casual observer these loops are ready to go, but if you look closer you'll see that the top part is not 100% straight and I'm thinking that a softer wire will take care of this. It's a very minute thing and most people wouldn't even see it, but I'm kind of anal so I want to do what I can to correct it. Also, I'm trying to learn the ins and outs of the noble art of wire bending, and I'm hoping that some research will help me in future projects. Really, many of my project stems from sheer curiosity, I just love to tinker and figure out how to do things like this. |
|
|
|
|
|
12-05-2012, 10:15 PM
|
#24 |
|
User
Join Date: Oct 2012
Location: Washington State
Posts: 99
Thanks: 67
Thanked 20 Times in 9 Posts
|
Speaking of wire.. electrical wire is available in a lot of different materials.. the closest gauge would be 9, which would be slightly larger, 8 gauge would be slightly smaller.. typically copper, aluminium, silver, and gold, but you cal also find steel usually from salvage companys.. not sure how they blue up though.
|
|
|
|
|
12-06-2012, 09:00 AM
|
#25 |
|
Lifer
Lifetime Forum Patron 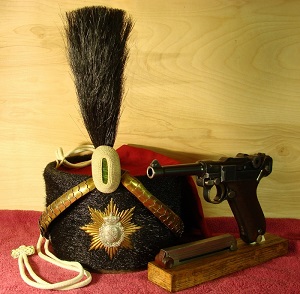
Join Date: Jun 2008
Location: Scottsboro, Alabama
Posts: 540
Thanks: 546
Thanked 438 Times in 165 Posts
|
Olle:
That's quite an ingenious bending jig that you have built--very impressive. My thought on why the back of the loop is rounded, although barely noticeable, is that the very small rod clamping screws might be stretching during the bending process, allowing the clamp cap to raise up, allowing the rounding effect. There has to be some tremendous forces exerted on those screws as the rod resists the sharp bending. Of course, the entire jig system would have to be larger to allow for larger and/or more screws. This is just one more nuts observation. By the way, I've done a lot of drill rod bending, but I am using W1 rod. It's my understanding that it comes annealed--at least it machines well.
__________________
Neil  The hurrier I go the behinder I get. Sometimes it takes me all day to get nothing done. The hurrier I go the behinder I get. Sometimes it takes me all day to get nothing done.
|
|
|
|
|
12-06-2012, 09:16 AM
|
#26 |
|
Lifer
Lifetime Forum Patron
Join Date: Jun 2008
Location: Scottsboro, Alabama
Posts: 540
Thanks: 546
Thanked 438 Times in 165 Posts
|
Olle:
A few more random thoughts (a mental dump)--how about a tiny steel shim in the center of the rod, in the clamping cap. This would allow the corners of the bend to rise up a bit, which might offset the rounding effect by providing some rebound capability. Relieving the groove ends in the clalmping cap (high spot in the middle) would probably serve the same purpose, but would permanently change the cap. FWIW.
__________________
Neil The hurrier I go the behinder I get. Sometimes it takes me all day to get nothing done.
|
|
|
|
|
12-06-2012, 09:19 AM
|
#27 |
|
Lifer
Lifetime Forum Patron Join Date: Jun 2002
Location: Chandler Arizona
Posts: 3,485
Thanks: 1,283
Thanked 3,581 Times in 989 Posts
|
Hi Neil, I thought the same,..it is a nice fixture, but bigger would be better...Actually the loops are nicely done, too nice! The Germans stamped them out hard and cold, and if you look close, they show it!
The reason the loop bottom isn't flat is that instead of being secured in the clamp, the grooved ram should push directly on the staple ...and then, it needs a final block, with a 1.5MM rad. groove to press against at the bottom of the jig at the very last .... won't get flat until this happens?? The clamp is neat, but overkill... when the ram picks up the stock and starts to bend, any lateral movement should be over... If it does move, just make a final adjusting saddle fixture to finish, using the same ram... ... might be a two step operation!!!  .... I call this type of discovery tool making, "Taking off on the short runway!" as your initial design seems logical but has built in problems that take much more work to cure.. but you have to give it a try, and of course, you go out thru the end markers.. but your 100% better equipped when you get on the long runway, should you be lucky enough to survive the attempt!... .... I call this type of discovery tool making, "Taking off on the short runway!" as your initial design seems logical but has built in problems that take much more work to cure.. but you have to give it a try, and of course, you go out thru the end markers.. but your 100% better equipped when you get on the long runway, should you be lucky enough to survive the attempt!... ....It is a nice fixture, and you should be proud of the effort and result...you're close! Keep trying!...Best to all, til....lat'r....GT..... ....It is a nice fixture, and you should be proud of the effort and result...you're close! Keep trying!...Best to all, til....lat'r....GT.....
|
|
|
|
|
12-06-2012, 09:20 AM
|
#28 | |
|
Lifer
Lifetime Forum Patron 
Join Date: Feb 2009
Location: ...on the 'ol Erie Canal...
Posts: 8,181
Thanks: 1,398
Thanked 4,438 Times in 2,327 Posts
|
Quote:
 Are you greasing it up real good before pressing??? I have to admit that it seems like what you have made would be quite adequate for a P-38 lanyard ring...maybe a bit of tweaking after the loop comes out of the press, but your prototypes look pretty good to me...
__________________
I like my coffee the way I like my women... ...Cold and bitter... 
|
|
|
|
|
|
12-06-2012, 11:02 AM
|
#29 |
|
Moderator
Lifetime Forum Patron 
Join Date: Jun 2002
Location: Arizona/Colorado
Posts: 7,760
Thanks: 4,848
Thanked 3,099 Times in 1,426 Posts
|
Nicely done! Congratulations.
__________________
Jerry Burney 11491 S. Guadalupe Drive Yuma AZ 85367-6182 lugerholsterrepair@earthlink.net 928 342-7583 (CO & AZ) Year Round 719 207-3331 (cell)  "For those who Fight For It, Life has a flavor the protected will never know." |
|
|
|
|
12-06-2012, 11:05 AM
|
#30 |
|
Lifer
Lifetime Forum Patron Join Date: Jun 2002
Location: Chandler Arizona
Posts: 3,485
Thanks: 1,283
Thanked 3,581 Times in 989 Posts
|
you can also make the loops, just are you are now doing...then make a small base plate with two holes for the ends to set into, and using the same ram, press it flat from the outside of the loop...either way, inside or outside, you'll have to upset some metal to get the original radius look!!... Easy as pie now, all the hard work is done..
...Best to you, til...lat'r...GT
|
|
|
|
|
12-06-2012, 11:13 AM
|
#31 |
|
User

Join Date: Feb 2012
Location: louisiana Now, but from the Rebublic of Texas
Posts: 937
Thanks: 429
Thanked 316 Times in 182 Posts
|
outstanding work
__________________
In this world nothing is free, except the grace of God |
|
|
|
|
12-06-2012, 11:33 AM
|
#32 |
|
Lifer
Lifetime Forum Patron
Join Date: Feb 2009
Location: ...on the 'ol Erie Canal...
Posts: 8,181
Thanks: 1,398
Thanked 4,438 Times in 2,327 Posts
|
I notice you have rounded the ends of the 'staple'...Where they fit into the grip frame...How do you intend to swage the ends to hold it in the gripframe???
__________________
I like my coffee the way I like my women... ...Cold and bitter...
|
|
|
|
|
12-06-2012, 03:14 PM
|
#33 |
|
User
Join Date: Feb 2010
Location: Tennessee
Posts: 1,149
Thanks: 159
Thanked 663 Times in 318 Posts
|
Thanks guys, I sure appreciate all the input and ideas!
The bend could be taken care of either by shimming like Neil suggested, or with the stop block or final adjustment step GT is describing. These methods will require some trial and error, I cant see any other way to determine exactly how much you will need to correct for the springback. Another solution that has crossed my mind is to install some kind of set screw arrangement in the cap, so I can adjust the tension until I find the point where everything ends up straight. Then again, if I can find a better material than the stout and somewhat springy drill rod, I might not have this problem anymore. The clamp may seem like overkill, but its there as an attempt to keep that section straight, and it was also needed to hold the blank centered while I was figuring out the correct cut length for the rod. Once everything works as intended, I have planned to add something (havent figured out exactly how to do it yet) where I can just drop the blank between two stops that hold it centered. Well see what I can come up with, this is actually the first prototype and it already works 99%, so I might just keep the clamp solution. If it aint broke, dont fix it, but now I have plenty of ideas for how to make a new and improved tool once it breaks. The ends are made with a slight bevel, and theres good reason for that. If I were to install one of these, I would build yet another fixture that would work as a holder/anvil while I stake the ends to the frame. However, I opted to go with beveled ends to make it easier for other people to install it. My thought is that the bevels make it very easy to put the loop in the frame, straight ends with sharp edges tend to scrape and bind in the holes, and what usually happens is that the piece gets cocked, bent or acts up in general. If you tap it in with a little Loctite it will be secure enough, and my assumption here is that theres not too much strength needed. I dont think that anybody would use the lanyard to swing a collectible pistol around, but just to make sure I did a test with a loop installed in a piece of steel together with some red Loctite. It took a large screwdriver to pry it loose, so I would think that its an easy DIY solution thats workable and strong enough. |
|
|
|
|
12-06-2012, 03:17 PM
|
#34 |
|
User

Join Date: Mar 2008
Location: Marco Island, Florida
Posts: 4,867
Thanks: 1,685
Thanked 1,916 Times in 1,192 Posts
|
Another idea is to add a bow to the ram, which will push that center area of the loop down while forming.
|
|
|
|
|
12-06-2012, 03:59 PM
|
#35 | |
|
User
Join Date: Feb 2010
Location: Tennessee
Posts: 1,149
Thanks: 159
Thanked 663 Times in 318 Posts
|
Quote:
|
|
|
|
|
| The following 2 members says Thank You to Olle for your post: |
|
12-06-2012, 08:04 PM
|
#36 |
|
Moderator
Lifetime Forum Patron
Join Date: Jun 2002
Location: Arizona/Colorado
Posts: 7,760
Thanks: 4,848
Thanked 3,099 Times in 1,426 Posts
|
Is there a market for P-38 lanyard loop staples I am not aware of? If so..how did the originals fall off? Were they staked? Peened? I
don't think the Germans didn't use red Loctite..
__________________
Jerry Burney 11491 S. Guadalupe Drive Yuma AZ 85367-6182 lugerholsterrepair@earthlink.net 928 342-7583 (CO & AZ) Year Round 719 207-3331 (cell) "For those who Fight For It, Life has a flavor the protected will never know." |
|
|
|
|
12-06-2012, 09:33 PM
|
#37 |
|
User
Join Date: Oct 2012
Location: Washington State
Posts: 99
Thanks: 67
Thanked 20 Times in 9 Posts
|
Have you tried A2? It hardens more after heat treatment but I believe it to be slightly softer without treatment. It should still have the integrity for a lanyard loop.
I found a source for metric, but I have never used them so cannot vouch. http://www.flat-stock.com/~store/Mer...ode=PM-A2DRMM3 I get materials from 'inventables' but did not see that they have a2 in metric. https://www.inventables.com/technolo...-drill-rod-a-2 If you are interested the closest to 3mm are: 7/64 = 2.7781mm 1/8 = 3.1750mm Last edited by LWaali; 12-06-2012 at 10:19 PM. Reason: typos |
|
|
|
|
12-06-2012, 09:44 PM
|
#38 | |
|
User
Join Date: Feb 2010
Location: Tennessee
Posts: 1,149
Thanks: 159
Thanked 663 Times in 318 Posts
|
Quote:
They were staked or peened from the factory (have to look closer when I get a chance), but they do obviously come off. They may work loose after while, they may not be peened correctly, could be torn loose by accident, and I know that some were simply removed by owners that didn't like them. |
|
|
|
|
|
12-06-2012, 09:59 PM
|
#39 |
|
Lifer
Lifetime Forum Patron Join Date: Jun 2002
Location: Chandler Arizona
Posts: 3,485
Thanks: 1,283
Thanked 3,581 Times in 989 Posts
|
Hi Olli, you may want to leave the ends square as they were a press fit into the holes, then slightly expanded to where they were flush to the inside of the frame mag well, i think the popular thought was that, if a few thousands upset will hold tons of force, anything at all would hold a couple of pounds of pistol... best to you, til...lat'r...GT...
|
|
|
|
|
12-06-2012, 10:18 PM
|
#40 |
|
Lifer
Lifetime Forum Patron
Join Date: Jun 2008
Location: Scottsboro, Alabama
Posts: 540
Thanks: 546
Thanked 438 Times in 165 Posts
|
I'm with you Olle. Lots of times I build something difficult to prove to myself that I can do it and I enjoy trying. When successful, it's not so bad getting compliments from others.
__________________
Neil The hurrier I go the behinder I get. Sometimes it takes me all day to get nothing done.
|
|
|
|
 |
| Tags |
| blivet |
|
|


 Linear Mode

