
upload photo | donate | calendar
|
my profile |
register |
faq |
search upload photo | donate | calendar |
 10-21-2014, 01:08 PM
|
#21 |
|
User

Join Date: Mar 2008
Location: Marco Island, Florida
Posts: 4,867
Thanks: 1,685
Thanked 1,916 Times in 1,192 Posts
|
|

|

|
|
10-21-2014, 05:20 PM
|
#22 |
|
User

Join Date: Oct 2007
Location: Maryland
Posts: 340
Thanks: 43
Thanked 107 Times in 51 Posts
|
Thanks! But if today's range trip happens again, I might not need one.
Today I took the FG42 out to the range in order to test the Meopta scope and Estes Adams mount. The first time I had it out, I had a wandering zero problem because the rings couldn't be tightened enough to hold the scope. I contacted Mr. Adams and he asked me to send him the setup for diagnosis. He found that the rings were not made quite right and personally reworked the mount so that it would be right. Today was the day I was waiting for. There was a medium soaking rain so that I could test how watertight the scope was as well as how tight the rings were. I also planned to use this opportunity to test the remaining three magazines. The scope functioned perfectly and the mount held zero even after being removed and re-installed on the rifle. Thank you so far Mt Adams!! I took 80 rounds of 1972-73 dated FNM surplus with me. I've shot a lot of this ammunition over many years in everything from G41's to G43's and from FN49's to Hakims and it has always functioned 100%. It was especially accurate in my scoped G43, shooting the center of the target out every time I used it. It's pretty much considered to be the BEST surplus 8mm ever available. Magazine number 1 for the day was a dud. As more rounds were inserted, the follower began to stick more and more. By round 18, there was no spring tension at all. I just dumped the rounds out and moved on to magazine number 2. After the first 10 rounds the scope was zeroed at 100 yards and I went to work. Somewhere in the second ten rounds I had a failure to feed:  It was easy to clear. Just pull the bolt back and the round fell out. Let if fly and back to work. 19 rounds and 1 dud so far. Next magazine I had three intermittent failures to feed. They are pictured in sequence from left to right:  The last was round 18 for the magazine and it almost seated but not quite. I have no idea exactly what caused the dent or the gouge. It was VERY hard to extract. The rifle was also much harder to charge at this point. In fact, it seemed to be getting harder as it warmed up. The scope was still holding zero. I fired the last two rounds from the hip because of the hard charging issue. I wanted to see where they landed. The gas setting was on high just as it was when I received the rifle. They flew about ten feet or so between the 10 and 11 o'clock position just like every other round. At this point, I had fired 36 rounds and had four duds, all failures to feed. I then inserted a magazine that had worked perfectly the first time I had the rifle out to the range. Round one (41 for the day) fed fine but the bolt did not open after firing. It had recocked but had not begun to unlock. I tried the SMG method for clearing it which is to bang the butt on the wooden table. Zero movement. Next I tried placing the charging handle on the edge of the table and leaned into it. I'm 6'2" and about 240 pounds and I was putting everything I had into it. Nothing. I tried banging the charging handle on the edge of the table. Nope. I stood above the rifle with the charging handle resting on the edge of the table and laid on the buttstock. It wasn't opening. It was locked up tighter than a nun. I messed with that thing for over twenty minutes in a nice soaking rain before giving up and coming home. I was so frustrated, I forgot to bring my target with me. It's about a 25 minute drive home. I took everything out of the truck and left the rifle in the garage while I came upstairs to put stuff away. I then headed back down to the garage intent on using a hammer if necessary. Before resorting to that though, I tried charging the handle by hand again. Still nothing. One last try before I break out the sledge....I'll catch the charging handle on the workbench and lean into it just like I did at the range. The action FINALLY opened and the casing fell out. It looks perfectly normal. The only thing I can figure is that the action is binding as everything heats up. The first time to the range ended in a locked action and nice marks on the handguard. I thought it was a magazine issue that time. This time, after only forty one rounds (37 actually fired) my range trip ended with a locked action and more marks on the handguard. The marks aren't as bad this time but they are there nonetheless. I see nothing out of the ordinary on the internals that might be causing this. I can only speculate that it is a heat and expansion issue. I will be contacting Rick Smith tonight. The reason I generally only buy military rifles is to avoid this kind of stuff but I made an exception for this rifle. For this amount of money, I expect perfection. Looking good isn't good enough and I'm starting to lose faith. I worked at the Post Office for over 13 years before quitting in disgust and now thought of trusting God knows who to send this thing halfway across the country makes me sick to my stomach.......
__________________
I promise to be nice and play well with others |
|
|
|
|
10-22-2014, 06:51 AM
|
#23 |
|
User
Join Date: Mar 2008
Location: Marco Island, Florida
Posts: 4,867
Thanks: 1,685
Thanked 1,916 Times in 1,192 Posts
|
Sorry to hear this. This looks like a magazine angle to chamber throat issue. Some fixes may be working on the magazine's latch shelfs and/or polishing the feed ramp into the chamber. Also a dipping mag follower may be the culprit and it may need to be stoned down to revent friction against the mag walls or the spring modified so it more effectively presents the round at the magazine feed lips.
Could you again show a photo of magazine inserted, (perhaps with one round being presented to the chamber) and the chamber area? Best done on a stripped rifle for better viewing, so that we can see how they interact. |
|
|
|
|
10-22-2014, 12:23 PM
|
#24 |
|
User
Join Date: Oct 2007
Location: Maryland
Posts: 340
Thanks: 43
Thanked 107 Times in 51 Posts
|
I was in contact with Rick Smith. He told me to send it back and he would video the unboxing, inspection and testing and post the video. You can't ask for better service than that! However, I'm not quite ready to give up and return it for service without trying a few of his suggestions first; adjusting the gas setting to the lower setting being at the top of the list. I will also be using the magazines it was tested with and paying particular attention to lubing the locking lugs on the bolt and the cam track in the bolt. His correspondence stated:
" Your rifle may have been one that was a little on the tight side when assembled/test fired and was set on the high setting when it went out. This is the case with about 10% of the rifles and normally within less than 200 rnds they have loosened up and need to be on the low setting or will zing brass 15 feet, kick with 15% more authority, and be in a competition with the mag spring to see who is fastest." Mine is still on the high setting and brass IS flying pretty far. I also noticed brass kisses on the receiver in front of the ejection port that weren't there first time out. So, too much gas just may be the main culprit here with the failure to feed problems. What he means by the last part of his statement is that the bolt is flying back with so much force and rebounding off the buffer so hard that it is getting back to the magazine before its spring has enough time to have the next cartridge ready for pickup. That still doesn't explain my lockup yesterday but I've only used CLP as my lubricant and I've kept my locking lugs bone dry, something I learned by shooting HK's for many many years where to DO NOT lube the trunnion. So, I will try again before returning it. That will be a couple weeks though. I will post the results.
__________________
I promise to be nice and play well with others |
|
|
|
| The following member says Thank You to Wilhelm for your post: |
|
10-29-2014, 02:00 AM
|
#25 |
|
User
Join Date: Oct 2007
Location: Maryland
Posts: 340
Thanks: 43
Thanked 107 Times in 51 Posts
|
Yesterday, I took the FG42 out to the range again. My plan was to shoot 100 rounds. Prior to heading out, I did the following:
1. Set the gas regulator to the low gas setting. 2. Greased the locking lugs with Swiss Automatenfett. 3. Greased the cam slot on the bolt with same. 4. Packed the two magazines numbered to the rifle. 5. Packed 40 rounds of Romanian surplus dated 1973 and 60 rounds of Portuguese surplus (10rds. 1959, 30rds. 1961 and 20rds. 1973). I am pleased to report that the rifle itself functioned flawlessly. I wasn't pounding the rounds through it but I was shooting fast enough that I had a decent mirage going on when looking through the scope. I took the muzzle brake off for about ten rounds and there is quite a noticeable difference in recoil with it off. I still can't report on accuracy because I was getting different POI because of the various ammunition I took along. I can tell you that accuracy so far is on par with a good SKS. A better trigger would help but familiarity with the rifle should improve the groups too. Charging effort was the same whether the rifle was cold or hot and whether there was a round in the chamber or not. I think we're making progress. Another 500-600 rounds like this and I'll call it good. Now for the bad. At round 90, a part fell off on the table. It turned out to be the band screw from the front mount. I checked the rear one and its screw was ready to fall out. 8mm recoil really puts things to the test. The scope seems to still be tight in the bands but that's probably because the locking levers are holding everything tight. If I were to loosen them, I believe that I'd have a mess. So, I discontinued shooting the FG for the day and headed home. Now I need to contact Mr. Adams and ask for advice about how to proceed; I'm thinking locktite...... Here is a random sampling of casings with three steel ones on the right and three brass ones on the left: 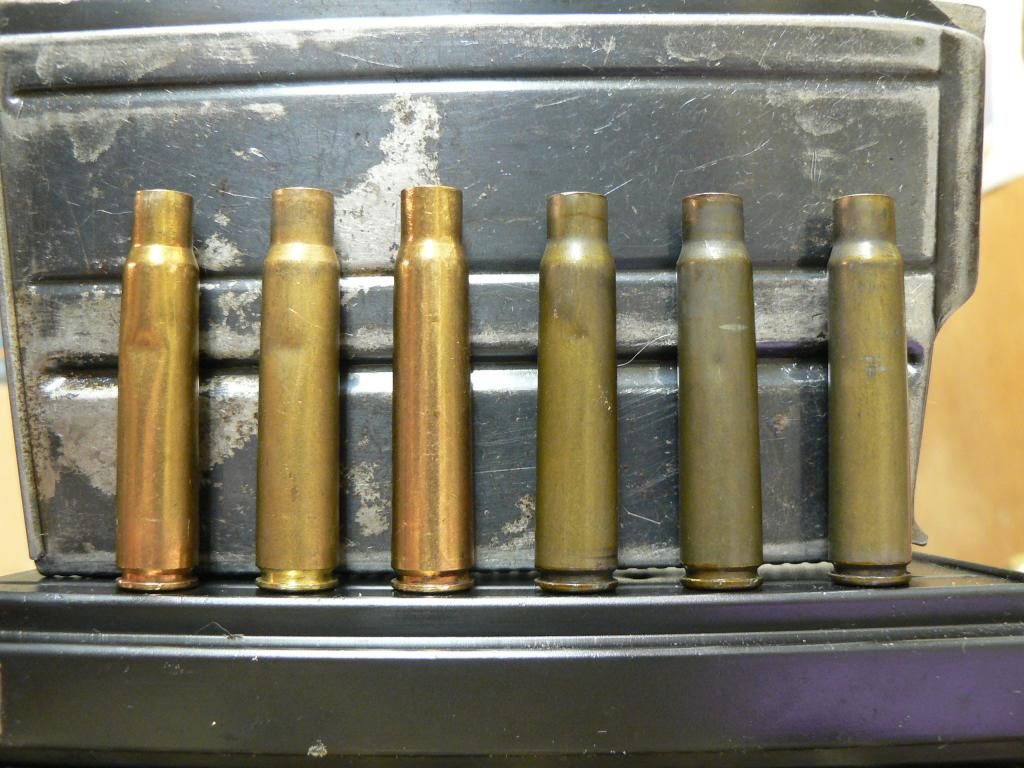 Not nearly as beat up as before. And the necks on those same casings: 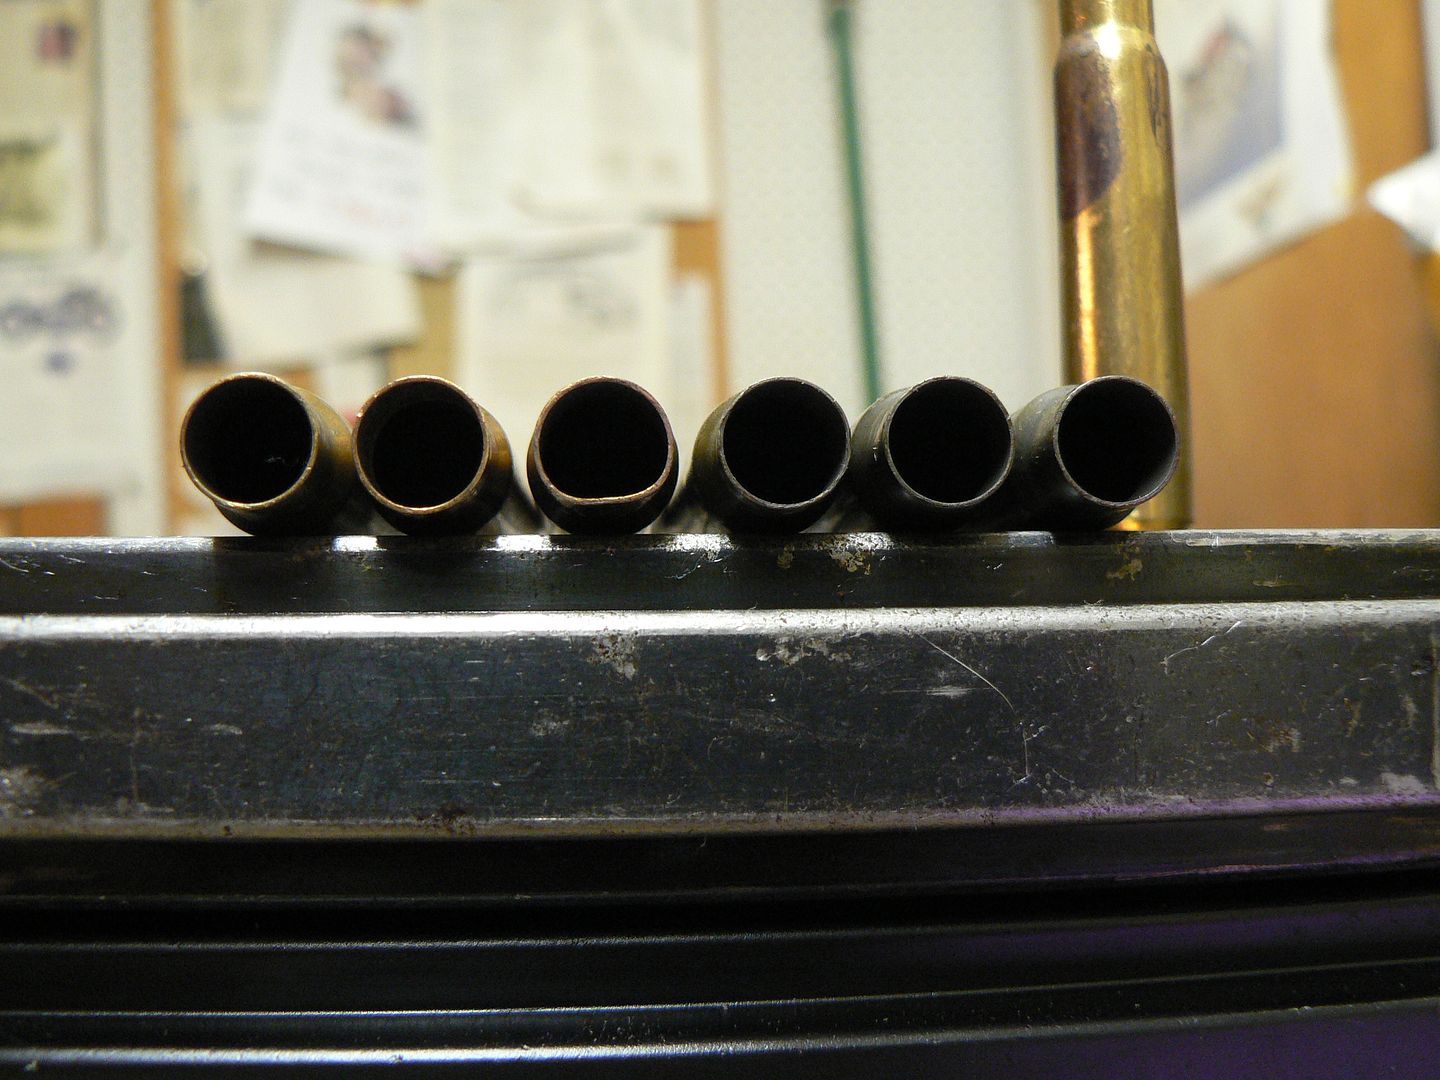 Prior to cleaning, I took a few pictures to show the surprisingly low funk level at 90 rounds. Here we have the: Gas plug:  Gas block and front of the hand guard:  Muzzle brake:  and gas piston:  Next are a couple pictures of the greased areas prior to cleaning. One of the locking lugs: 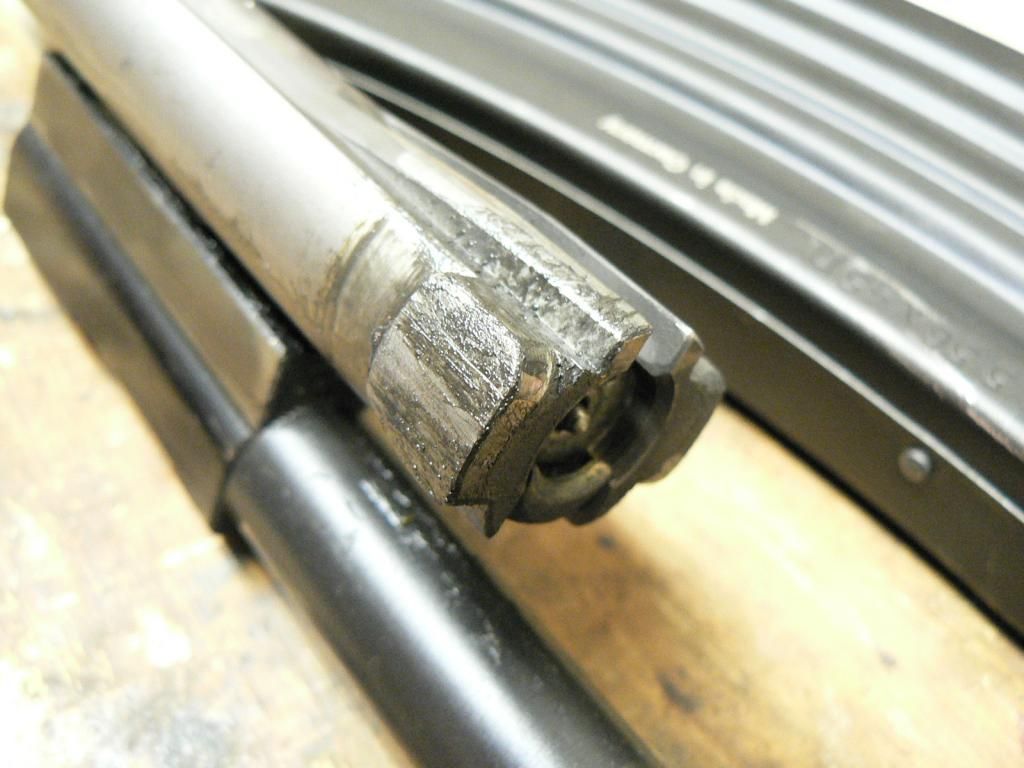 The cam slot and other locking lug: 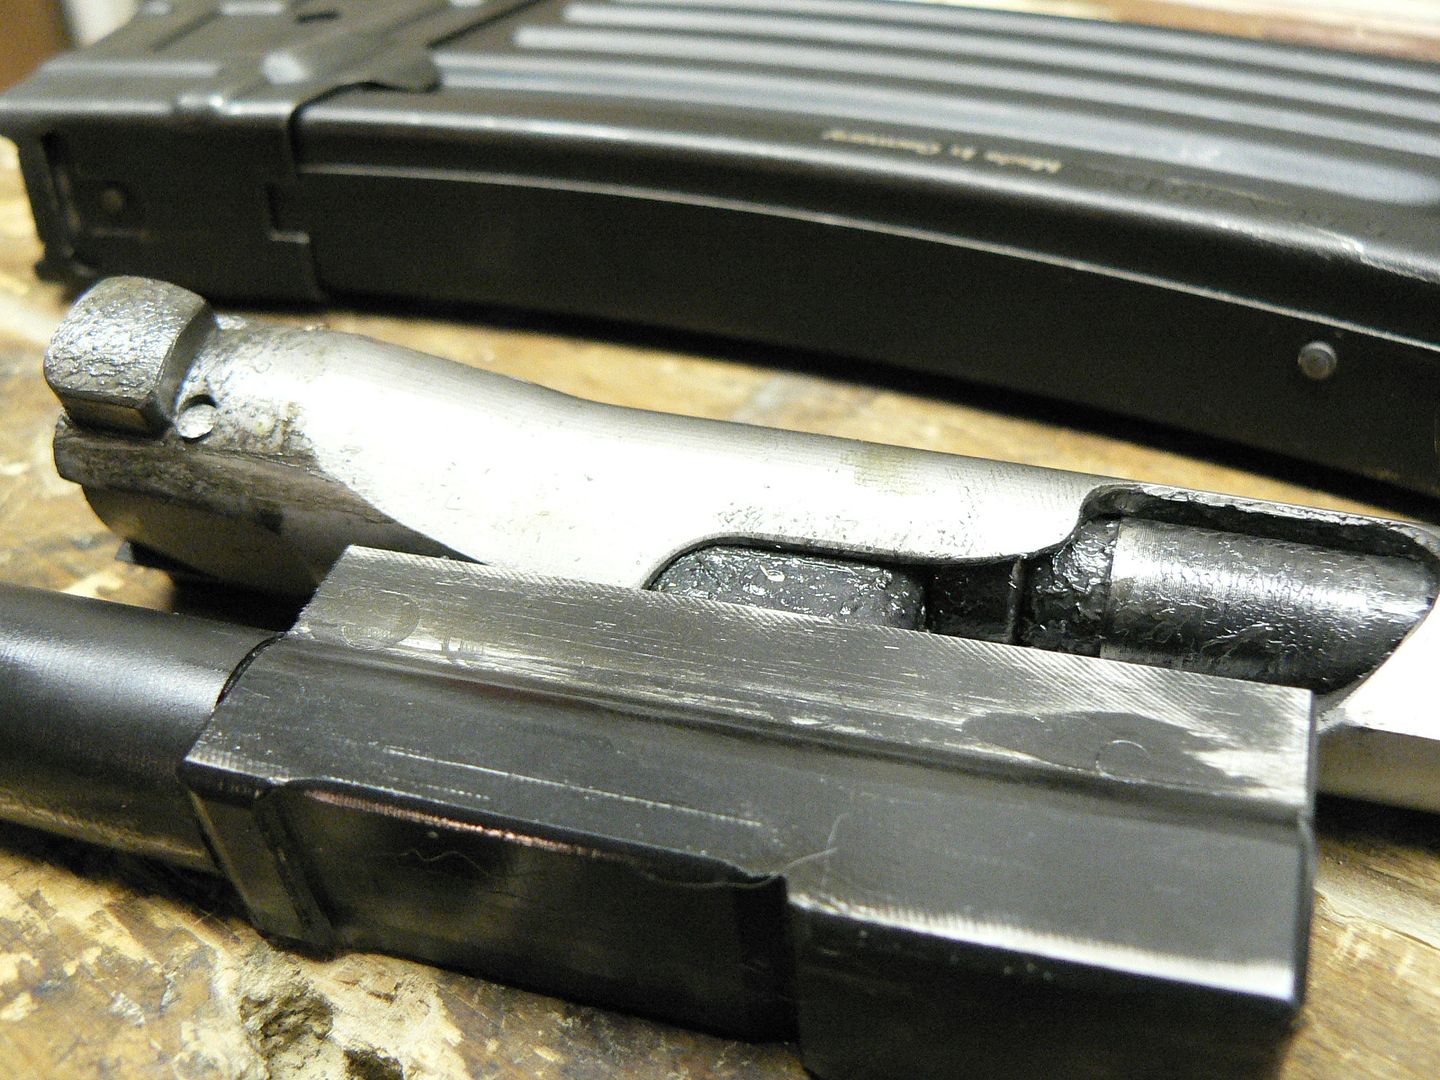 Cleaning this rifle is pretty easy because residue seems to stay confined to a few small areas. I had taken an HK along with me too (I pretty much ALWAYS take an HK too!) and I'm used to the mess they make so this thing is positively tidy compared to them. With nothing more than on old toothbrush and a little Hoppes #9, everything was done in no time. Here's the gas plug post cleaning: 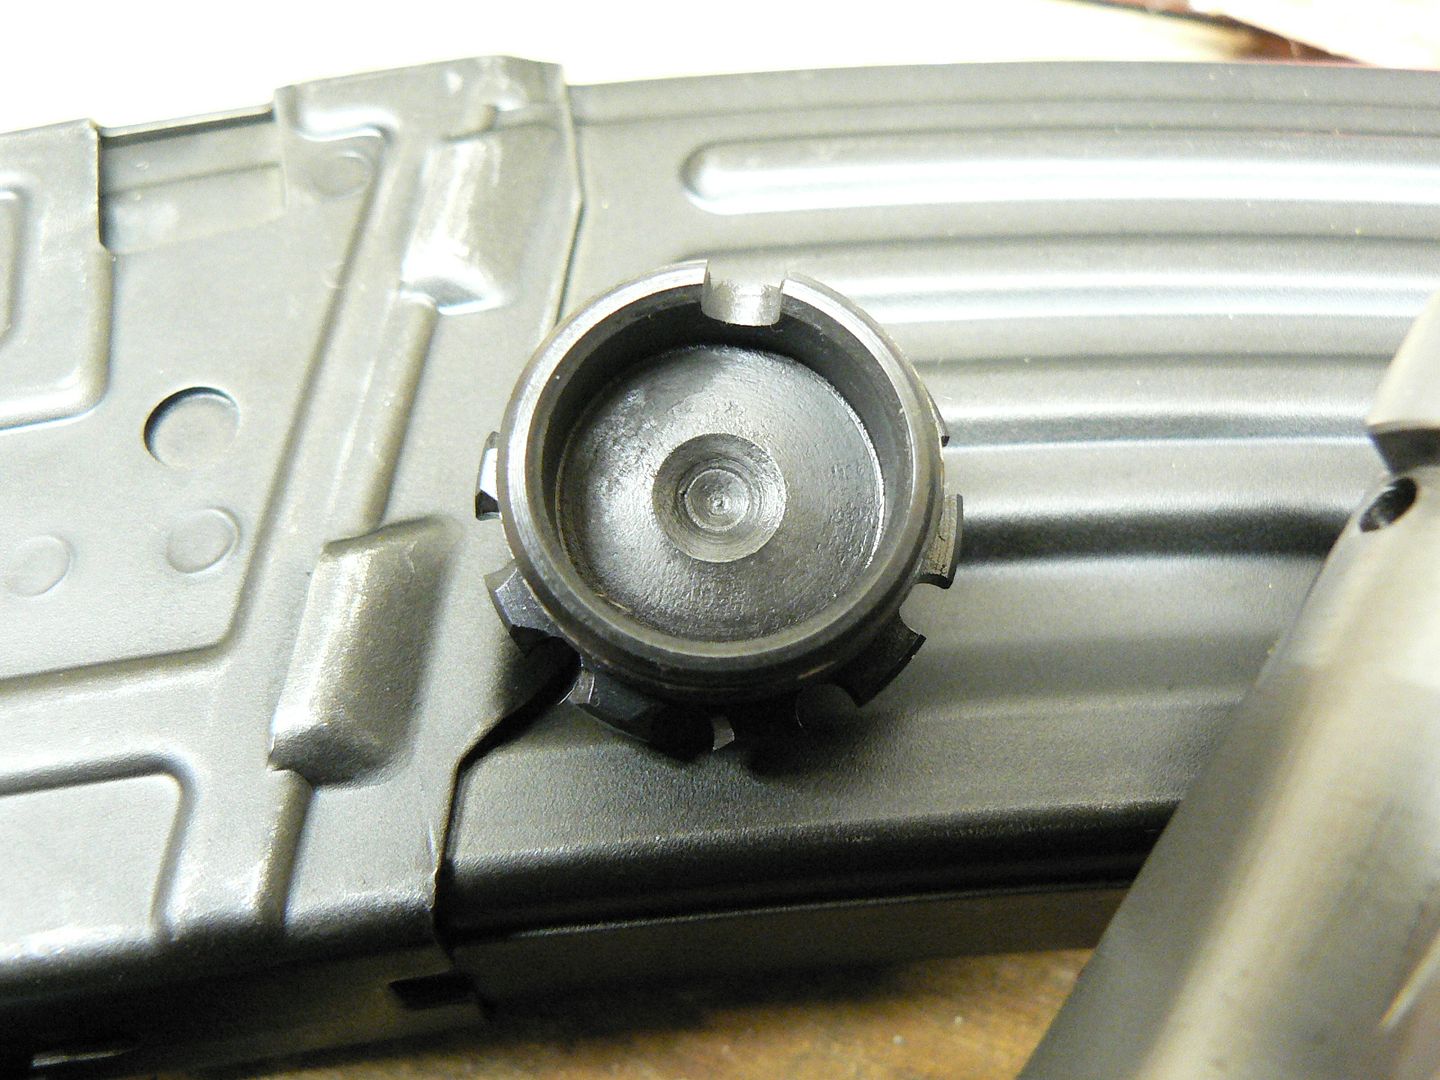 And the piston:  Everything else (other than the barrel of course and the trunnion) needed nothing more than a wipe with a rag and a little solvent. Getting into the trunnion area is a bit of a chore since it's so deep in there and protected by knife sharp edges if you try to go in through the ejection port and, to a lesser extent, through the magazine well. It quickly teaches you to use a toothbrush or get nasty cuts on your fingers! While wiping down the trigger group, a part fell off. It turned out to be the knob from the safety which had unthreaded itself from the detent! What the hell?? Well, since it was already partially apart, I figured I'd take the safety out of the trigger housing and get a picture of what the safety looks like disassembled: 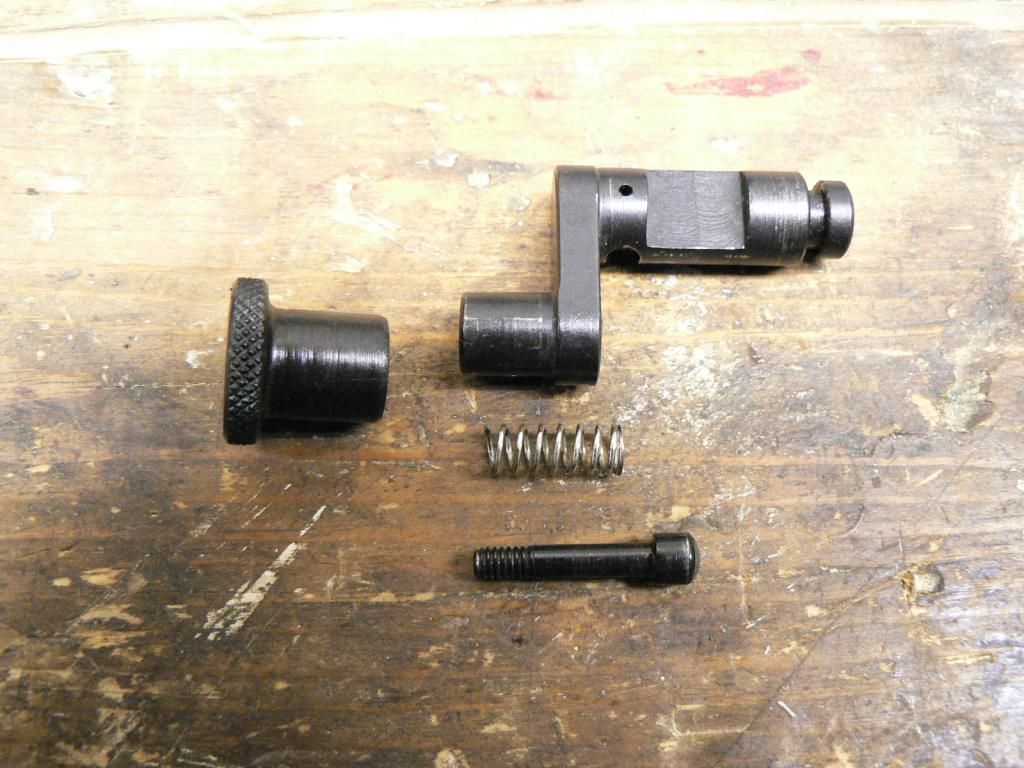 As I said earlier, the 8mm round really puts components to the test. Things WILL disassemble themselves if they aren't properly fastened together. So I put the safety back together. Here's the knob screwed back in place on the detent: 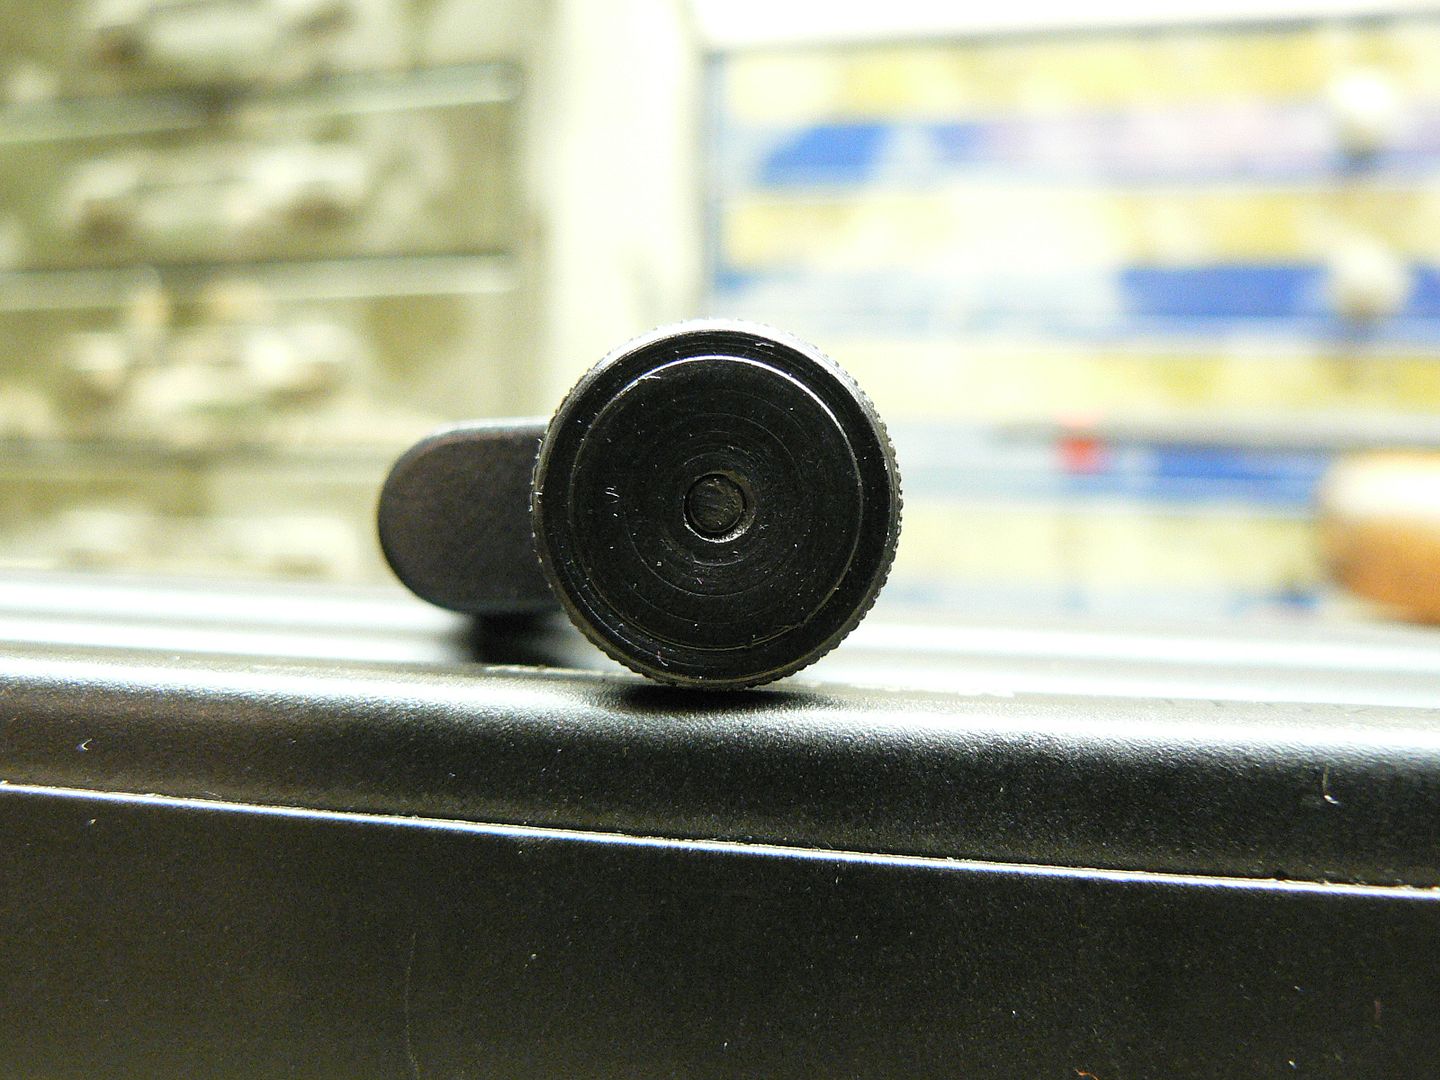 And here's what it looks like after I staked it in place:  Note to SMG......you might want to consider doing that or at least locktite it. Okiedokie. While it's all clean and dry, let's take a look at some wear marks with approximately 210 rounds through the rifle. I'm posting these so that you know what to expect as you shoot the rifle and it starts to wear in. I assume they are normal even though I personally am not normal..... Lets start with the tip of the firing pin: 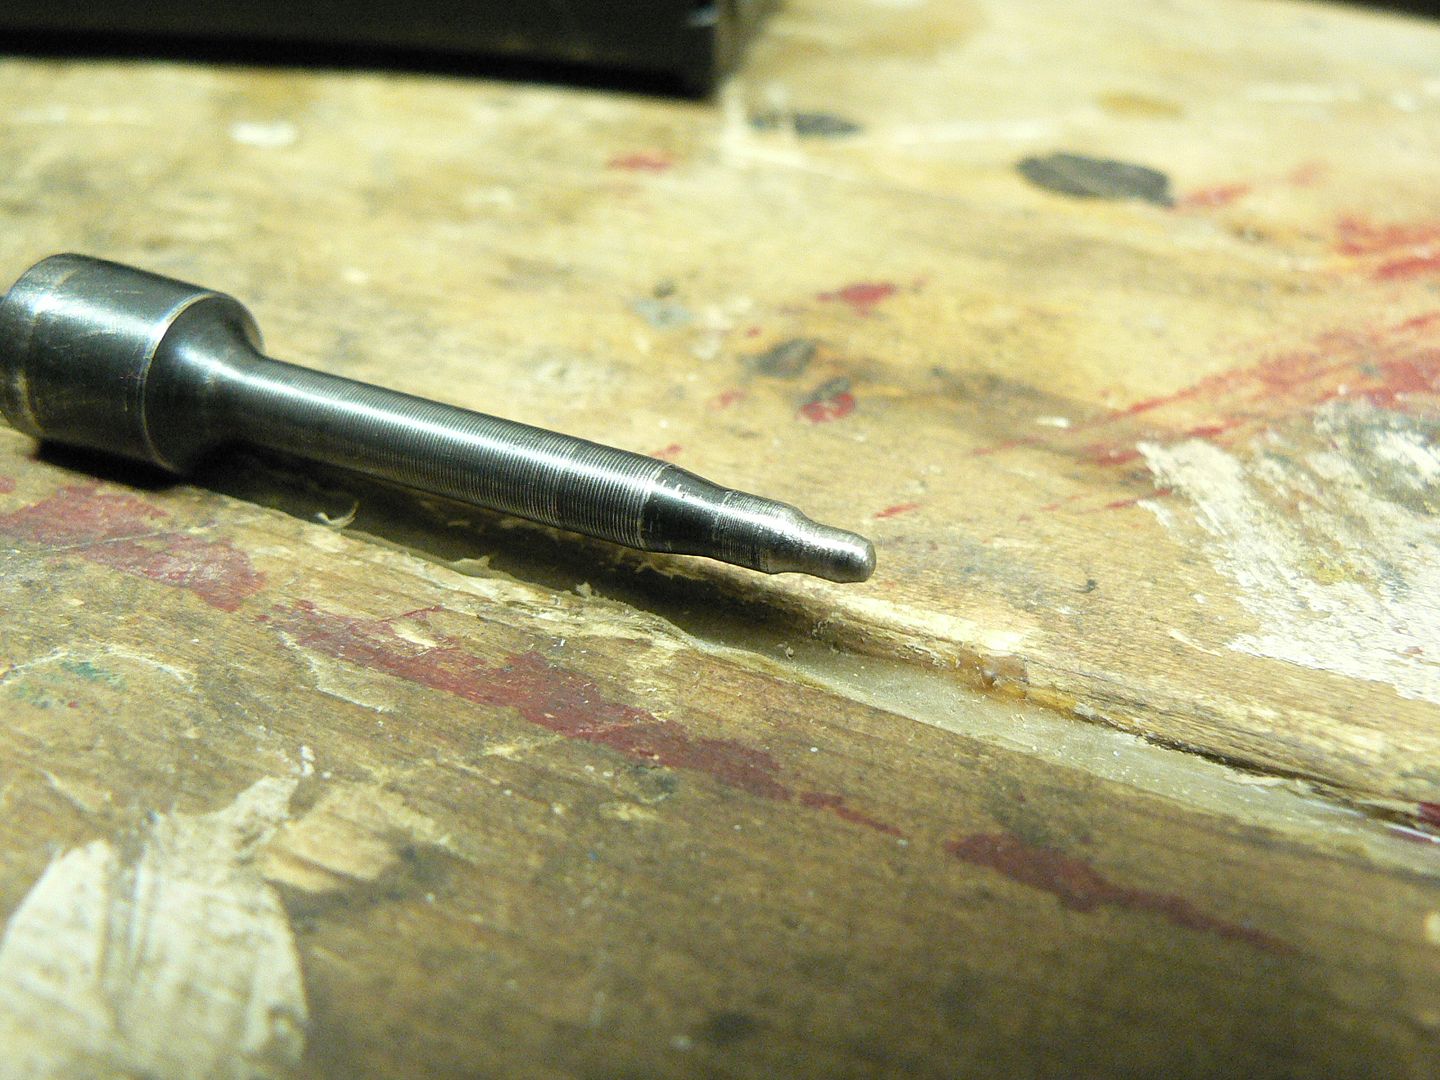 It kind of looks like a Polaris missile doesn't it? The rest of the firing pin showing marks from interaction with the yoke and the inside of the bolt: 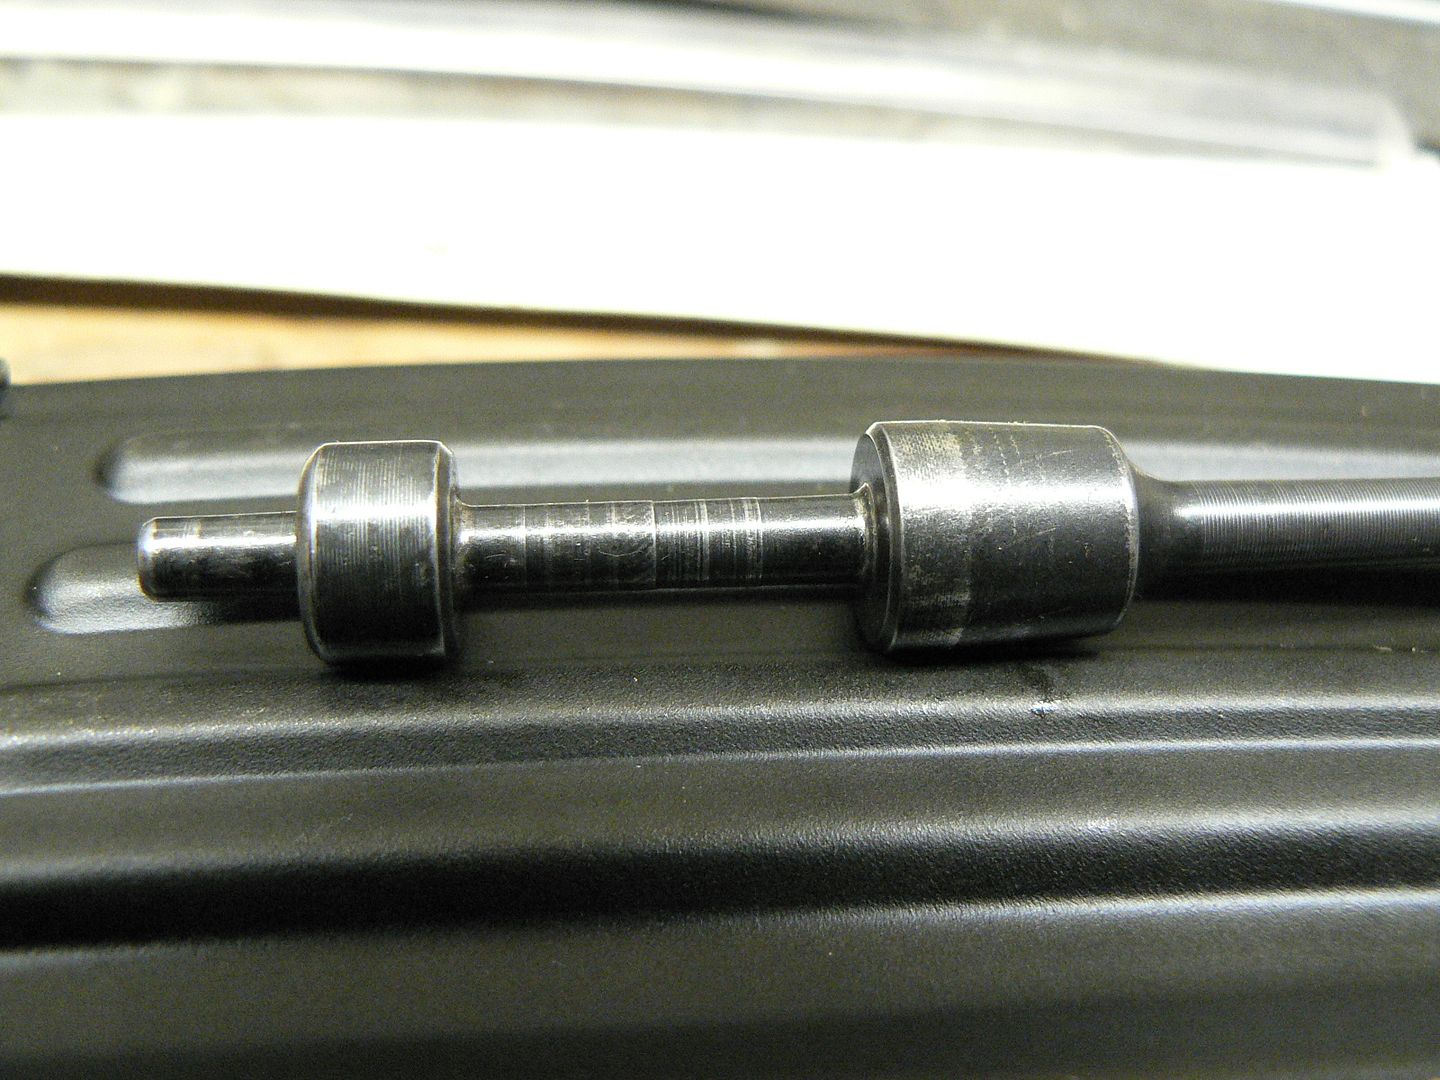 The firing spring guide: 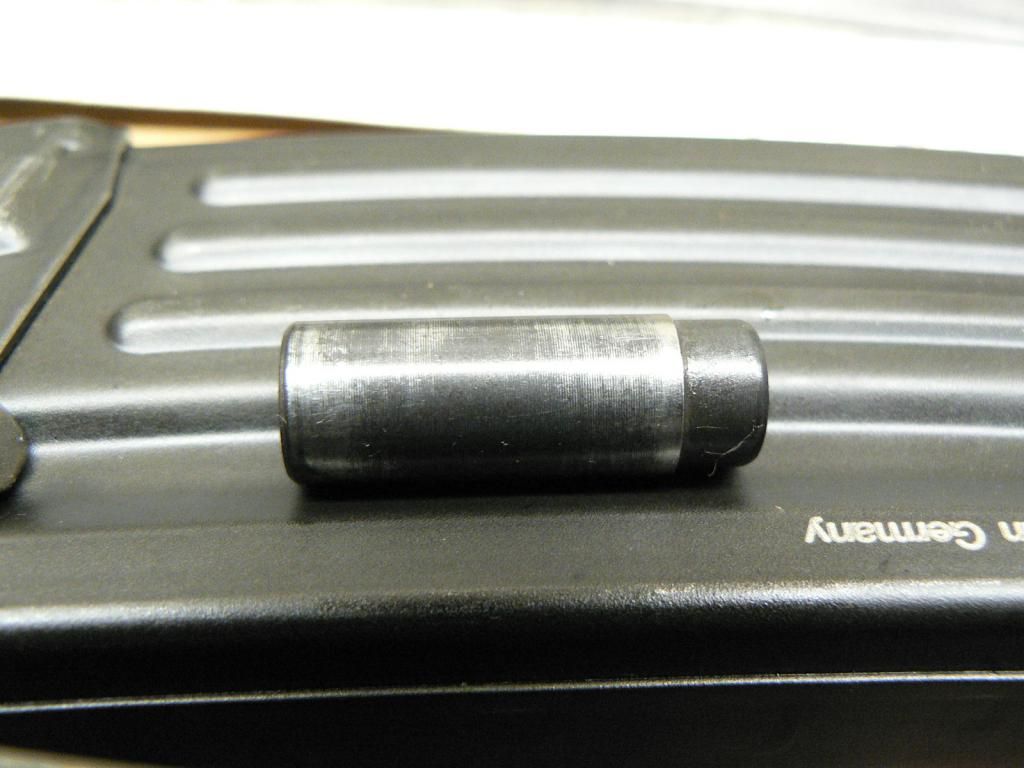 The right rear of the yoke: 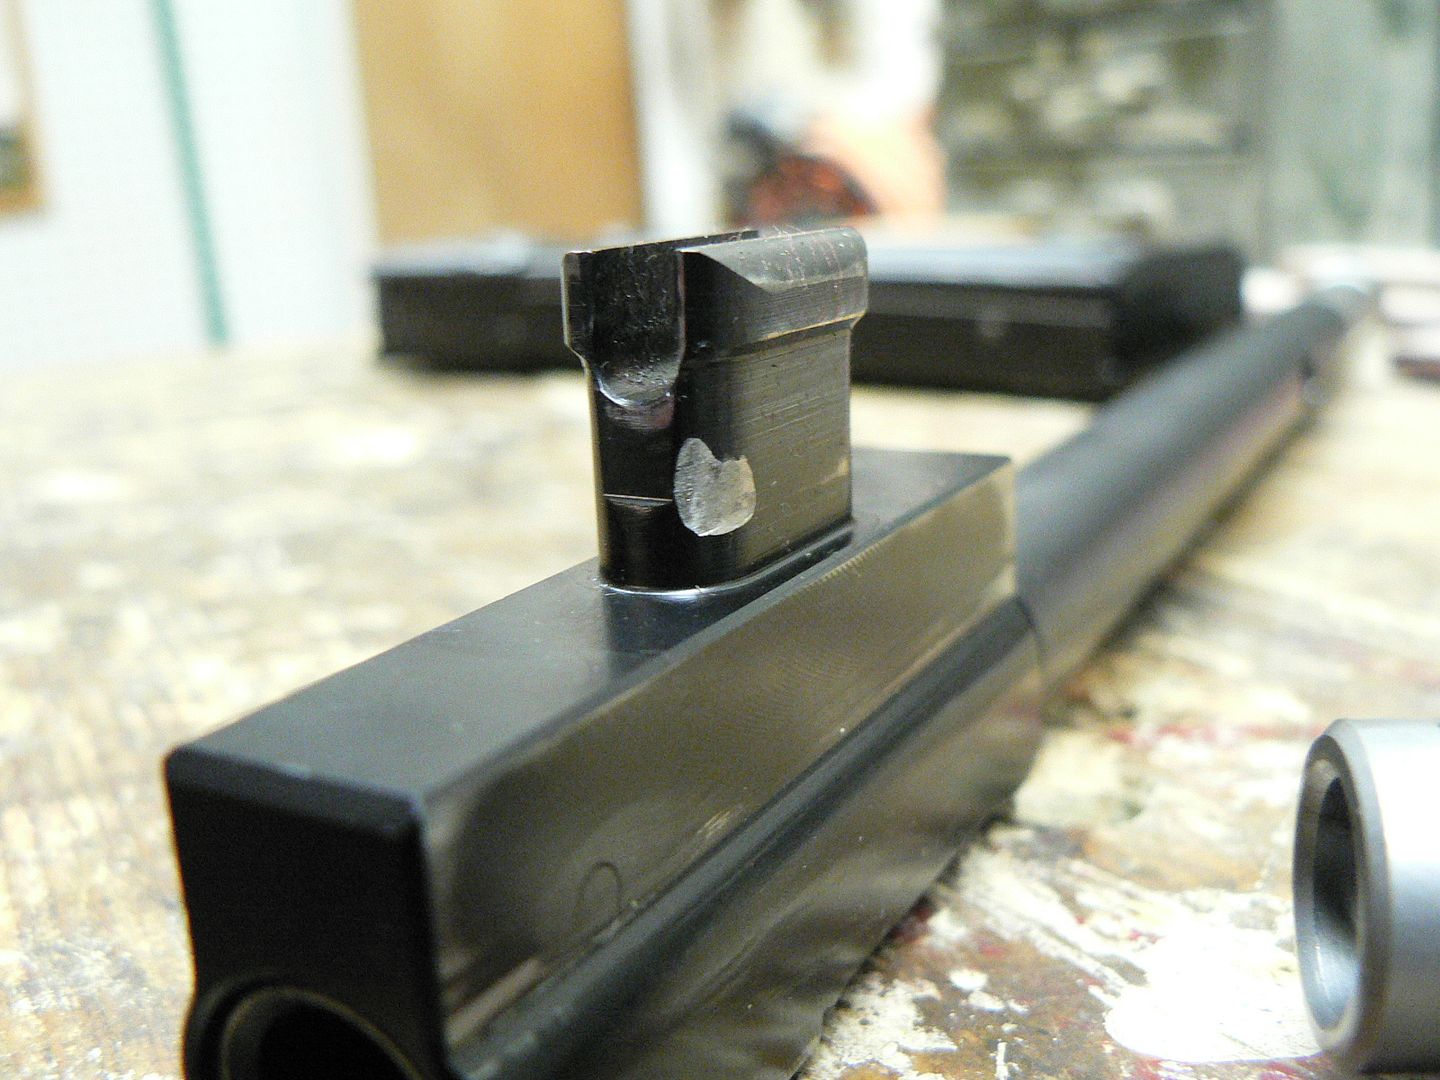 Yep, that's a divot wearing in there. SMG says it's normal so don't wig out when this happens. The front left of the yoke: 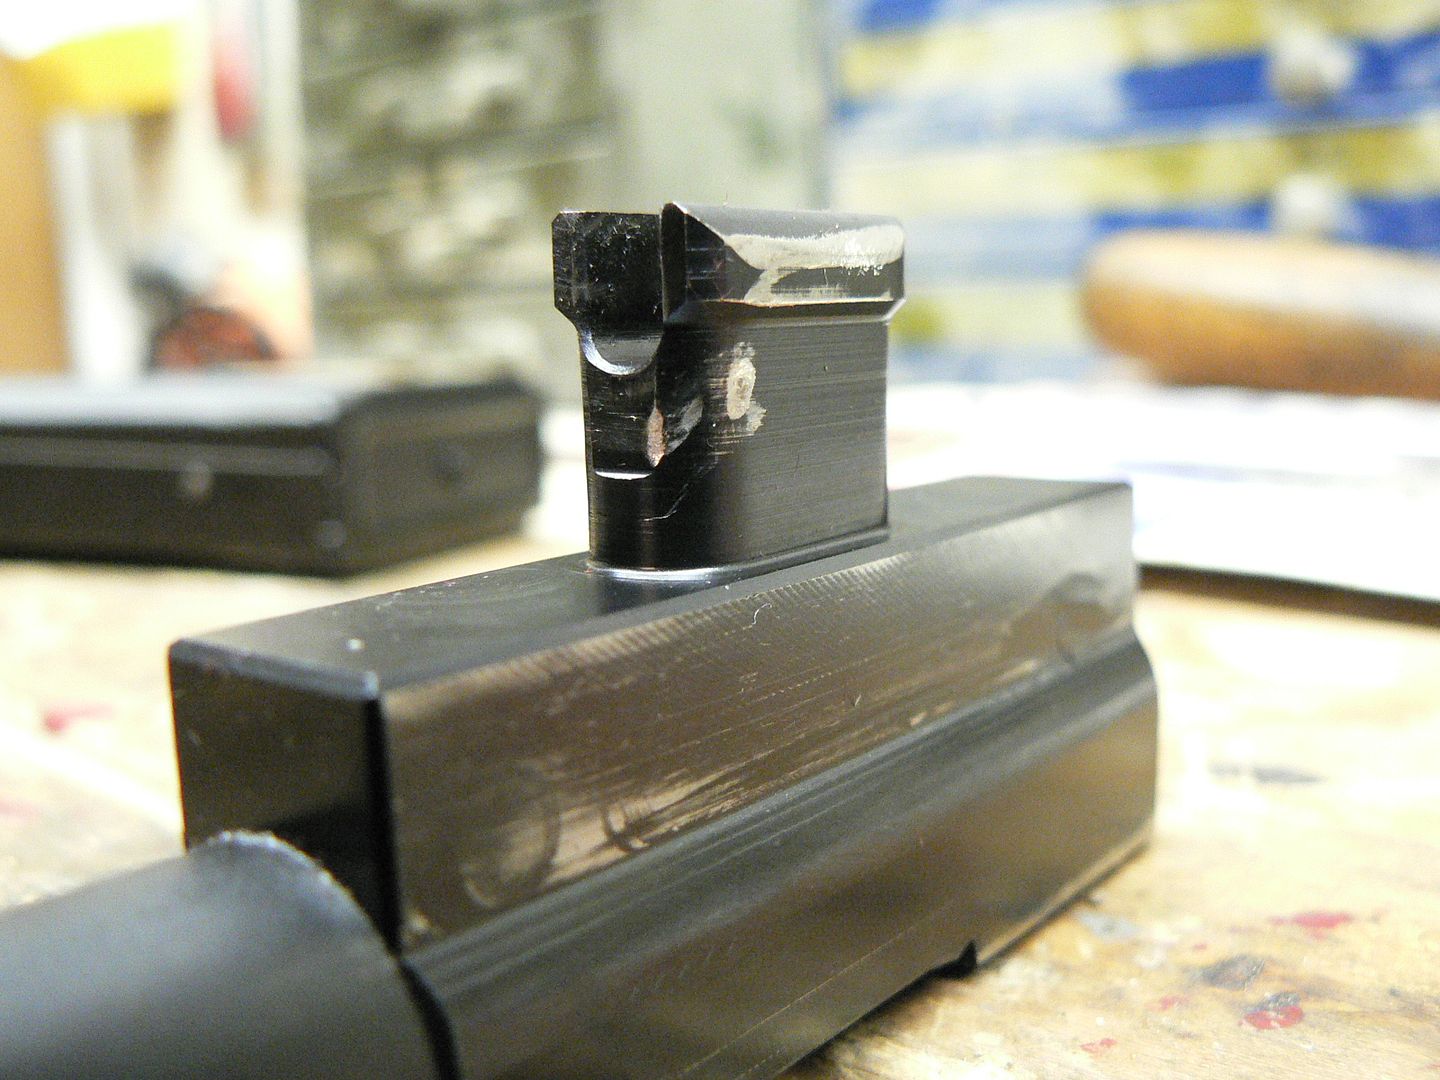 That's NOT a crack. It's just scratches in the bluing. Bolt lugs: 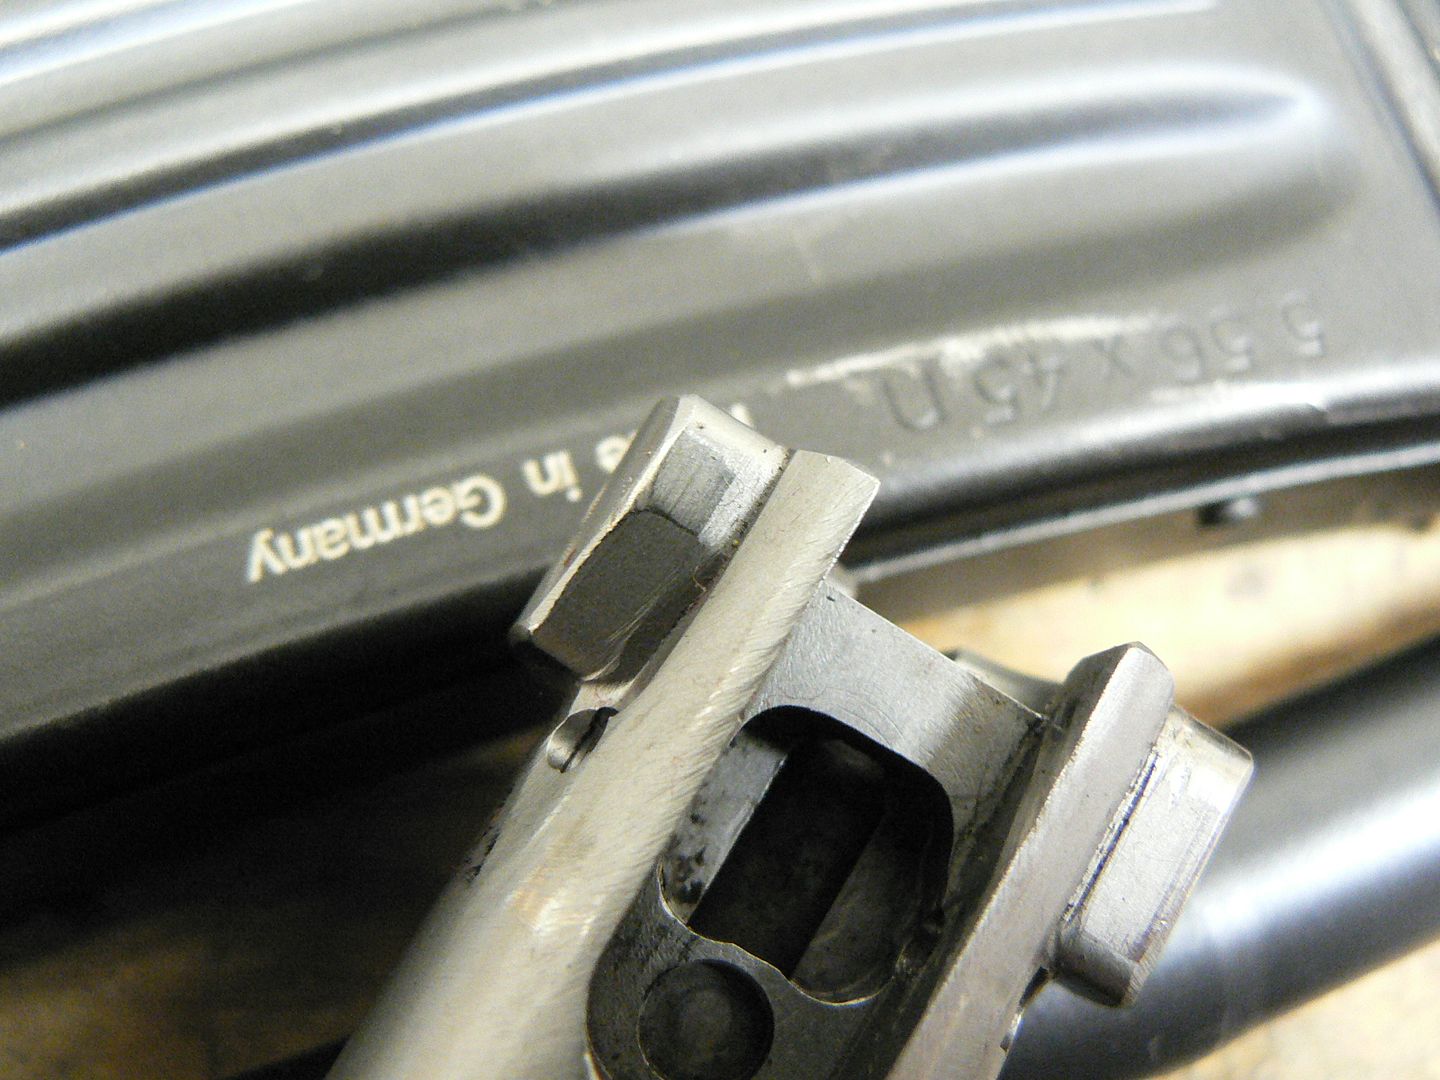  These next two are interesting. They show wear marks behind the lugs on the body of the bolt. I believe this to be from minimal clearance between the bolt and the trunnion and it helps explain (in my mind anyways) why these rifles are prone to locking up if they are run dry: 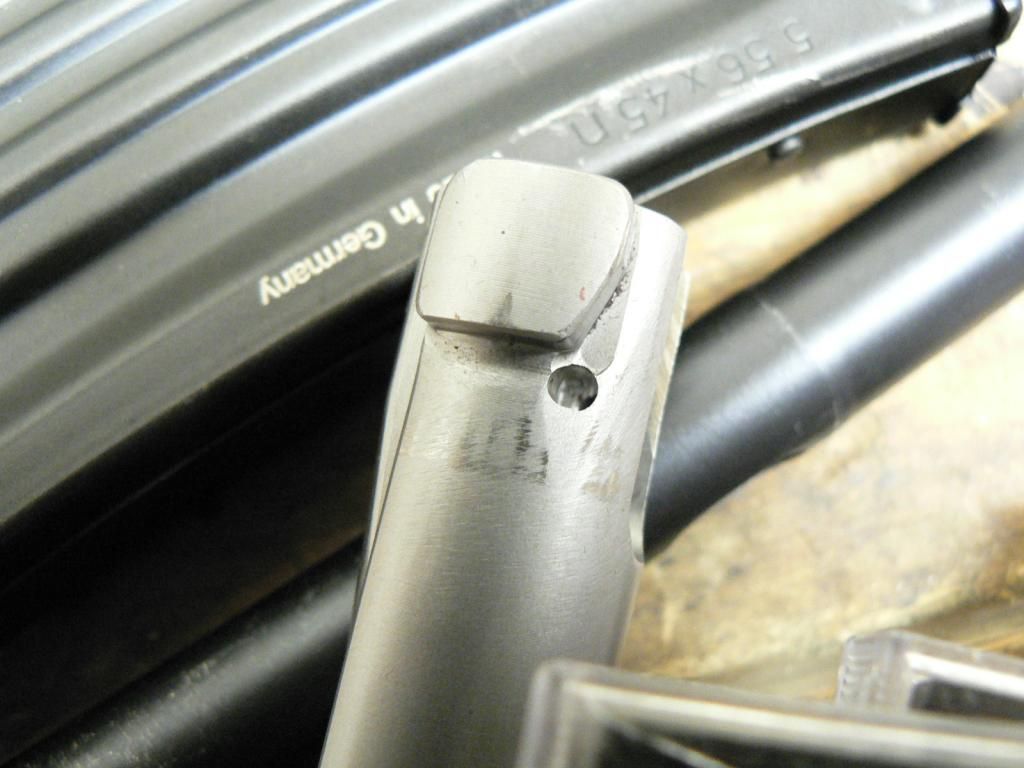 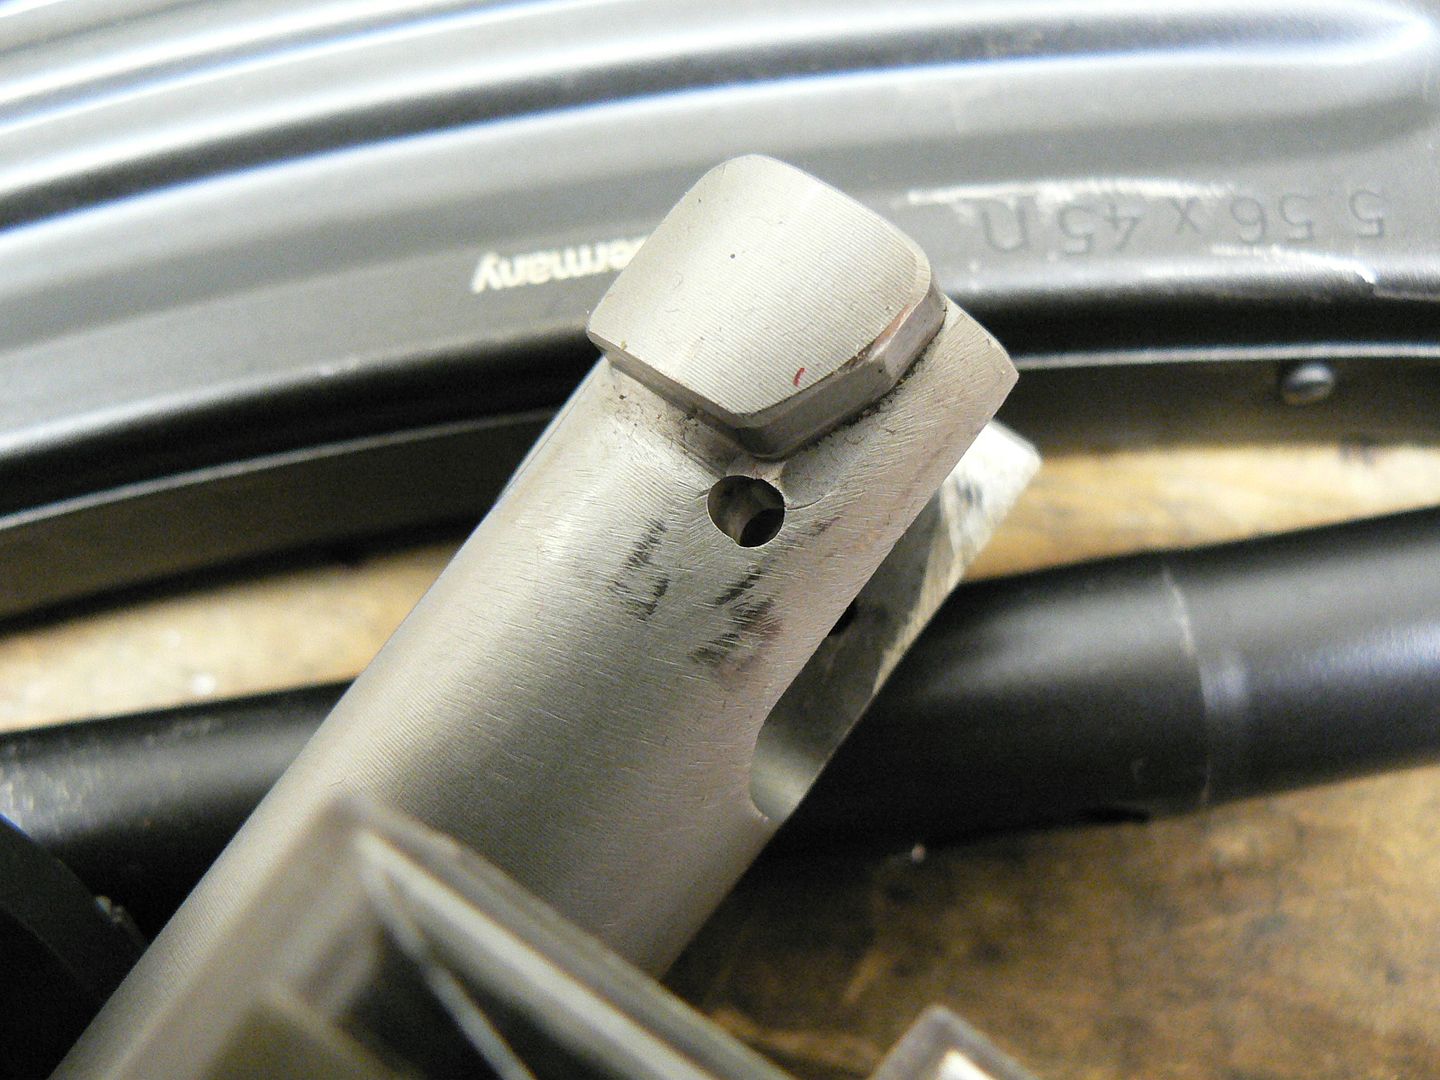 That's not a complaint, just an observation. I've been contacted by several owners now and they have experienced the "FG42 lockup" as well so this isn't just my rifle. SMG says in their instructional video that these rifles seem to run better and better the more you shoot them and I have no reason to doubt their claim. The wear marks shown above seem to be proof of that. So my advice is.....slap some grease on there and run the hell out of it!! Speaking of that, based on accumulated data so far, here's my recommendation so far for lubrication after cleaning: 1. A drop of good oil (I use Break Free) on the rear of the extractor. 2. A very little bit of grease on the firing pin where it contacts the inside of the bolt and where it contacts the yoke. 3. A very little bit of grease on the firing spring guide where it contacts the inside of the bolt. 4. A little more grease on the yoke where it contacts the cam slot in the bolt. 5. A little more grease in the rear of the bolt cam slot after the entire bolt group is assembled just before putting everything into the receiver. 6. A little more grease on the locking lugs paying attention to NOT smear it on their fronts (enough will work its way there in use) or on the bolt face. As an example, let me show you what my lugs look like greased just before it all goes into the receiver: 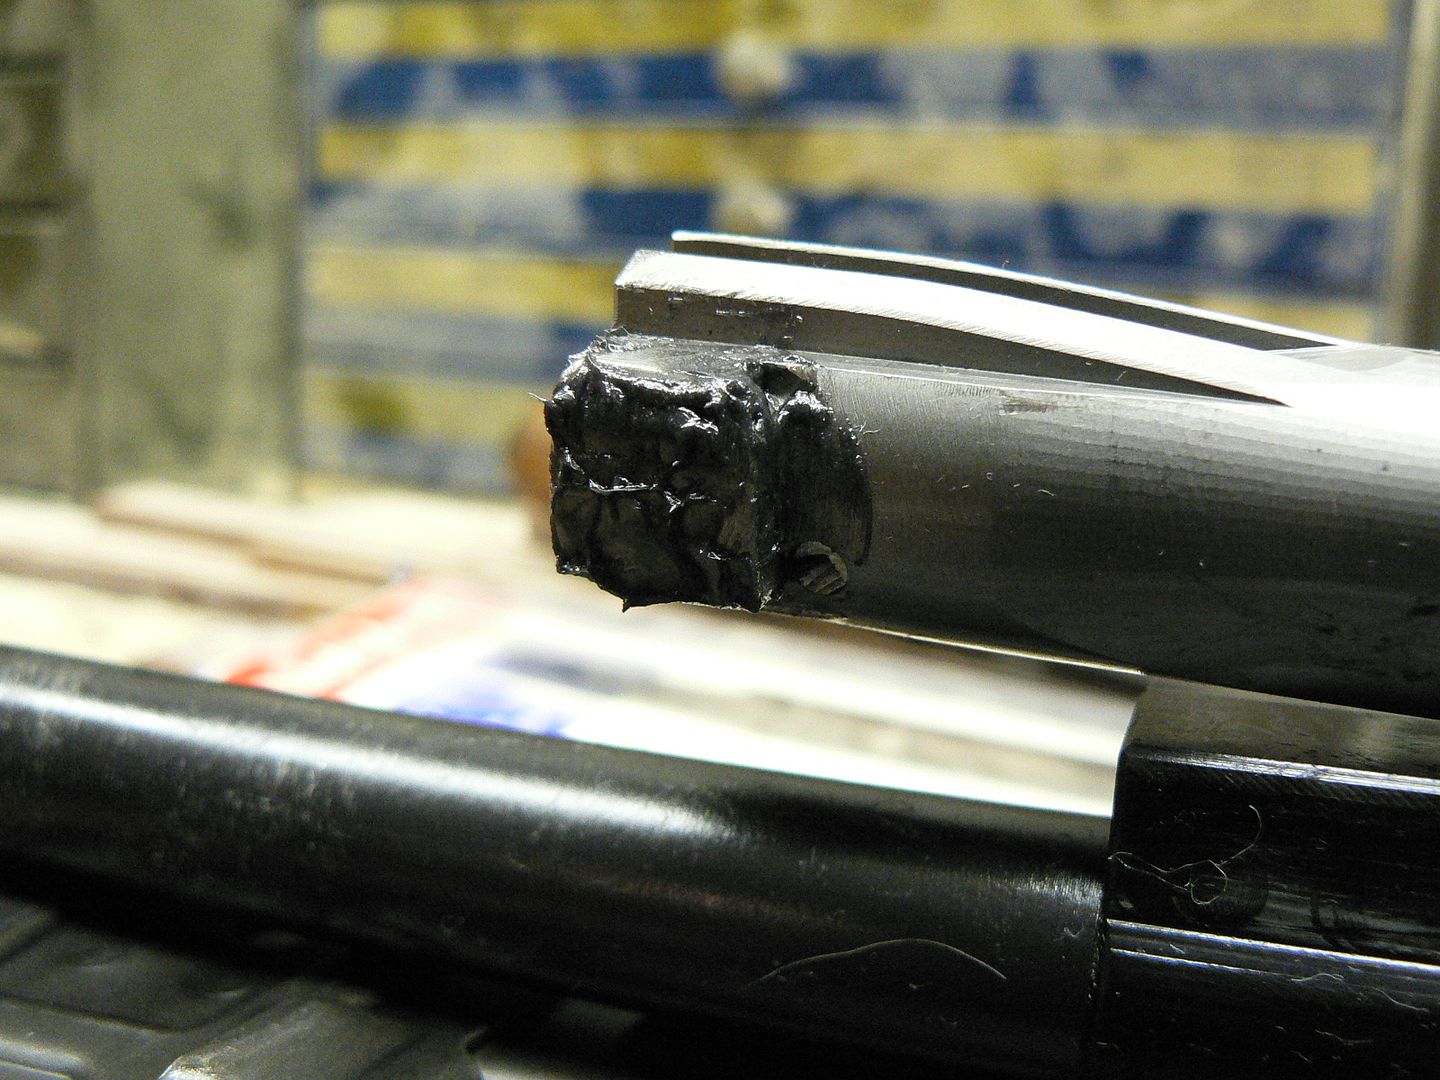 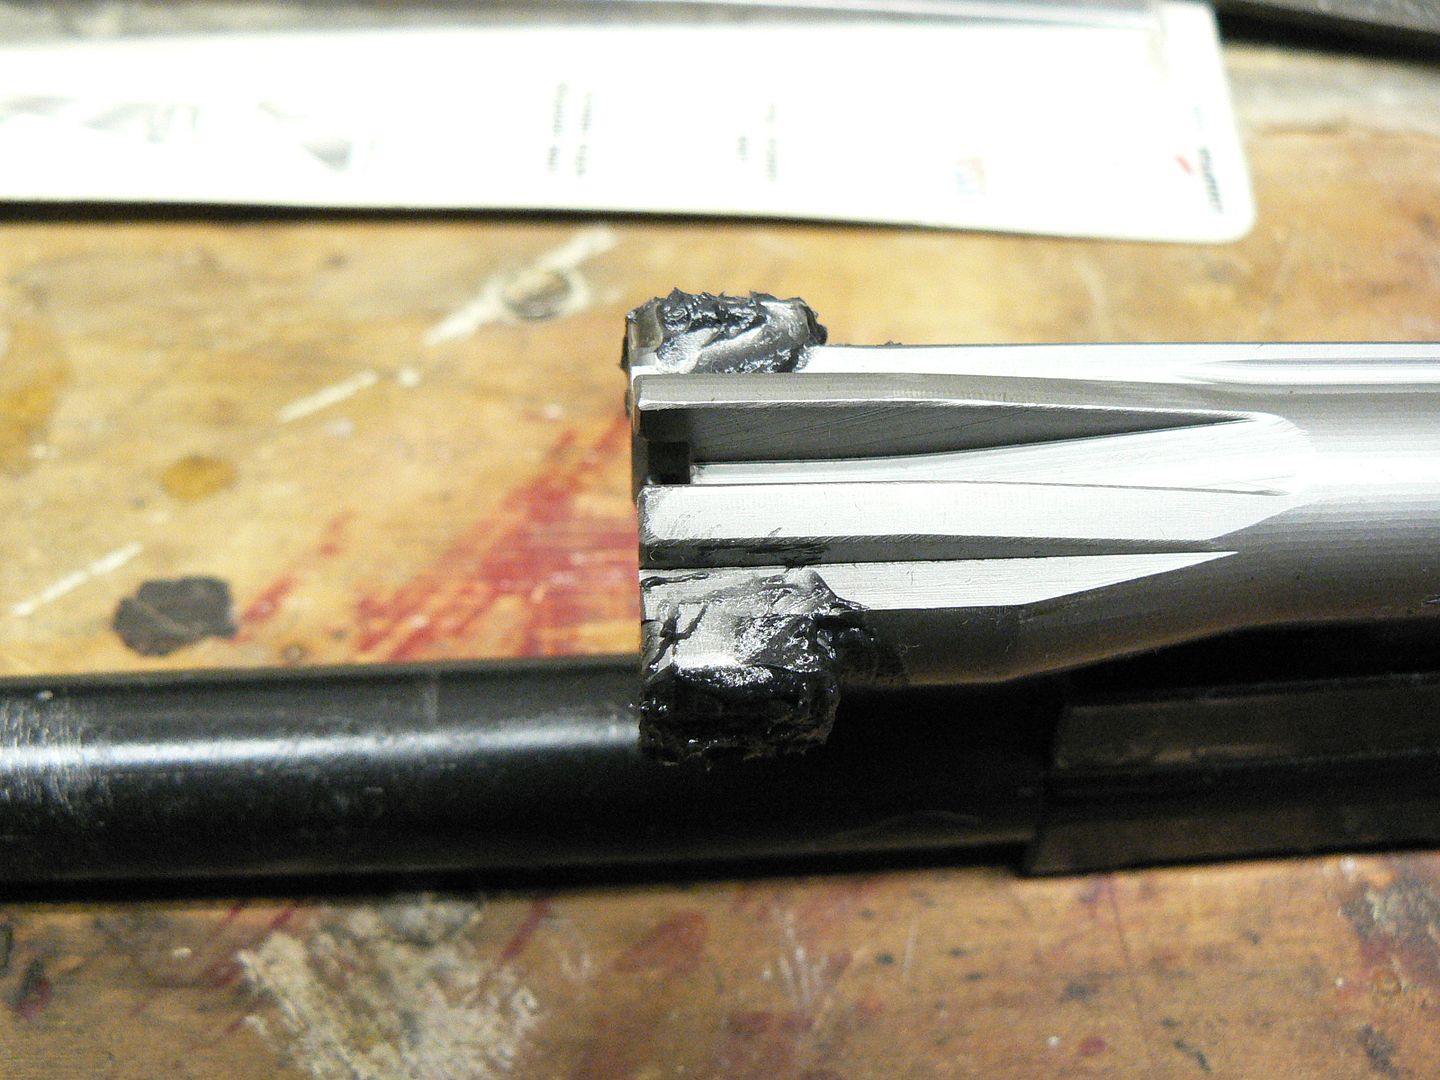 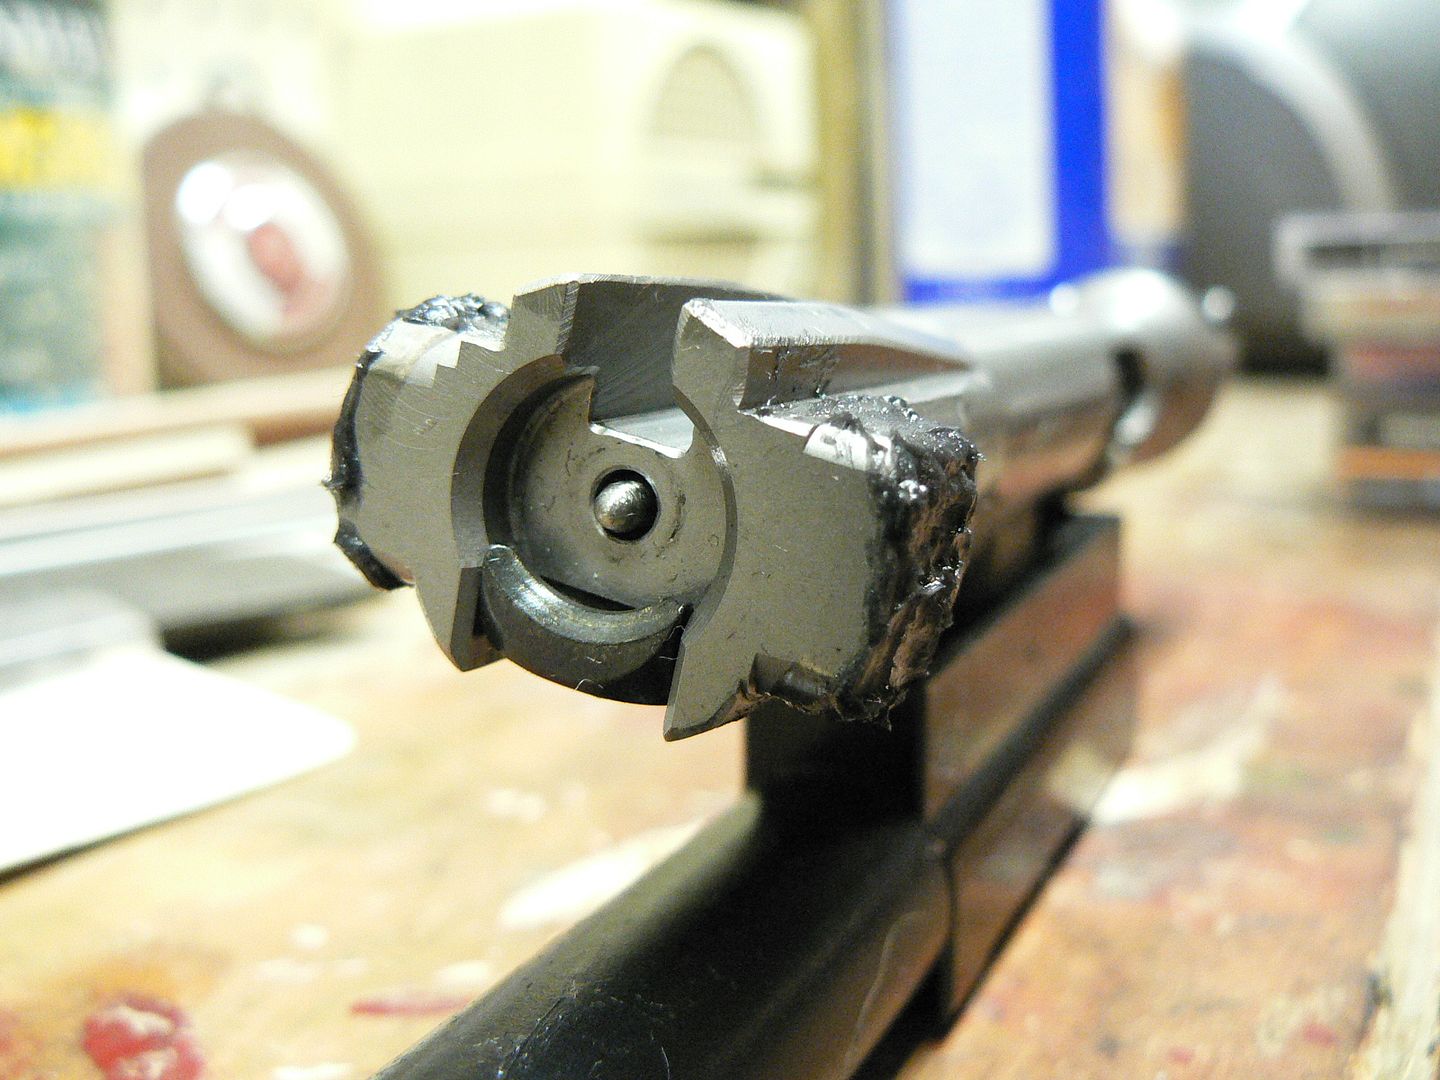 SMG should give you some idea about proper lubrication procedures in their manual but they don't so learn form my problems, stupidity and experimentation. Admittedly, most of my problems come from my stupidity but not all of them. HAHA!! As for what grease to use, I'm using Swiss Automatenfett but any quality high temperature grease should work just fine I would think. Okiedokie.....that's it for now. Eventually, I'll get this whole scope thing worked out and get some decent accuracy tests going on.
__________________
I promise to be nice and play well with others |
|
|
|
|
11-06-2014, 06:42 PM
|
#26 |
|
User
Join Date: Oct 2007
Location: Maryland
Posts: 340
Thanks: 43
Thanked 107 Times in 51 Posts
|
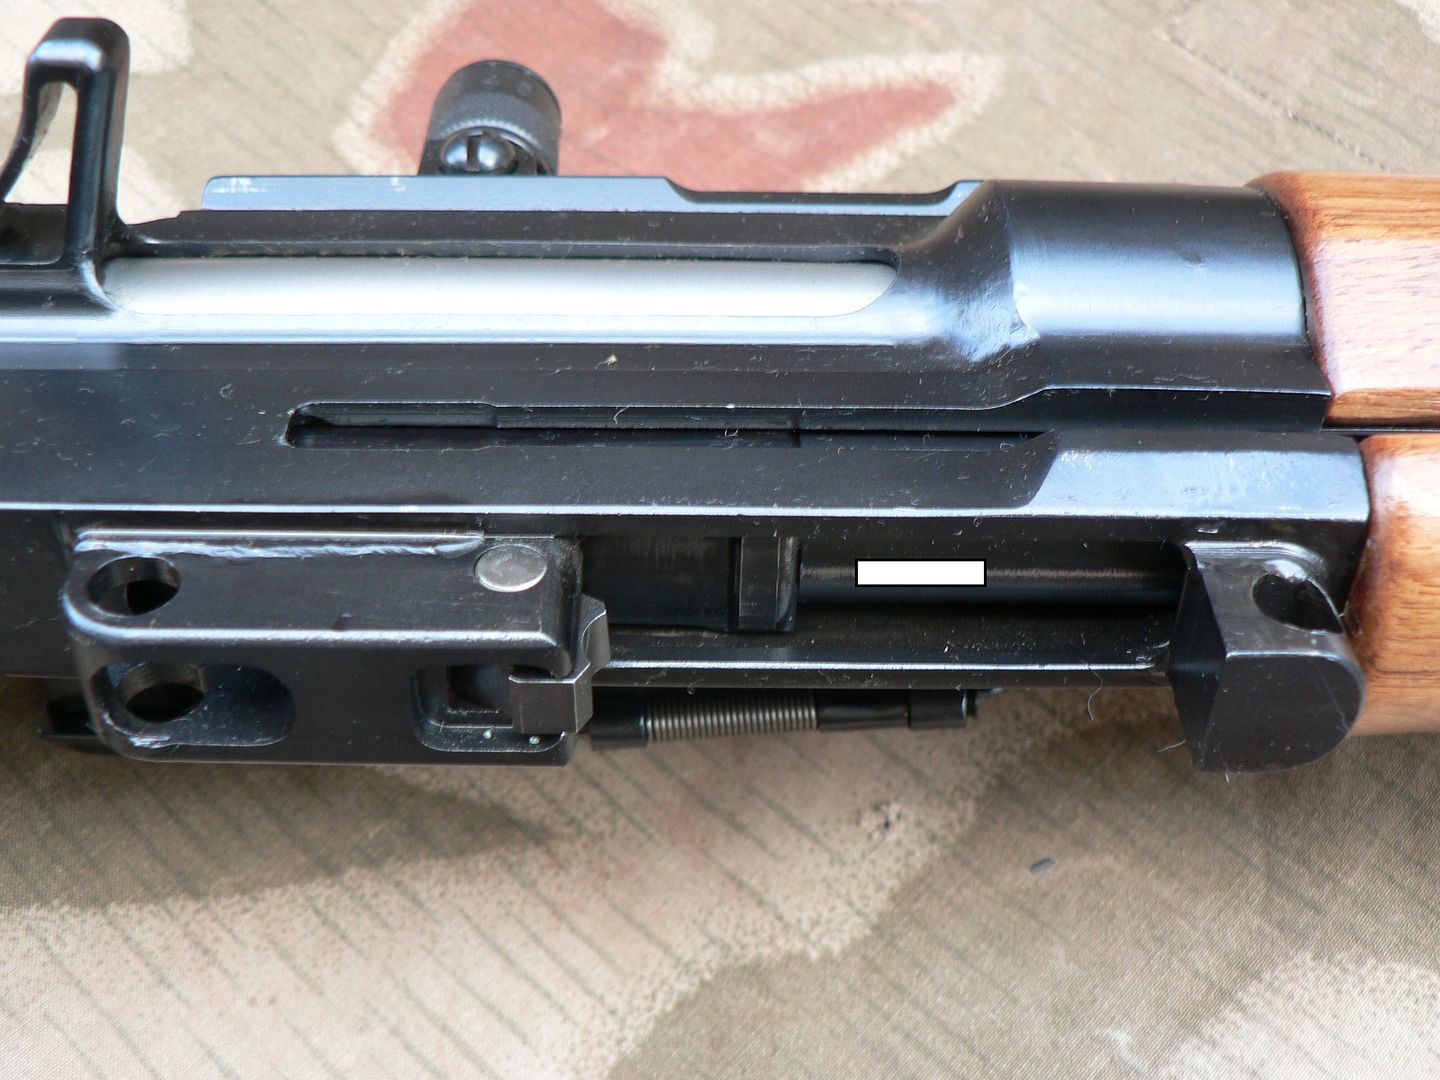
In this post, we are going to talk about trigger pull. Mine is terrible. It's hard and the best way to describe how it feels is to compare it to a rusty ratchet wrench. It starts hard, clicks and scrapes as you pull and finally, just barely before it goes off, it smooths out. You can actually hear it scraping and clicking in there. So I decided to do something about it...or at least TRY to do something about it. I had a feeling that the problem was the sear so, I cocked the action, took the trigger housing off and used a screwdriver to push on the sear where the sear trip in the trigger group fits. Sure enough, I could feel the scraping and clicking. Time to take the sear out. It's held in the receiver by the bright shiny pin seen here below the charging handle slot:
 I just placed a punch on the pin and it pressed out using only hand pressure. There is a spring in there holding the sear under considerable pressure so parts went flying up into the receiver when I removed the punch. I'll figure out how to get it back together later! After fishing the parts out of the receiver I took a picture of them: 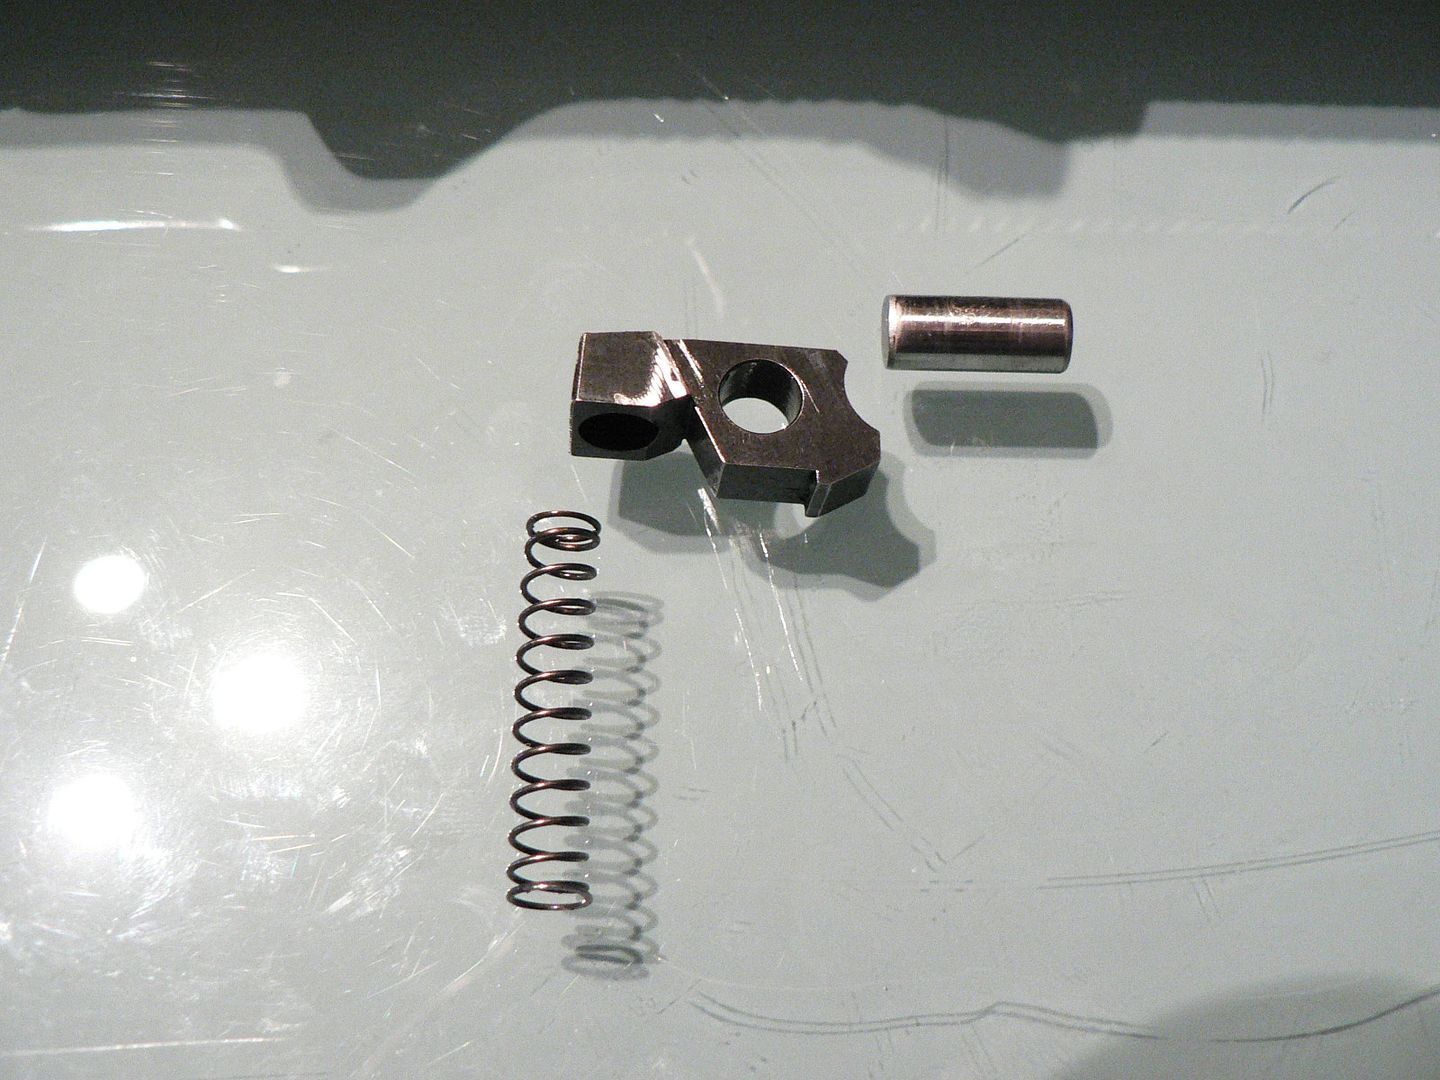 Forward is to the right and we are looking at the right side and bottom of the sear. The top of the sear spring fits into the bottom back hole and there is another hole in the receiver for the bottom of the spring. This spring is of a larger circumference where it fits into the sear, presumably to aid in assembly. The step on the bottom towards the front is where the sear trip on the trigger engages. Also pictured is the retaining pin which obviously goes through the hole in the center of the sear. Here's the scalloped area on the front of the sear where the disconnector goes: 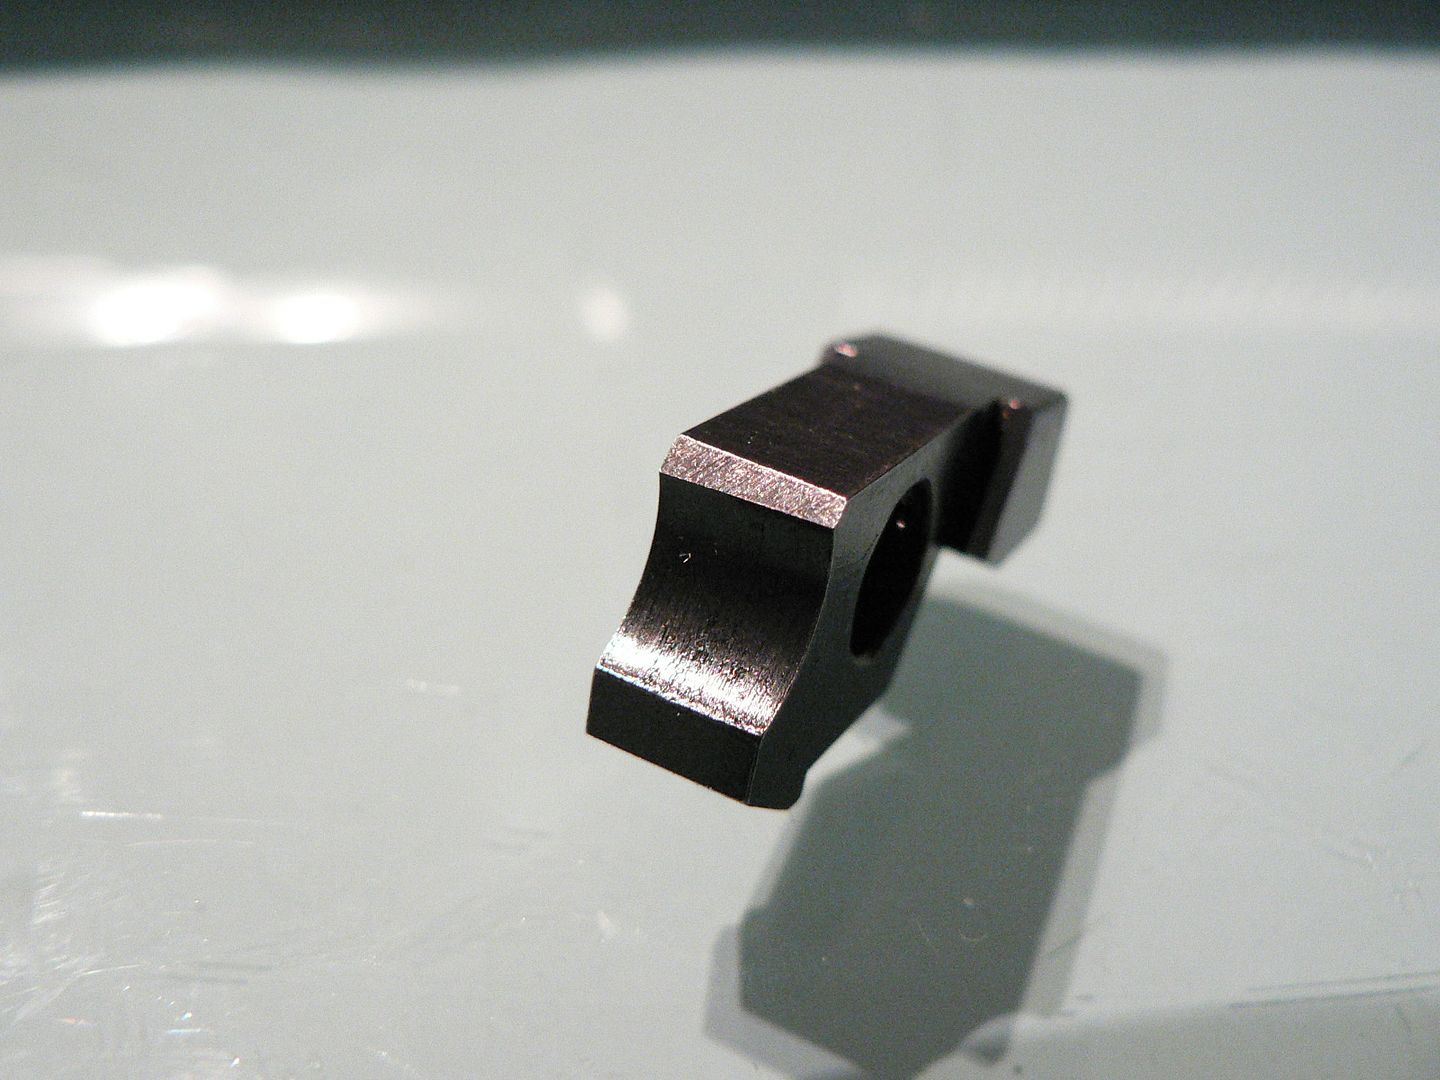 Here's a better look at the bottom of the sear: 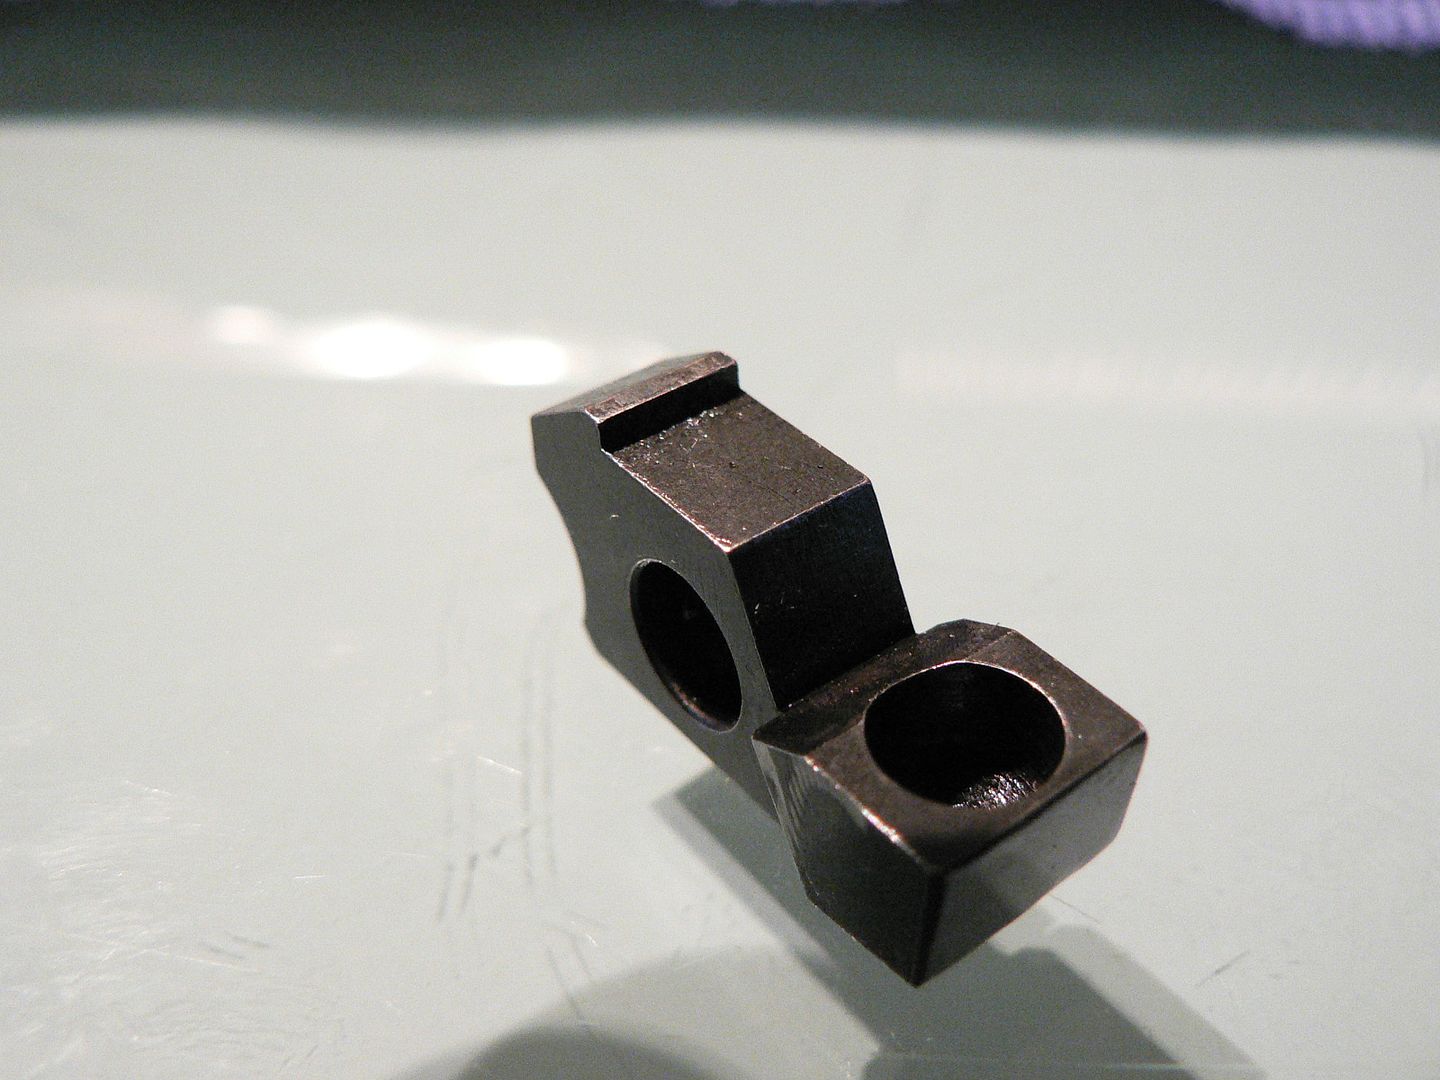 And the top of it: 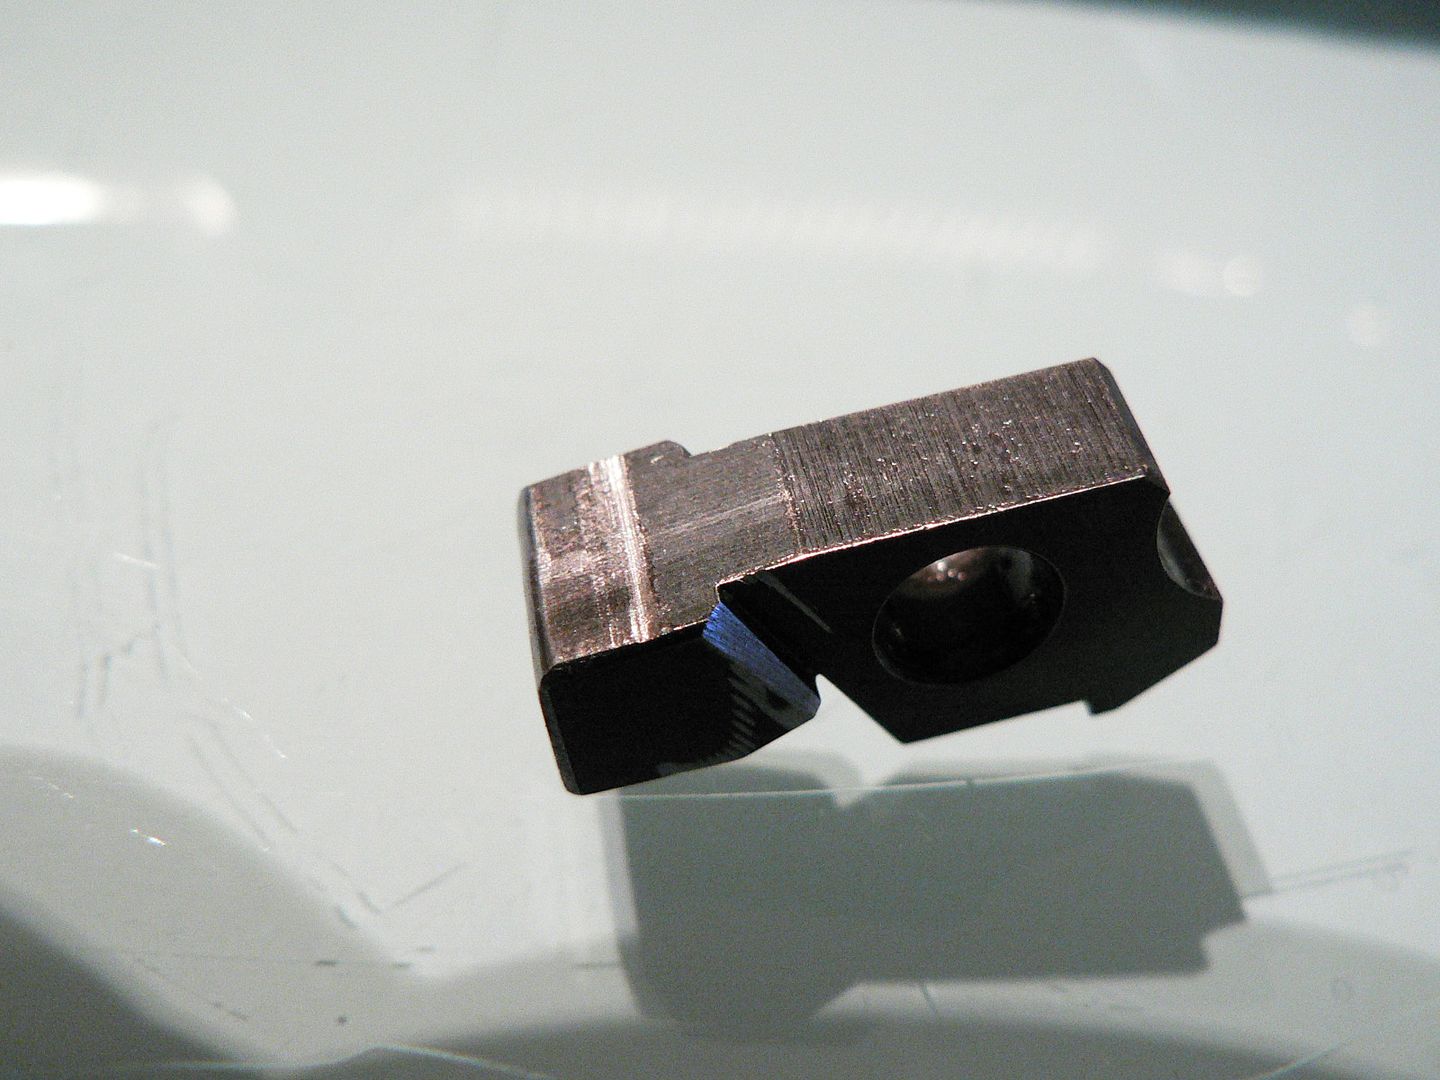 The rear surface of the sear is what engages the bolt carrier notch and as soon as I looked at it I saw why the trigger is so scratchy. It is shown here in two pictures: 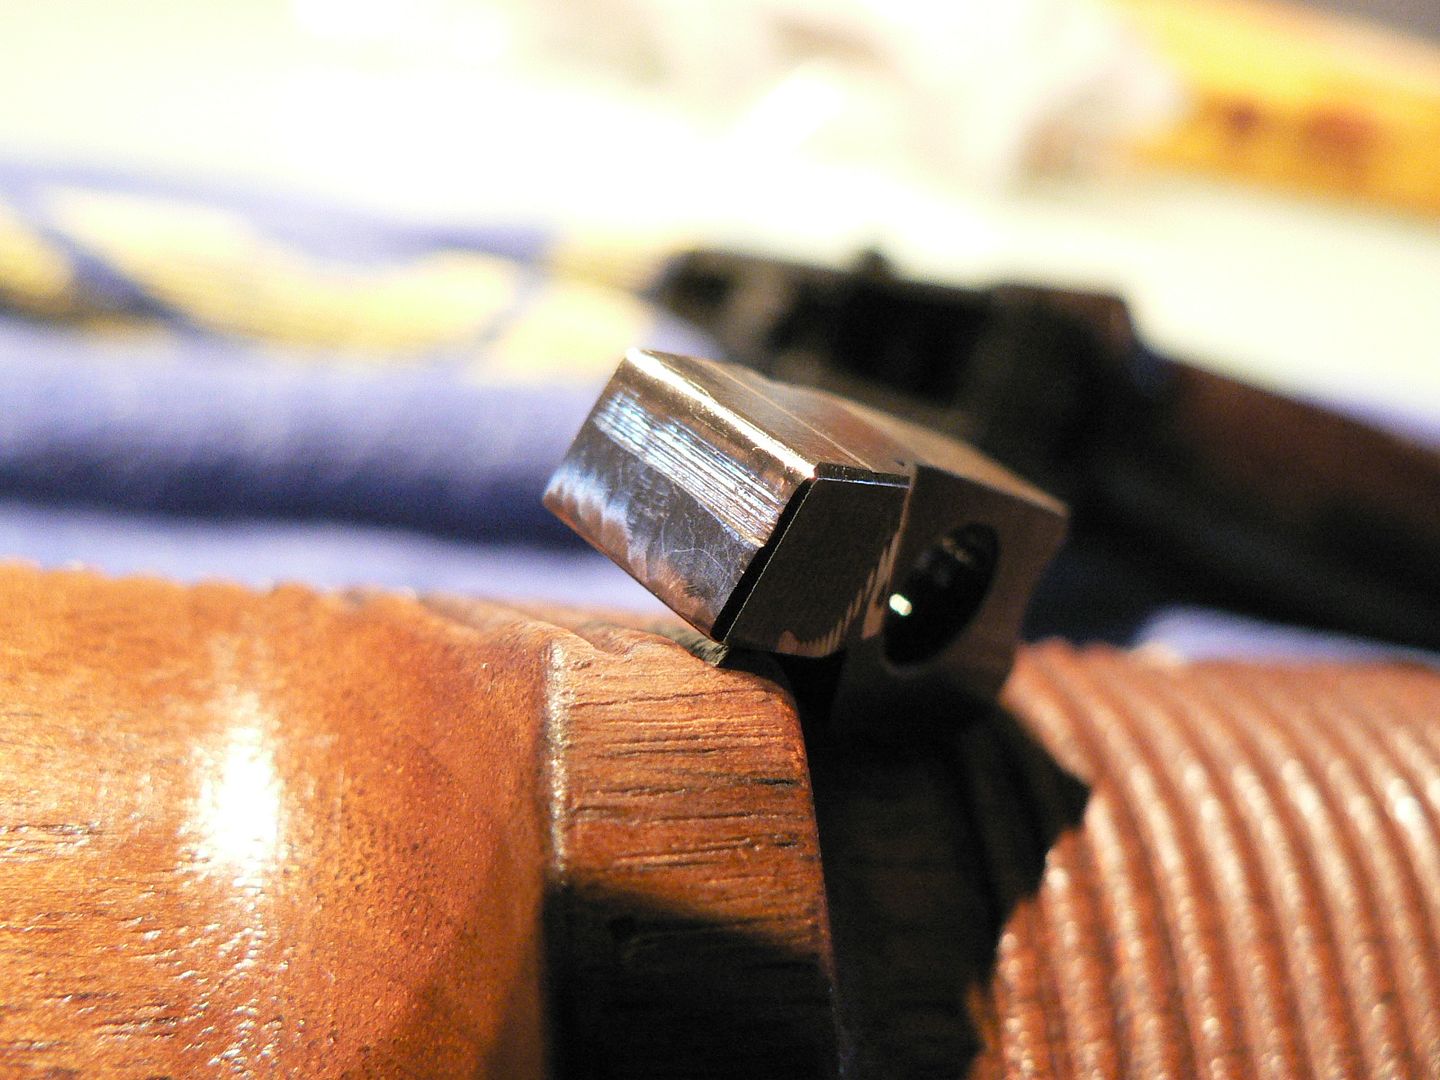 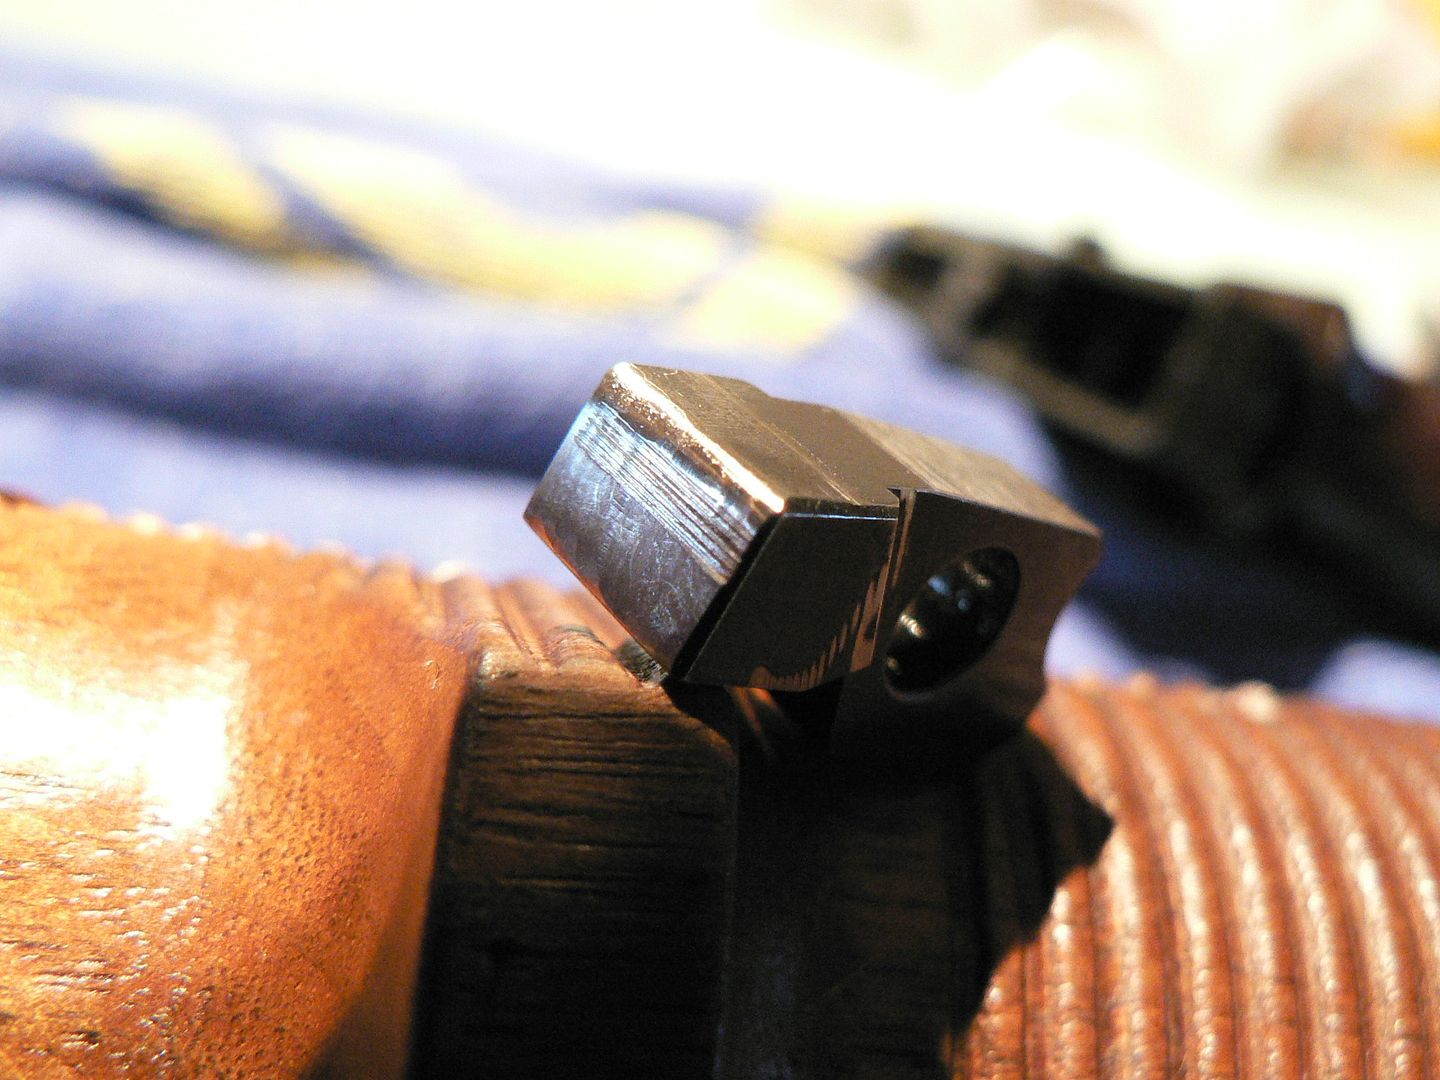 All those lines going across the polished surface are the cause of all my trigger problems. As the trigger is pulled, they scrape and stutter across the mating surface on the bolt carrier until they are no longer touching it and the pull evens out just before releasing the carrier to fly home. So I broke out the emery cloth and my diamond encrusted sharpening stone and went to work, being carful to keep the surface straight and flat and only removing exactly enough metal to eliminate the marks. I was also careful to stay away from the very top edge of the surface for fear of making the rifle unsafe when cocked. Additionally, I left just a little bit of the bottom groove to see if I could feel it when I pulled the trigger. If I could still feel this groove after reassembly, it would also tell me just how far down the sear face the carrier notch grabs. Here are two pictures of what it looks like after polishing: 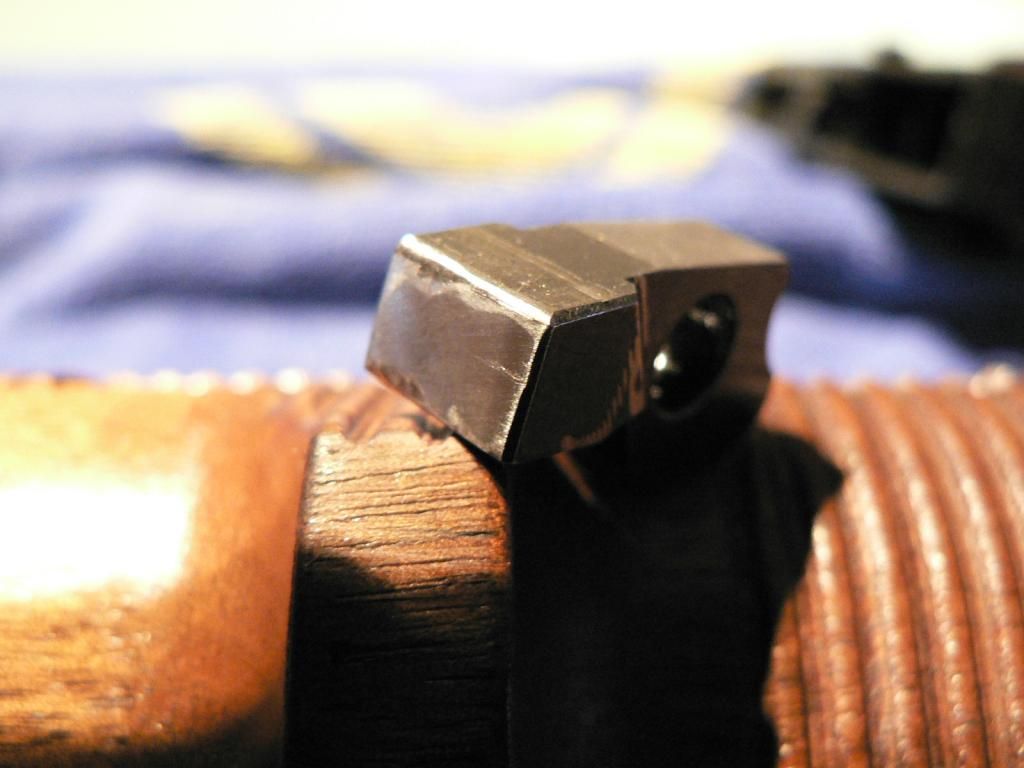 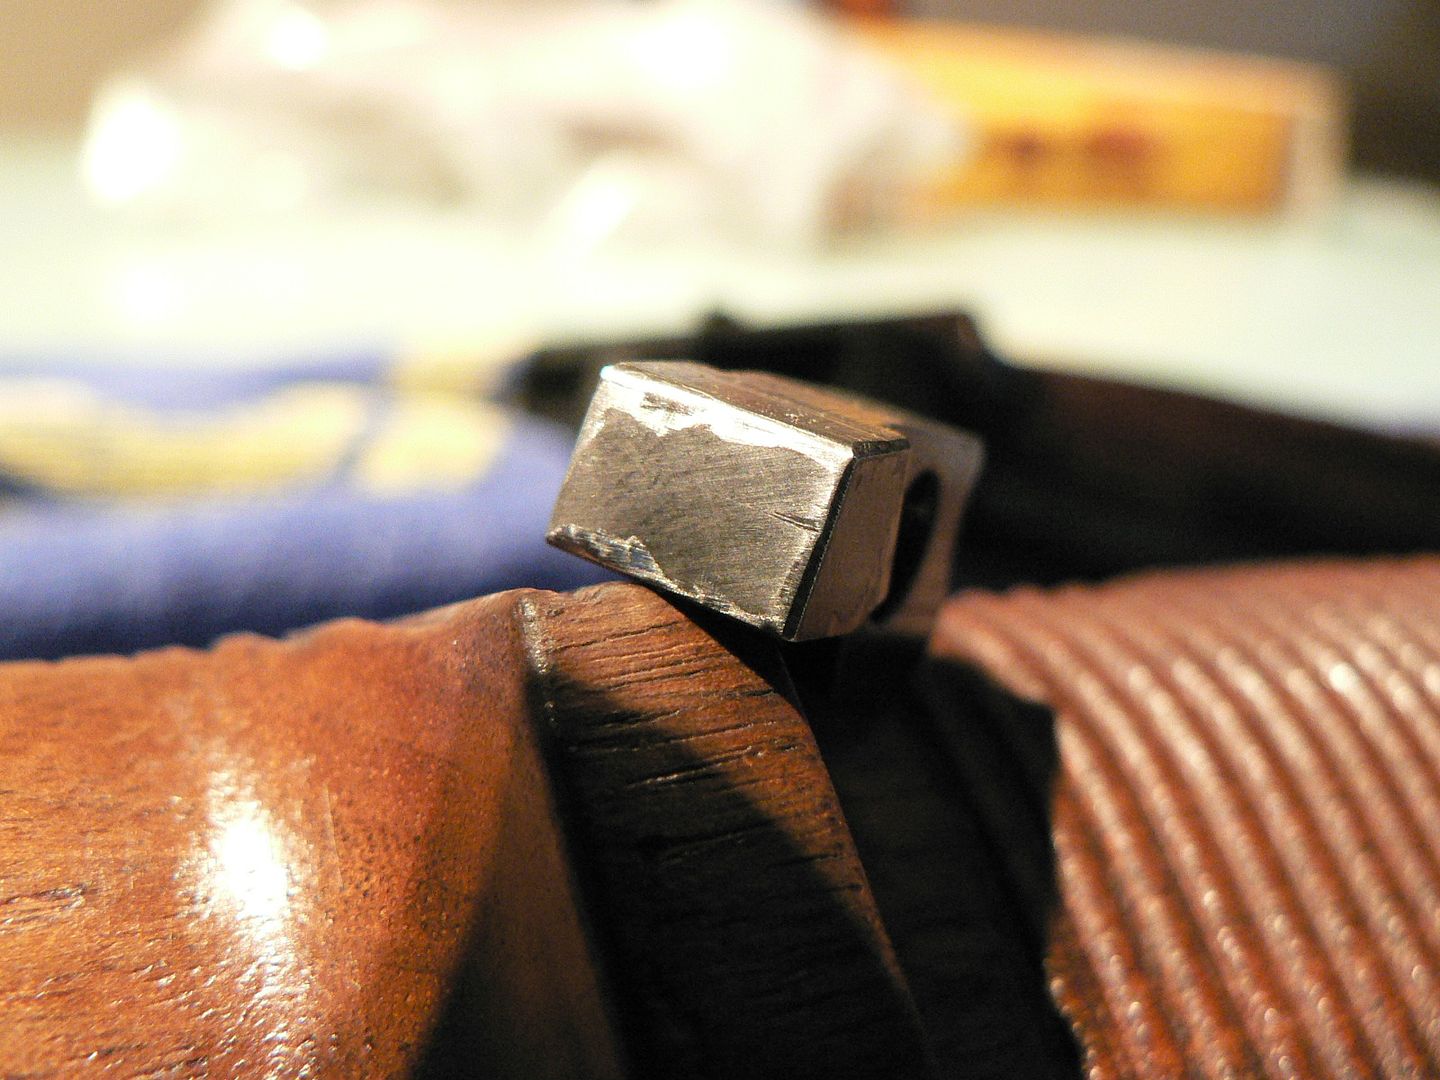 The fact that I stayed away from the top of the surface and the partial notch I left are clearly visible. The ease with which I removed the marks does have me a bit worried though. Perhaps this surface is not hardened? If not, were those grooves made by SMG or are they an artifact of the bolt carrier striking the sear in the forward stroke? If they are from the latter, they are going to show up again with use and the trigger will again become funky. You can't keep dressing the surface or you will eventually run out of sear! I'll keep an eye on it and report back. Reassembly was an absolute pain in the arse and I can't exactly describe how I did it because it took a lot of fidgeting. There is a technique to it though and I'm sure that it would go easier next time. Once it was back in, I put the trigger housing on and quickly found out that it wasn't in right so I had to take the sear back out and start over. The second time worked and back together the rifle went. The result of my efforts is a MUCH smoother and lighter trigger pull. I can indeed feel the notch I left on the sear face so I know that the sear and carrier have a good engagement but the drag is minimal and only felt at the very beginning of the pull. After that, while it's still quite a long pull, it's silky smooth all the way to let off. As stated, the weight of the pull is significantly reduced too but I unfortunately do not have a tool to test that. Of course, a range test tell me a lot and use will tell me if the marks will return. So, should YOU do this to your rifle if you aren't happy with the trigger? Only YOU can answer that for yourself. But I will say this......unless you know EXACTLY what you are doing, don't mess with it. The absolute last thing you want is an unsafe rifle. So if you have any doubts whatsoever about your abilities, contact SMG and ask them if they can polish your sear. Of course, you may be perfectly happy with your trigger already because it's as smooth as glass. If so, you can just disregard this post because you don't need it!!
__________________
I promise to be nice and play well with others |
|
|
|
| The following member says Thank You to Wilhelm for your post: |
|
11-09-2014, 10:55 PM
|
#27 |
|
User
Join Date: Oct 2007
Location: Maryland
Posts: 340
Thanks: 43
Thanked 107 Times in 51 Posts
|
Recently and today, I spent a good amount of time disassembling an original FG42 for documentation purposes and for comparison to the SMG reproduction. I learned some things. First off, SMG did one hell of a job recreating the past. Second, while published sources tell us a lot about these rifles, there's still a lot of interesting information waiting to be published. In the coming months, I'll be writing an E-Book about the FG42 and documenting things that have never been published before. It'll be ready for publishing in 2015 and I'll post here when it's available.
  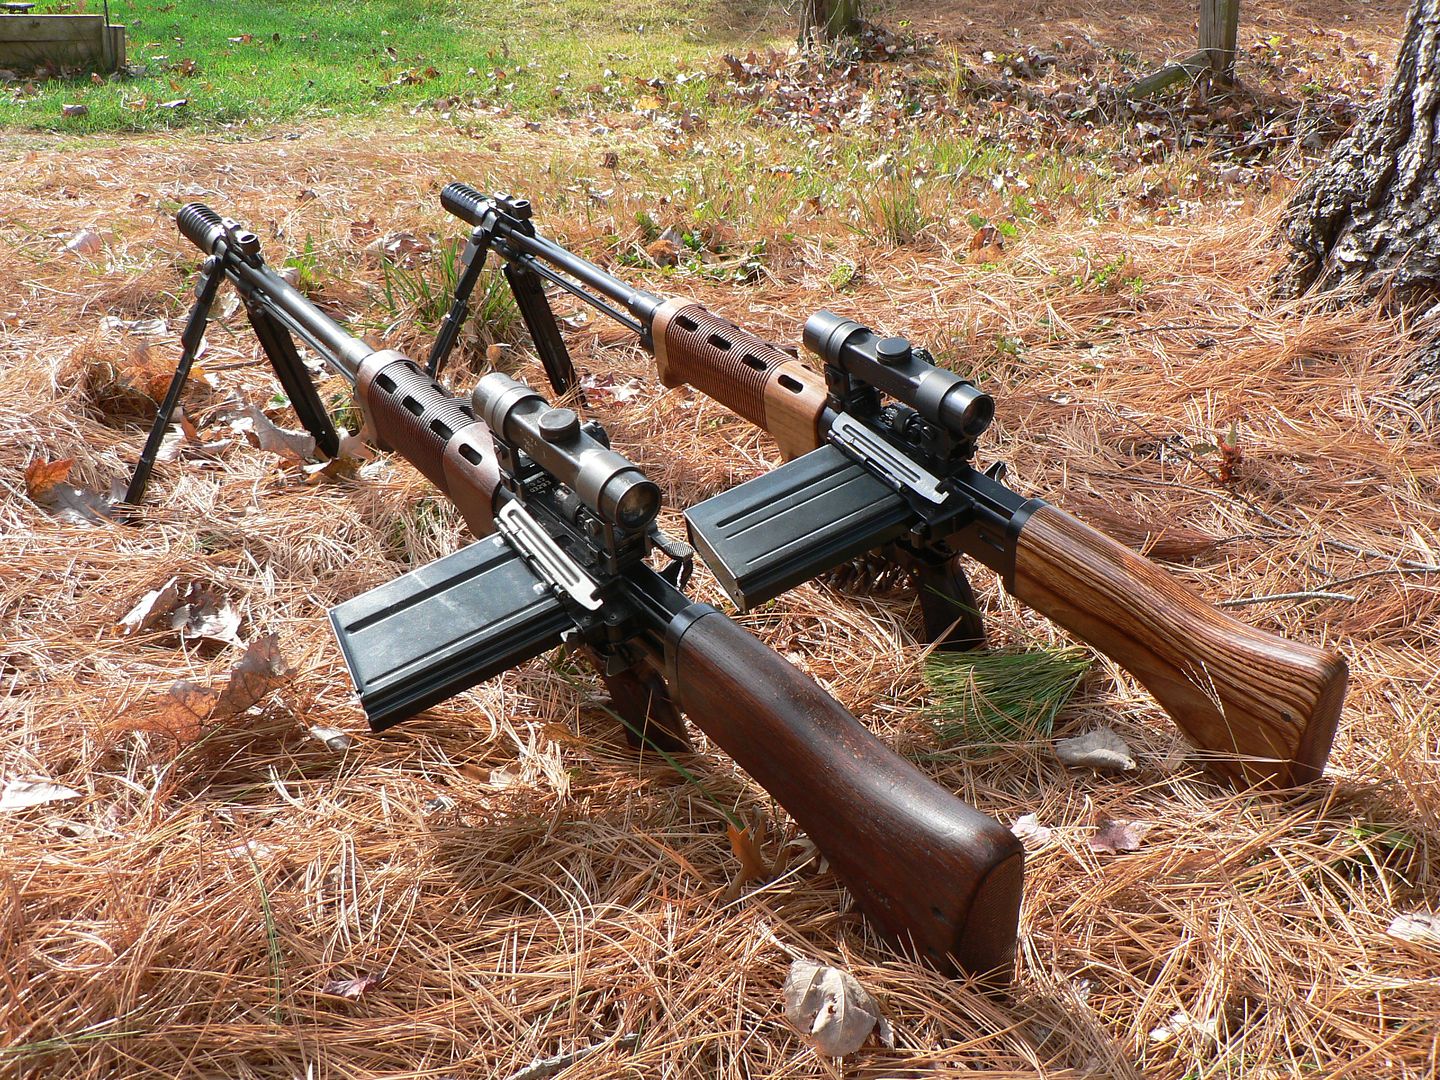 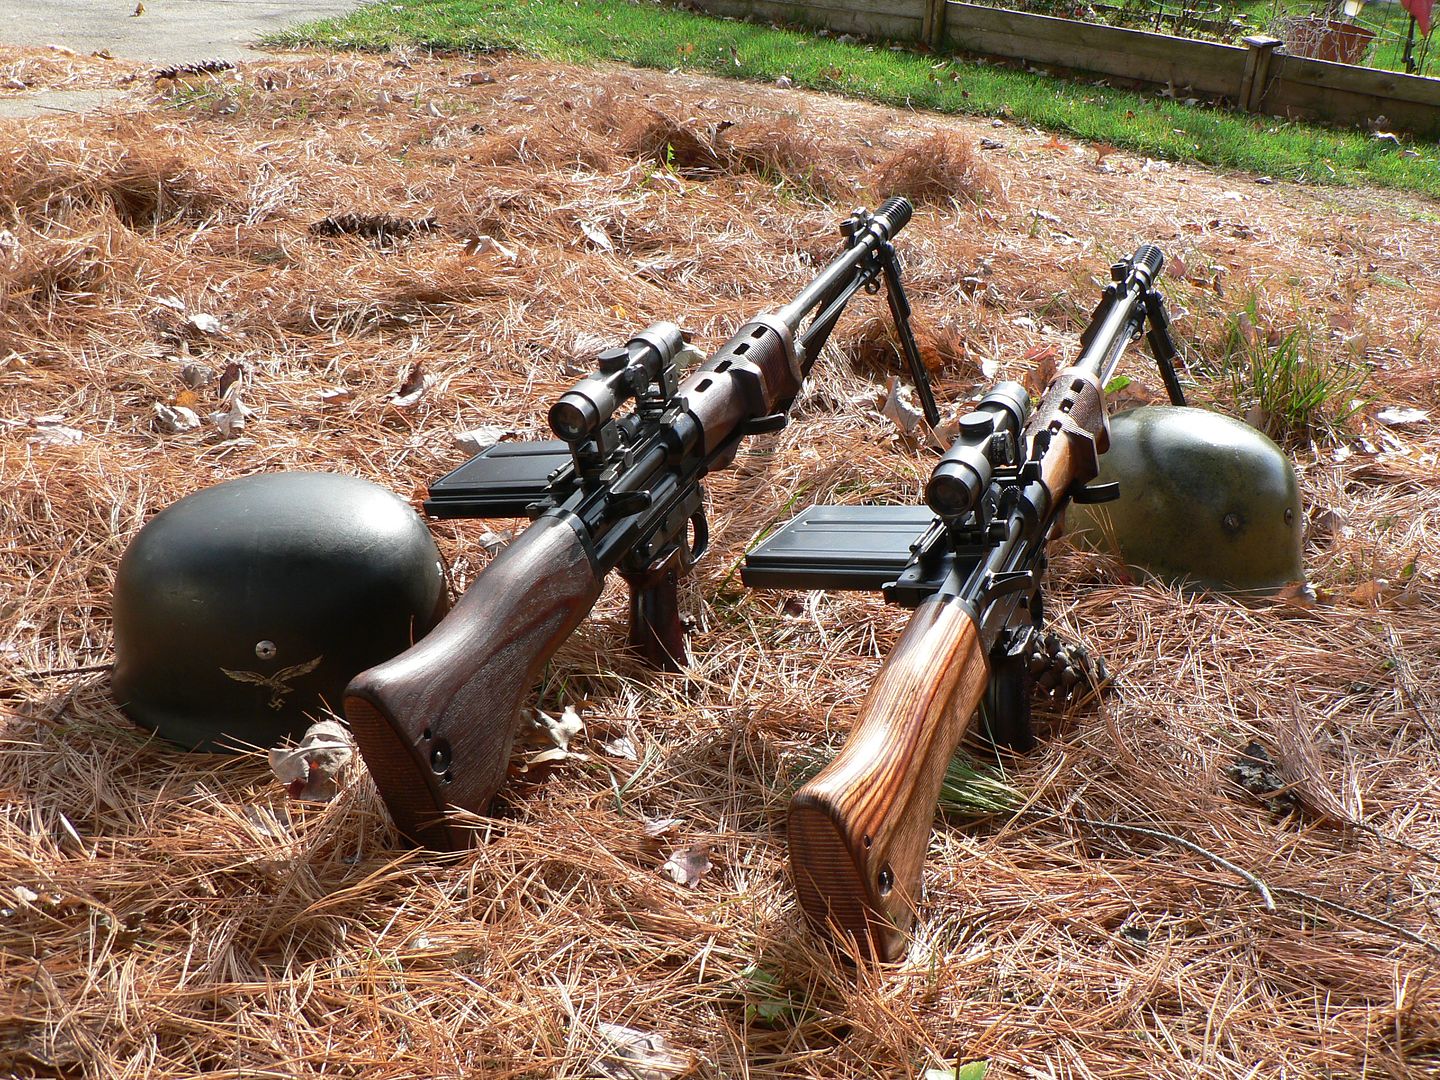 I threw a couple original Fallschirmjager helmets in there for fun.
__________________
I promise to be nice and play well with others Last edited by Wilhelm; 11-10-2014 at 10:17 AM. |
|
|
|
| The following member says Thank You to Wilhelm for your post: |
|
11-23-2014, 03:04 PM
|
#28 |
|
User
Join Date: Oct 2007
Location: Maryland
Posts: 340
Thanks: 43
Thanked 107 Times in 51 Posts
|
I managed to get out to the range earlier this week for more testing. There were several objectives and I'll go over them one by one.
1. Continued function tests. I shot 86 rounds, ten of which were 1973 Romanian. The remainder were FNM dated from 1966 to 1973. I had one failure to feed which made a mess of the round. It was easy to clear. All I did was pull the charging handle to the rear and hold, remove the magazine, dump the bad round out the ejection port, replace the magazine and keep on rolling. The round was nicely mangled: 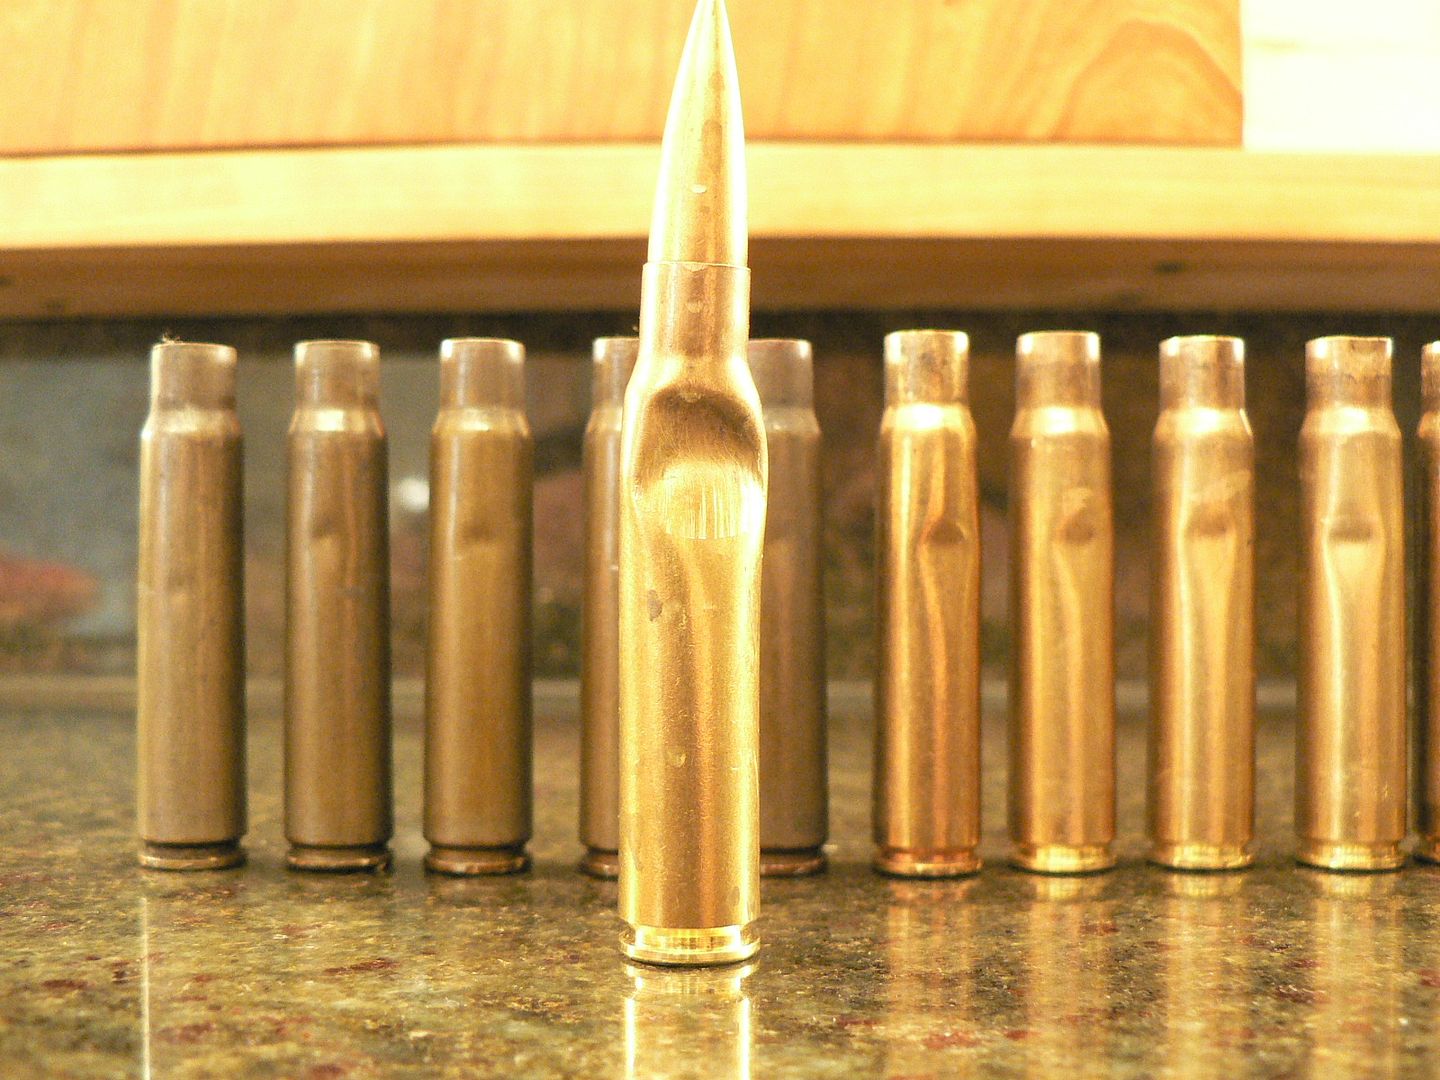 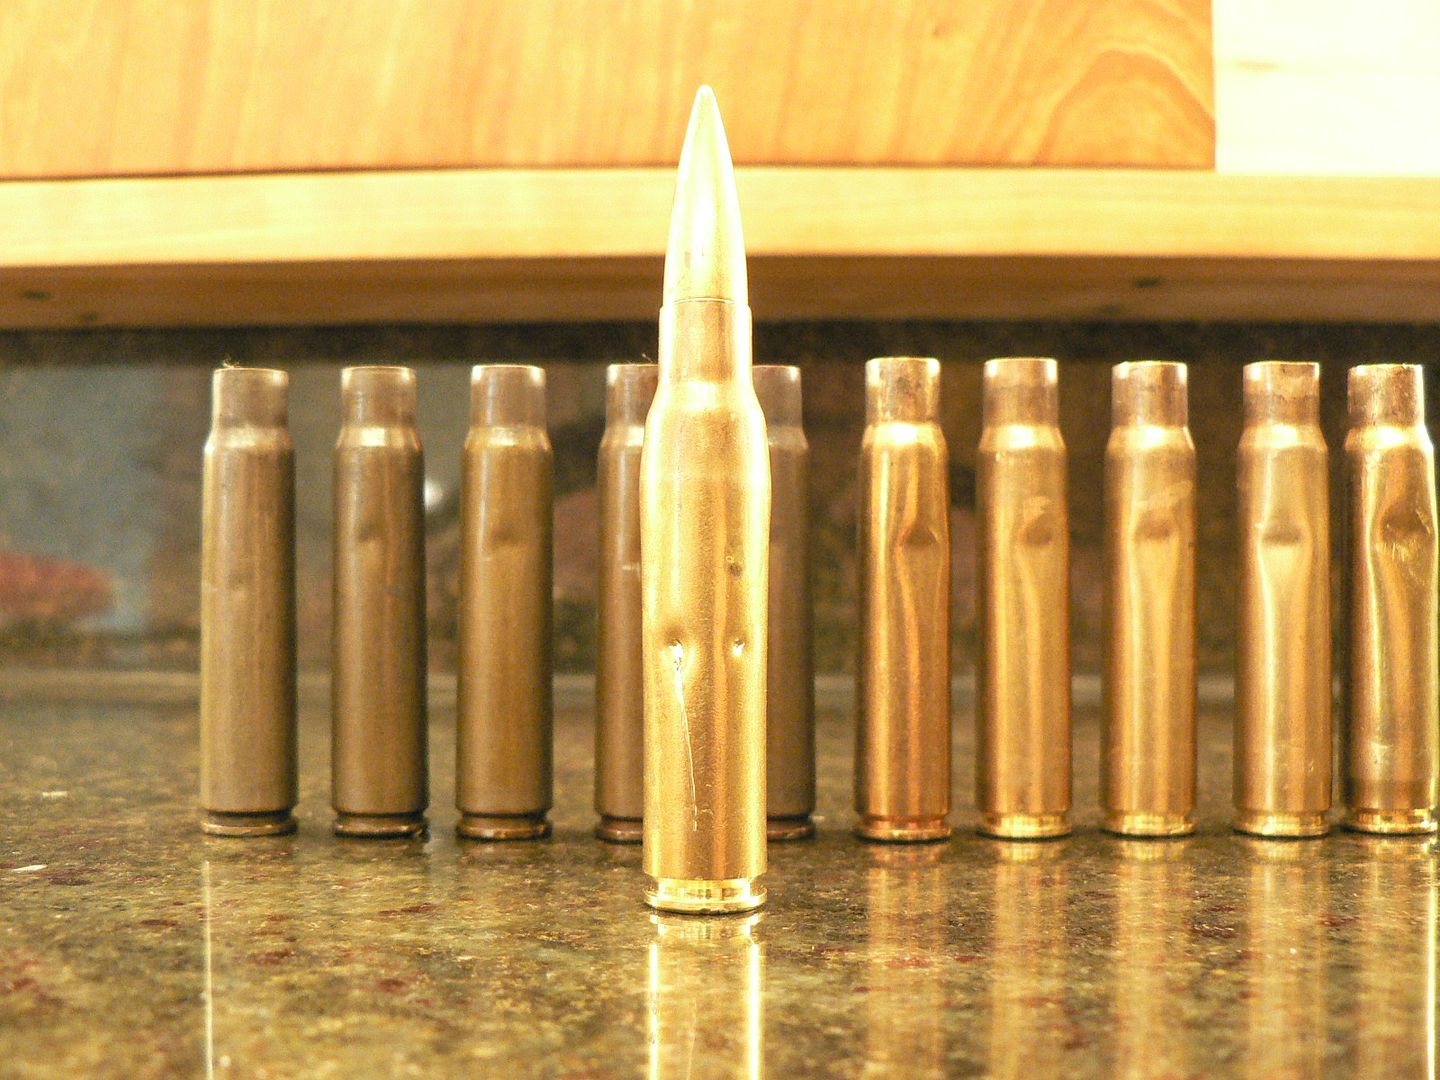 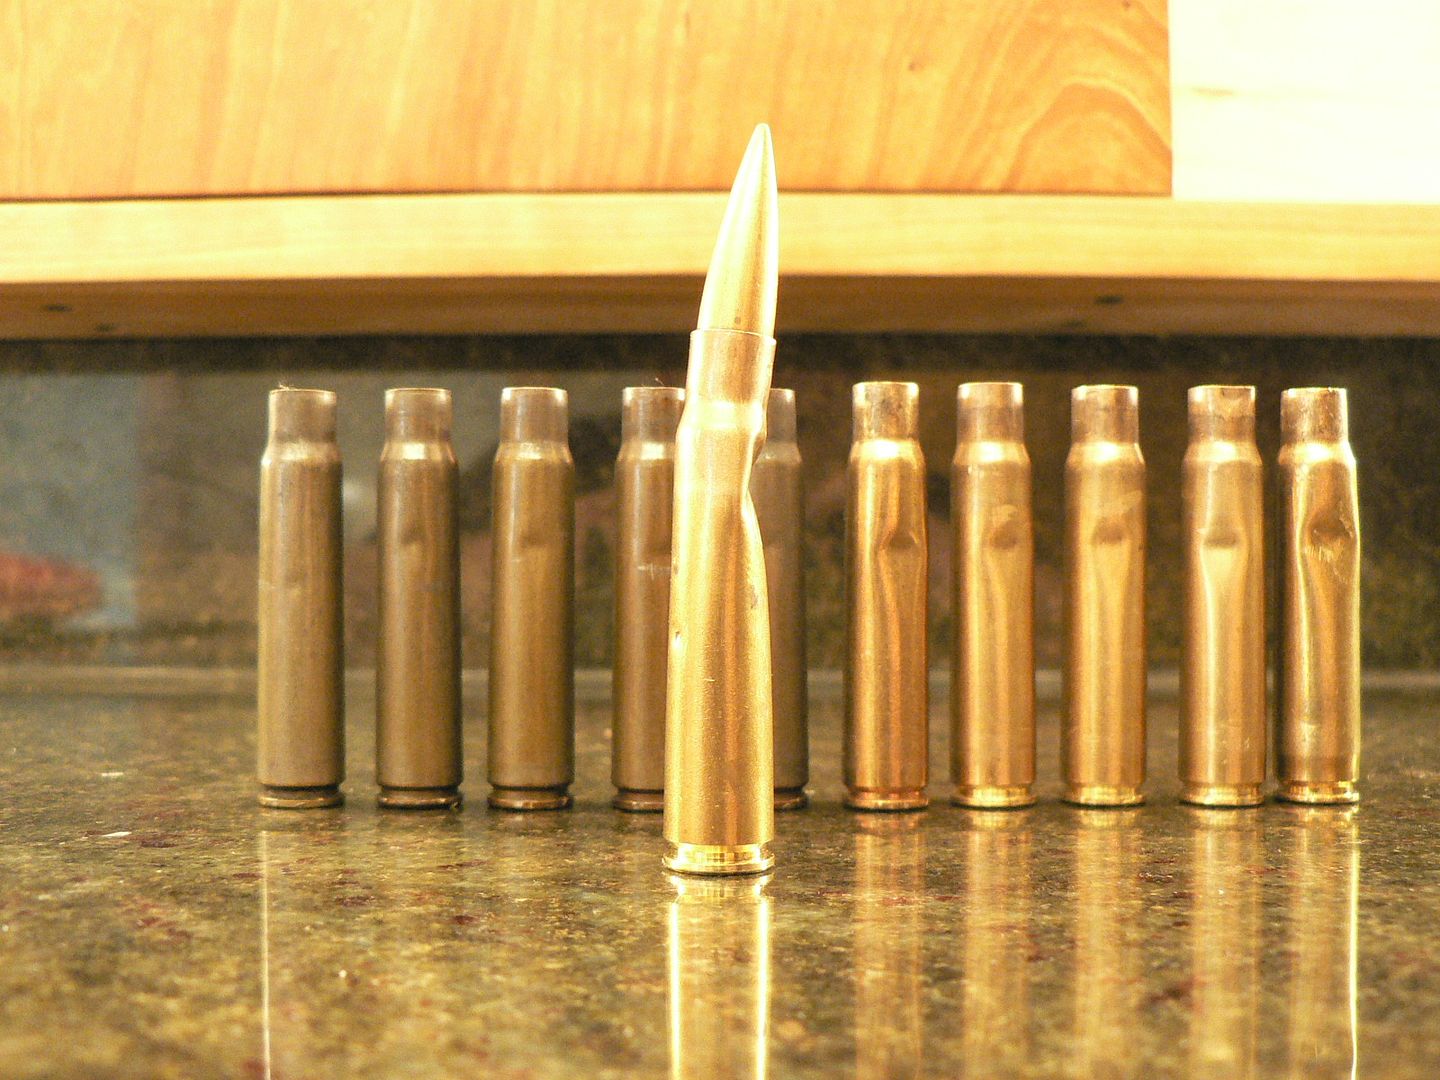 Here is a random sampling of ejected cases with 5 Romanian on the left (ignore the mangled FNM round) and 5 Portugese on the right: 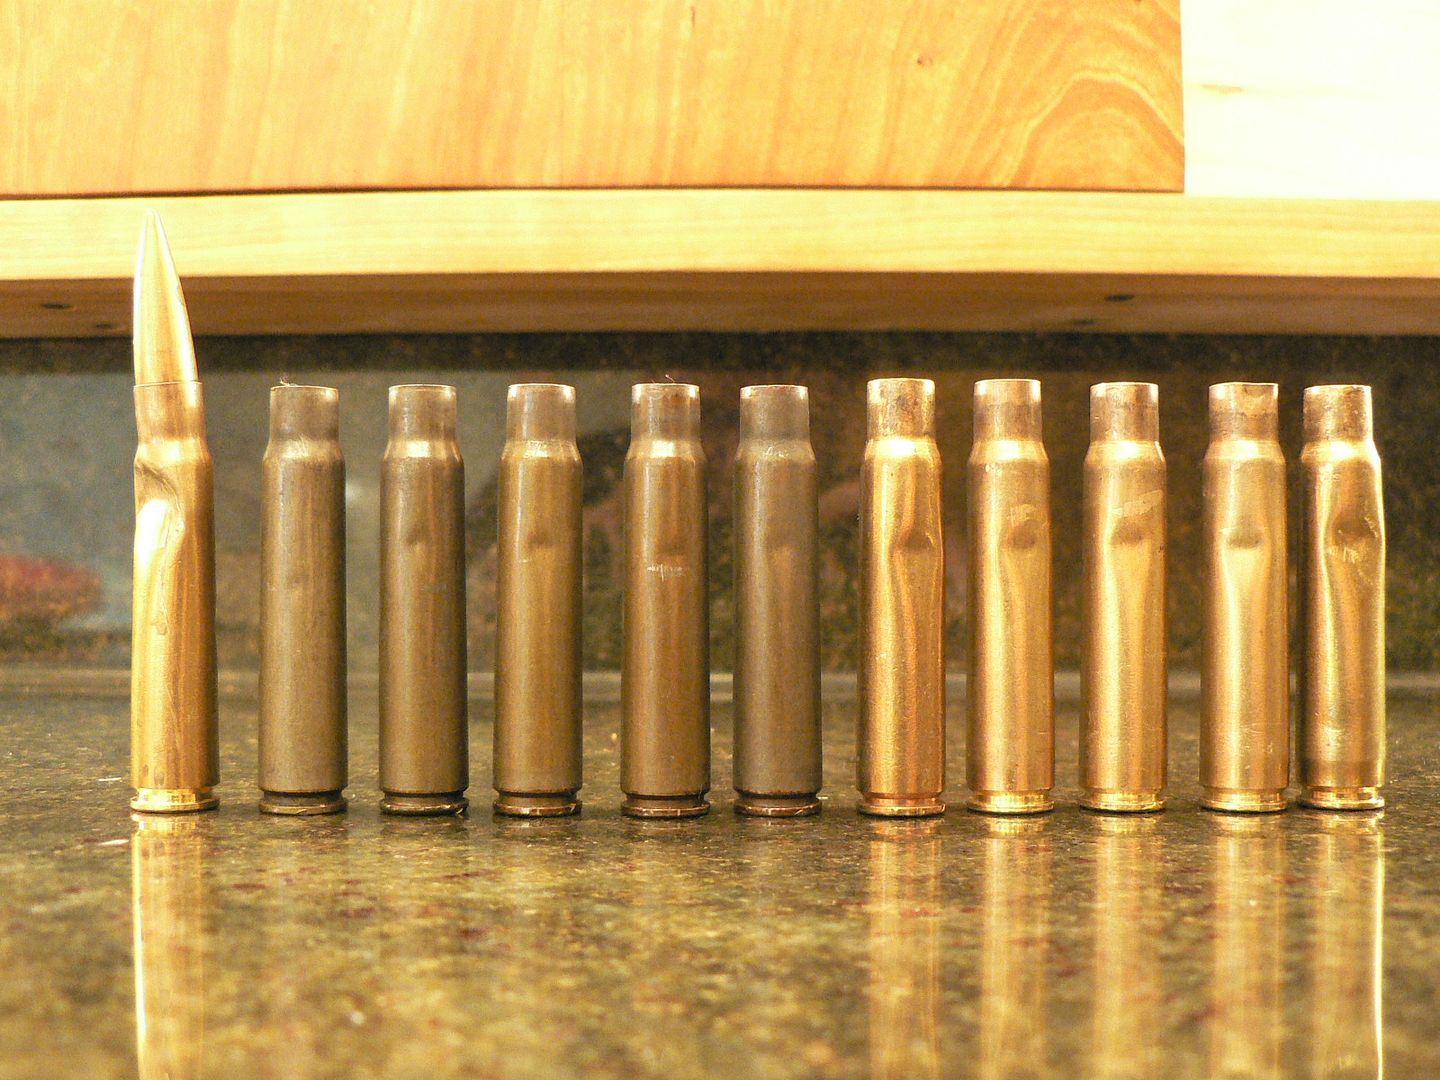 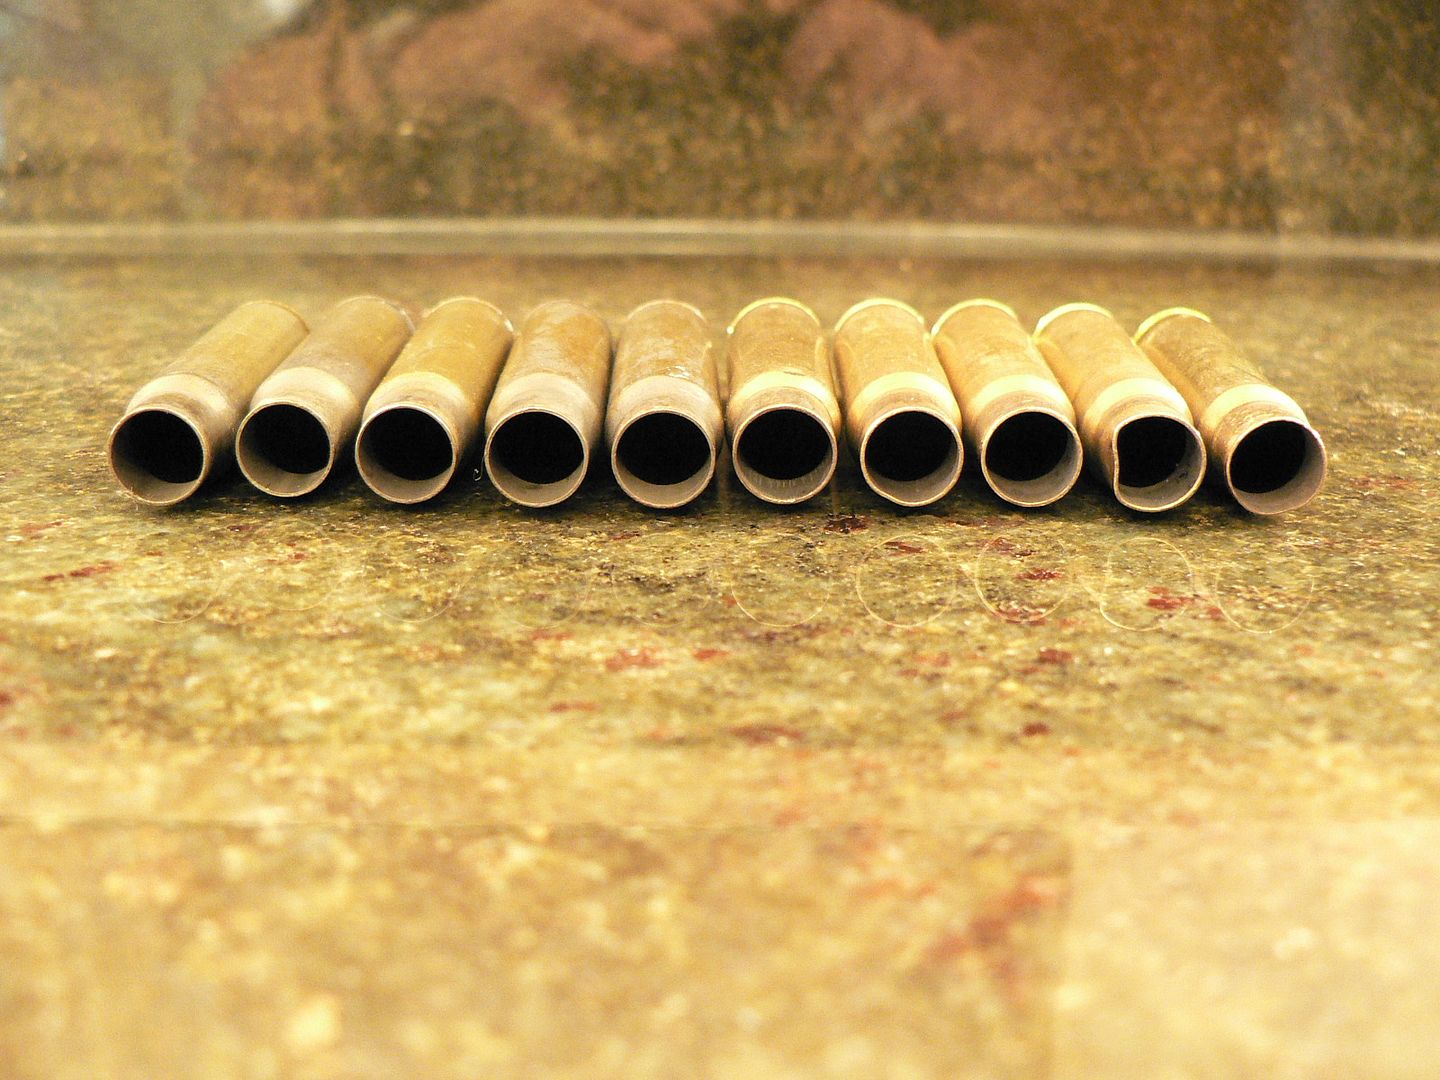 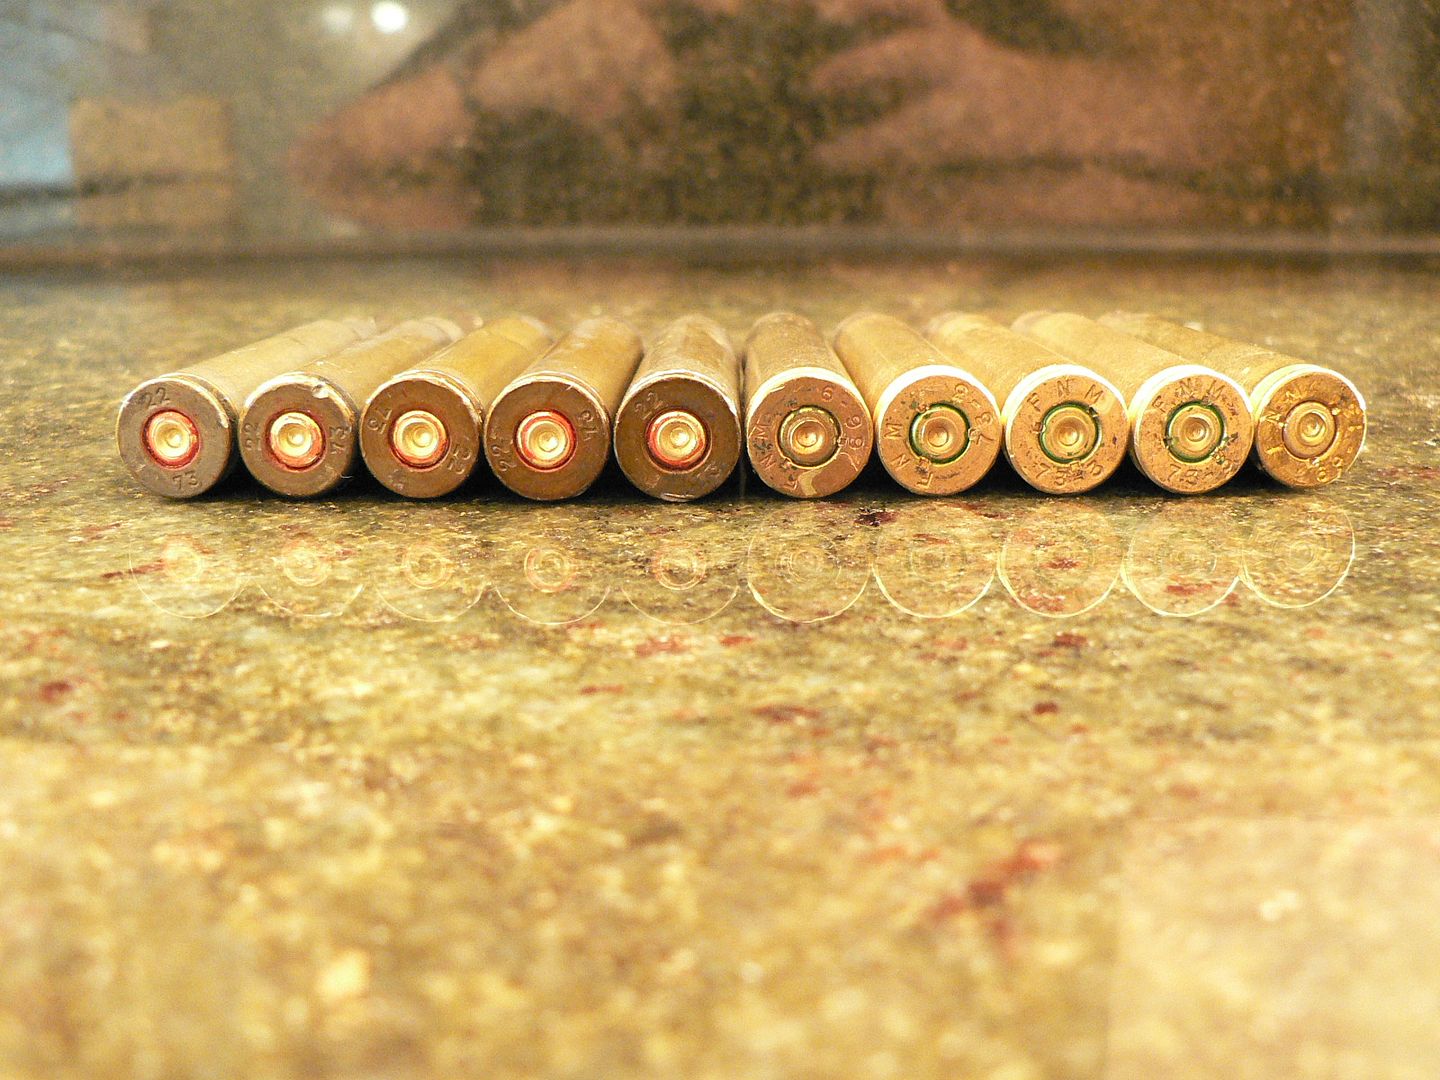 2. As the rifle warmed up, I began to have problems with it locking up again. Not as bad as before but I still had to place the charging handle on the edge of the table and push with moderate force. I began to hold the charging handle to the rear when changing magazines to get around the problem. I'm hoping the problem disappears as the rifle continues to wear in. At this point, my analysis of the wear marks on the bolt behind the locking lugs convinces me that the problem is tolerances being too tight. 3. Once zeroed, the scope held it even after being removed and reinstalled on the rifle. Accuracy is, as stated before, about the same as an SKS: Final 27 rounds of the day at 100 yards: 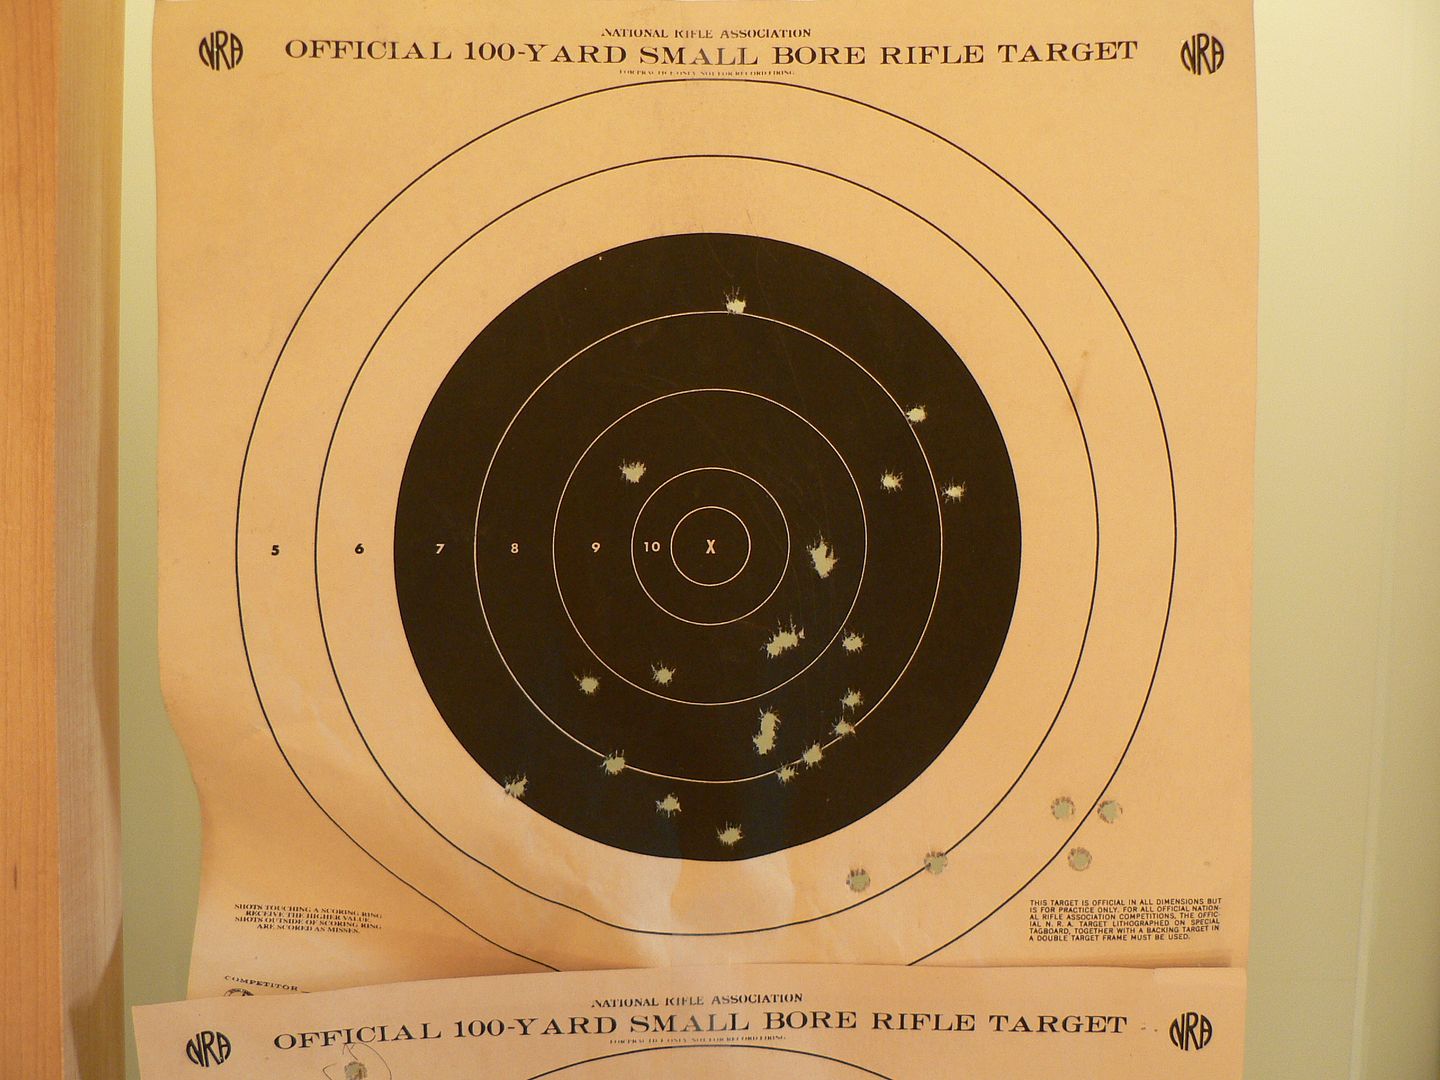 This is not a target rifle nor did I expect it to be. However, I was plinking at fist sized objects laying in the backstop which is at about 110 yards and hitting them one after the other with no problem. For some reason, I shoot at objects better than I do paper targets so the rifle is more accurate than you see above. 4. The blue locktite on the scope screws seems to have done the job. I put pencil lines on the rings as index marks prior to the range trip and the screws did not move. More rounds will tell the tale as to whether or not this is a viable fix. If it proves to be, I'll go over everything at that time. Front band index mark: 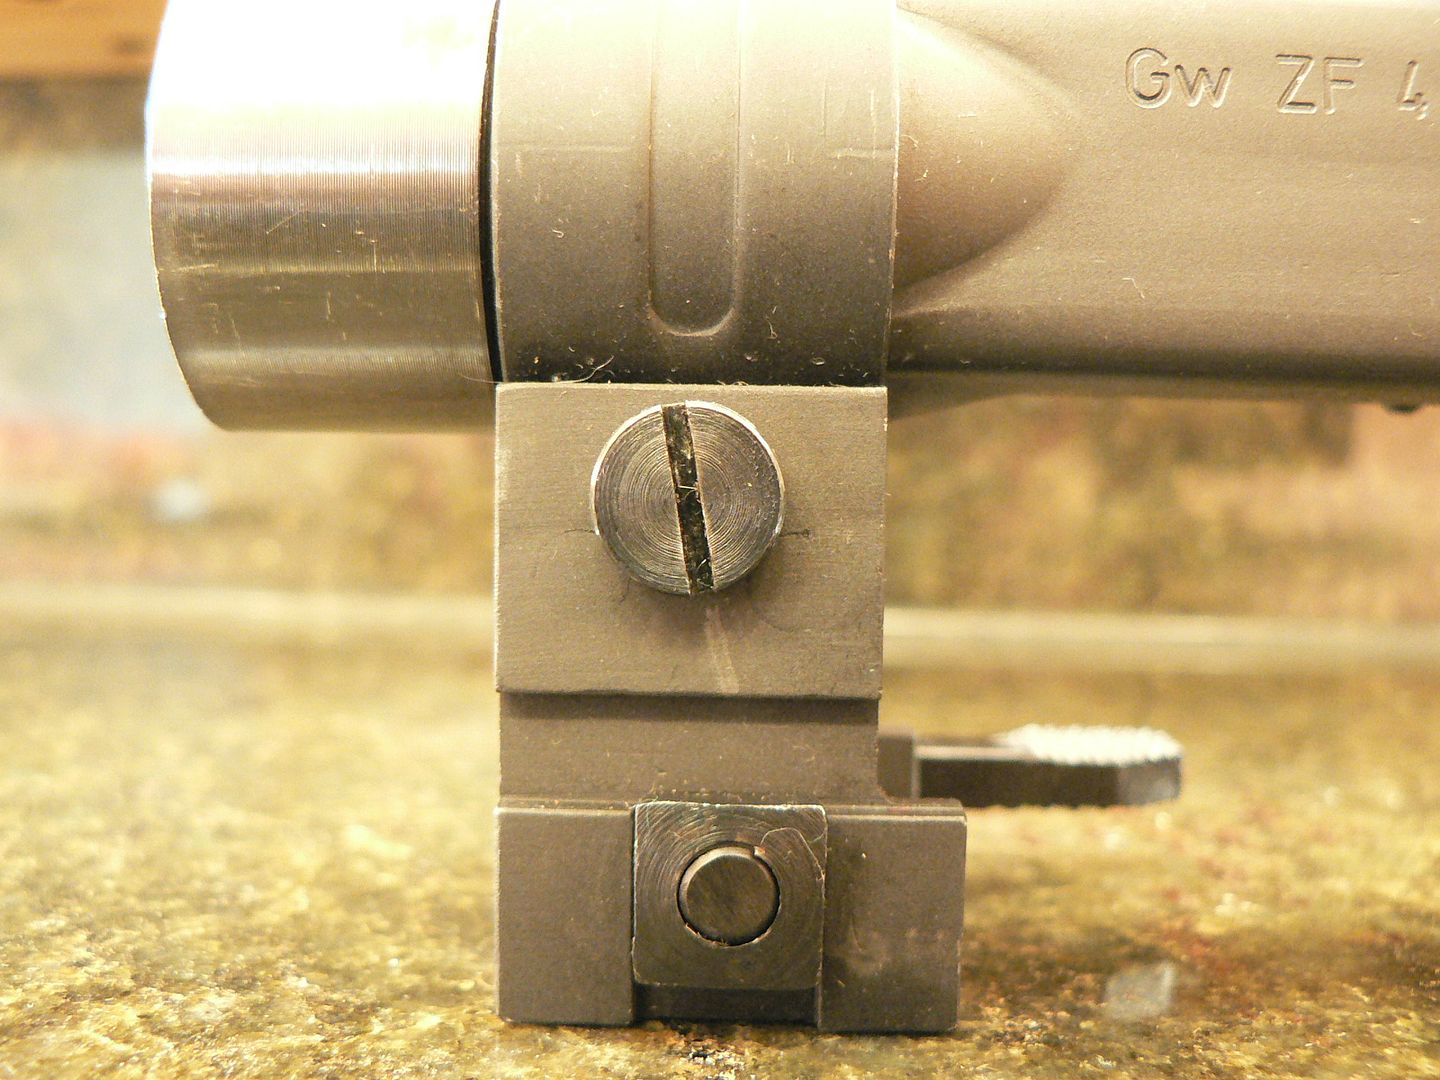 Rear band index mark: 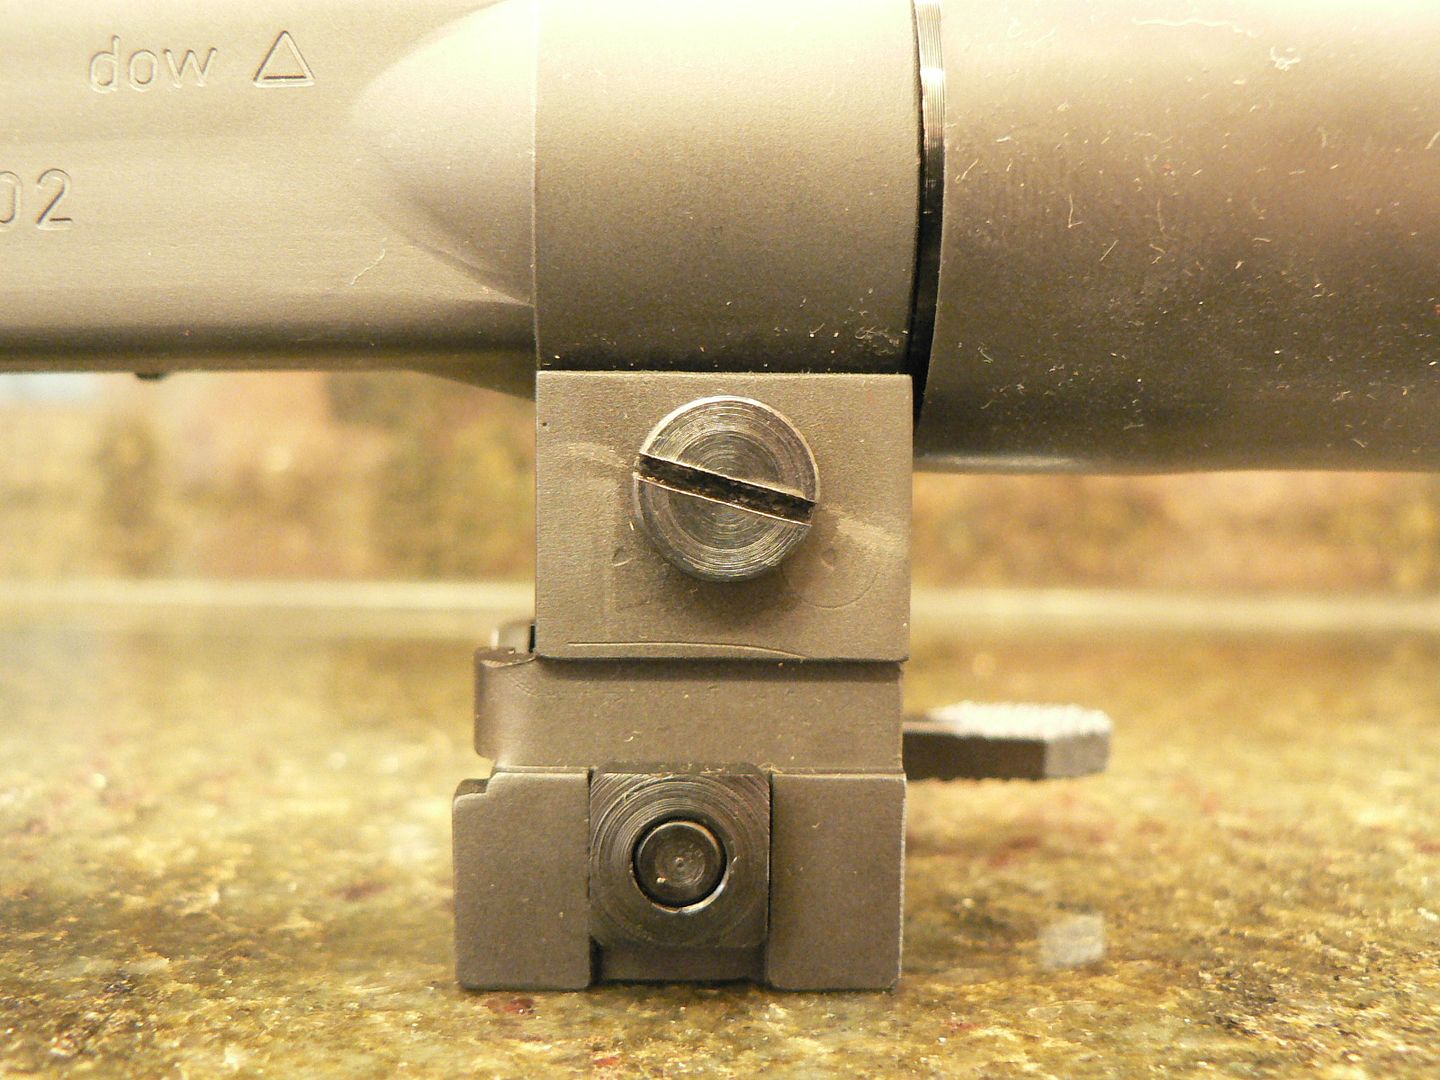 When the scope is attached, the locking levers do not turn fully to their front stops: 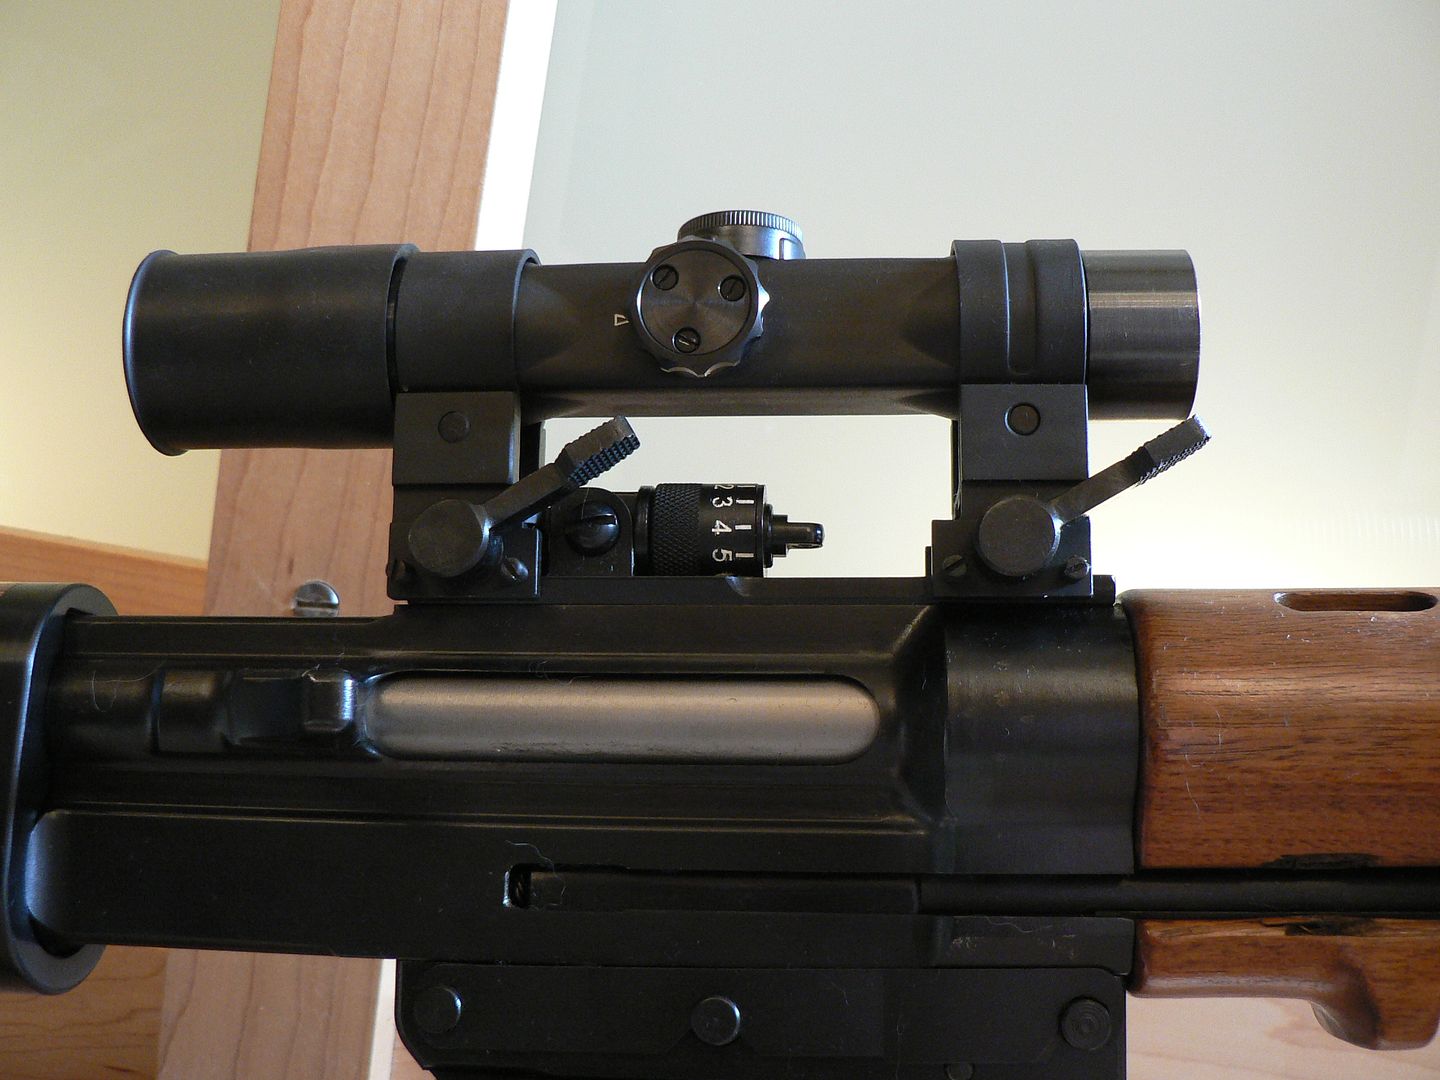 I do not think that they are necessarily supposed to but it is worth noting so that you don't get too excited should you buy one and have the same thing happen. What is important is that they do not move during use and mine have not. Again, we're only talking 86 rounds here. Much more testing is required before I can give a real opinion. I can say though, that the optics on the Meopta scope are crystal clear. 5. Now for the bad. The trigger pull is back to rusty ratchet status. I did not remove it and take pictures but I can see it when looking into the back of the receiver and I can definitely feel it. After just a few shots, I could feel that it was going south and the problem became worse and worse. After only 86 rounds, the sear looks just as bad as it did before I dressed it. This problem is simply unacceptable. I don't know if I just got a poorly hardened one or it's systematic but I will be contacting SMG about it. I will report my findings. That's it for now and I will continue reporting back as testing progresses.
__________________
I promise to be nice and play well with others |
|
|
|
| The following 2 members says Thank You to Wilhelm for your post: |
|
11-24-2014, 11:56 PM
|
#29 |
|
User
Join Date: Oct 2007
Location: Maryland
Posts: 340
Thanks: 43
Thanked 107 Times in 51 Posts
|
Late last night I sent Rick Smith an email about the sear problems I'm experiencing and he was kind enough to respond today. I new, harder sear will be in the mail tomorrow. You can't ask for better service than that if you ask me. After it's installed and tested I'll of course report what I find out. Stay tuned!
__________________
I promise to be nice and play well with others |
|
|
|
|
12-17-2014, 01:37 AM
|
#30 |
|
User
Join Date: Oct 2007
Location: Maryland
Posts: 340
Thanks: 43
Thanked 107 Times in 51 Posts
|
It's been a while since I've posted but as they say, 'tis the season....
I received the new sear from SMG in late November but haven't has had a chance to install it until this evening. Prior to installing the new one, I thought it would be a good idea to measure the trigger pull on the original. It was somewhat hard to get a good reading on the digital meter because of the grooved sear. The meter was jumping up and down as it would clear one groove and hit the next one but I finally managed to figure an average pull of right around 10.5 lbs. Next, I removed the old sear and took a few pictures comparing it to the new one: 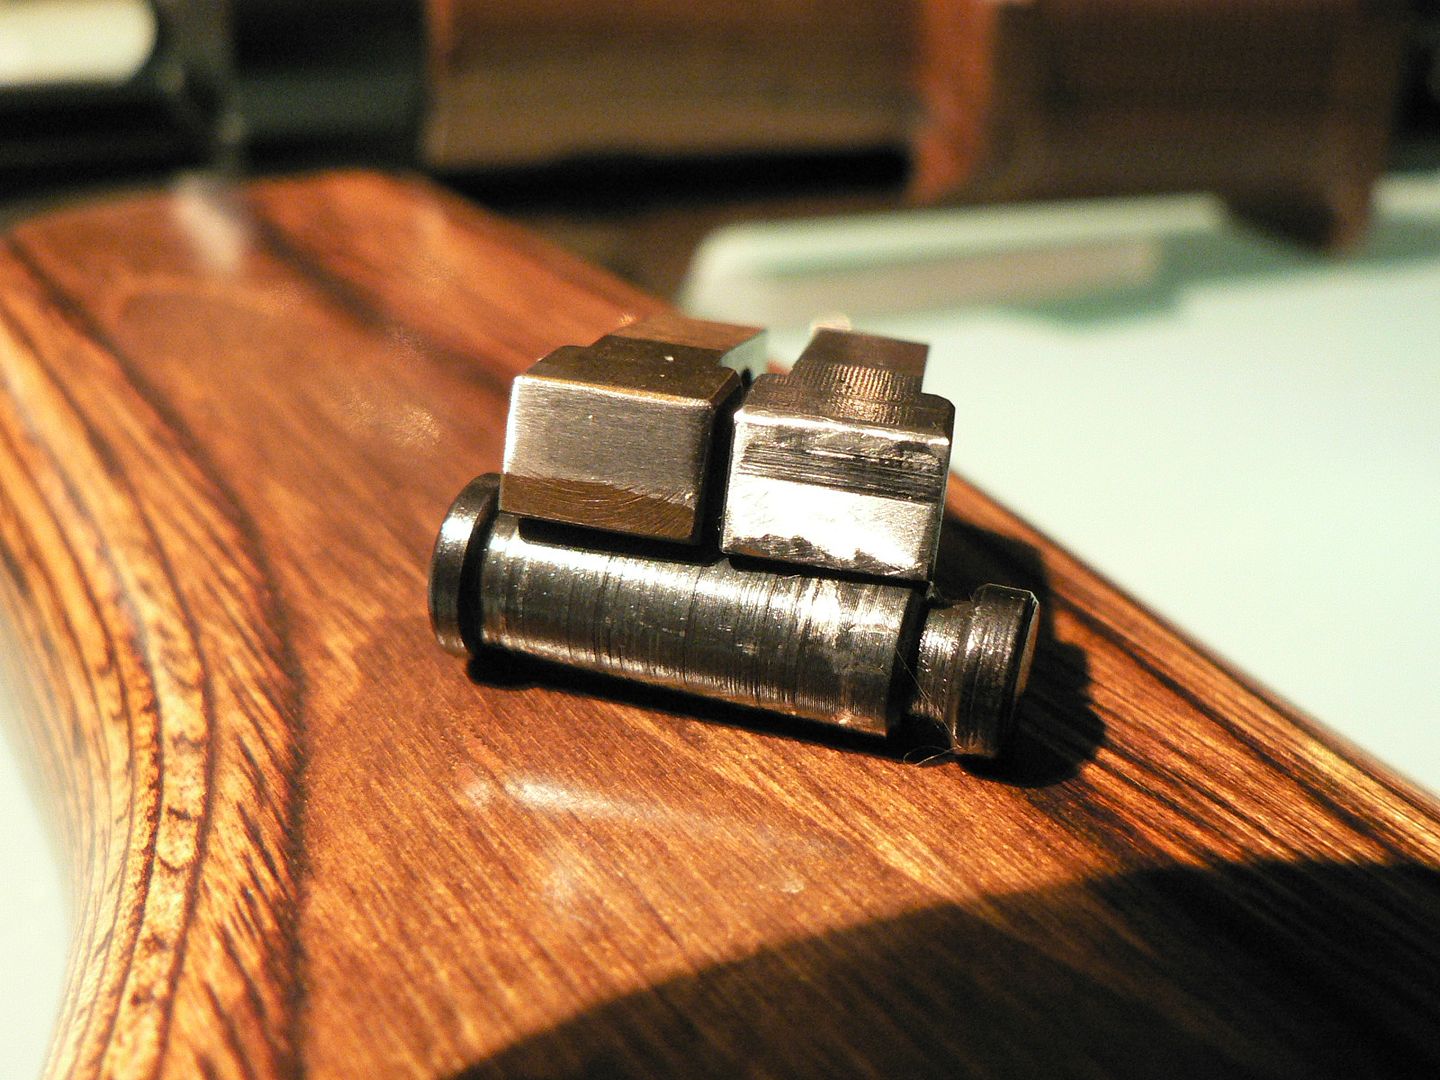 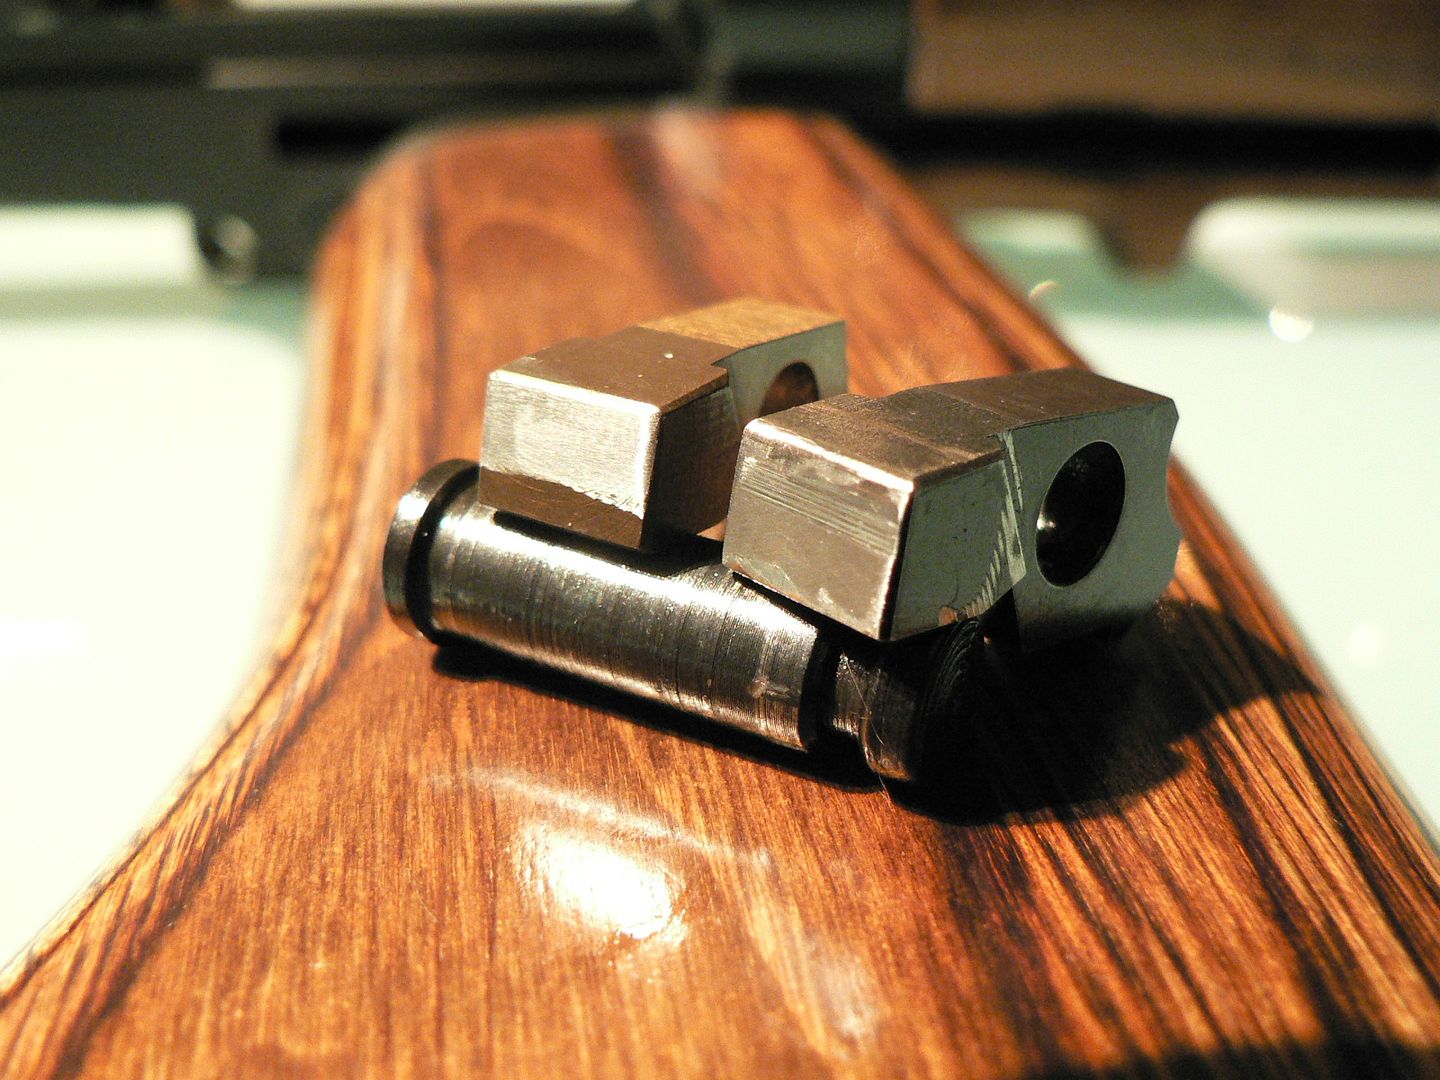 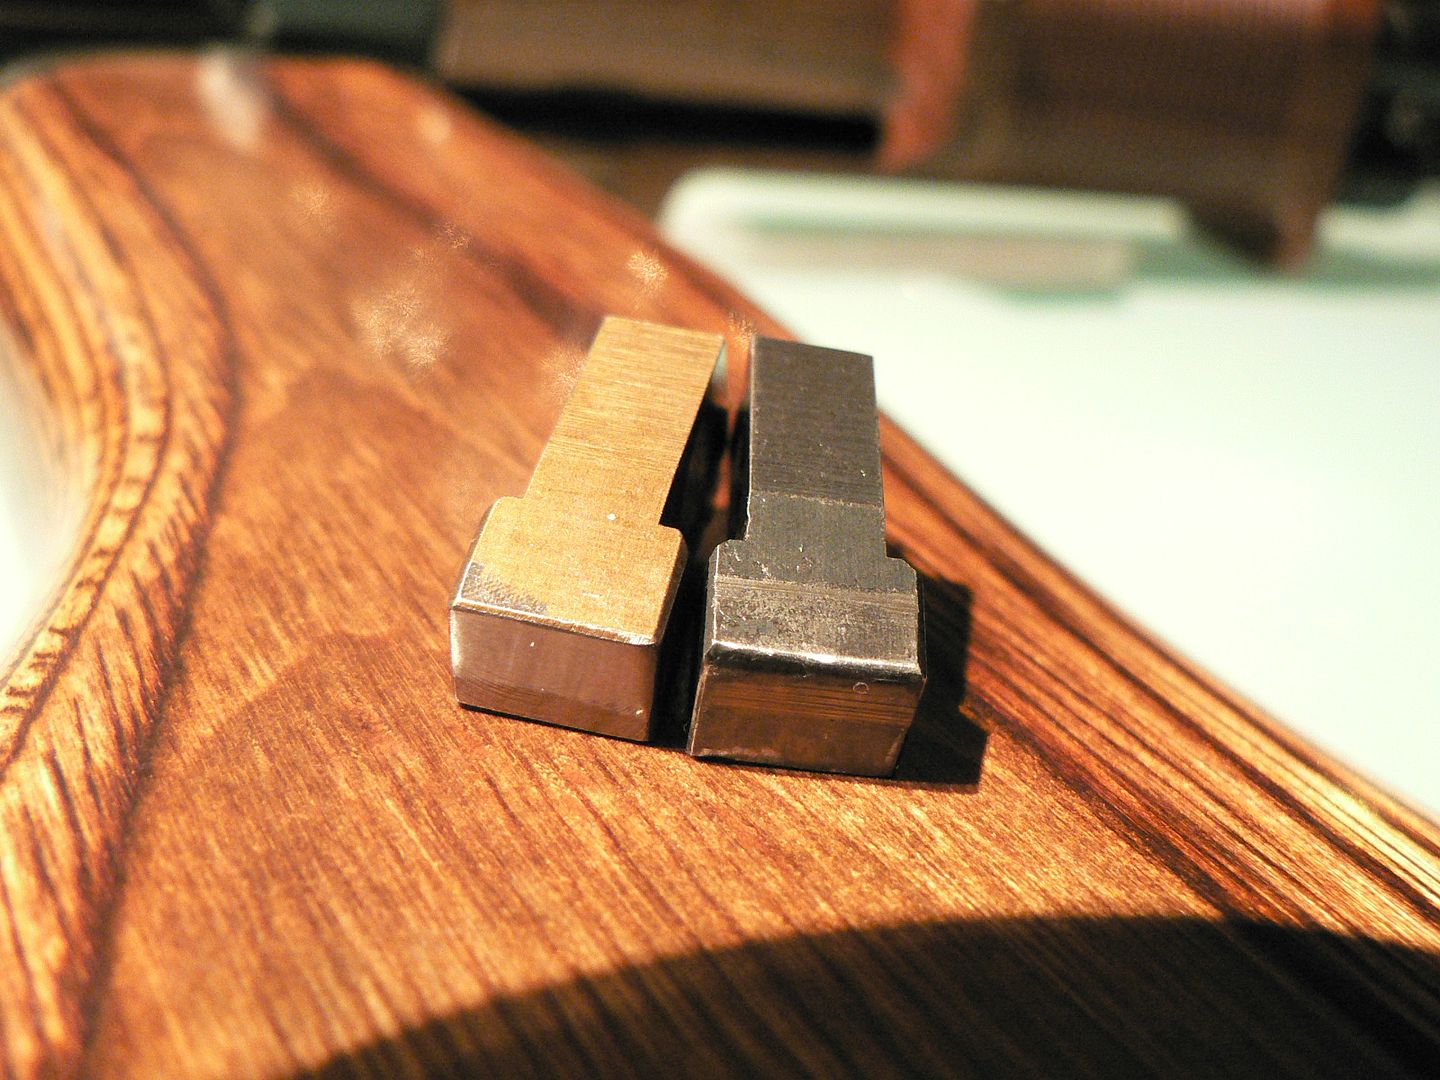 The old one is on the right and you can clearly see the grooves pounded into it by the bolt carrier. Also note that the new one has a copper hue to it. When Rick sent me the new one, he recommended that I slightly radius the notch on the bolt carrier where it contacts the sear so that I don't have as sharp an edge impacting the sear. He also cautioned me not to take too much material off as this may create an unsafe situation. Here is the notch on the bottom of the bolt carrier prior to reshaping: 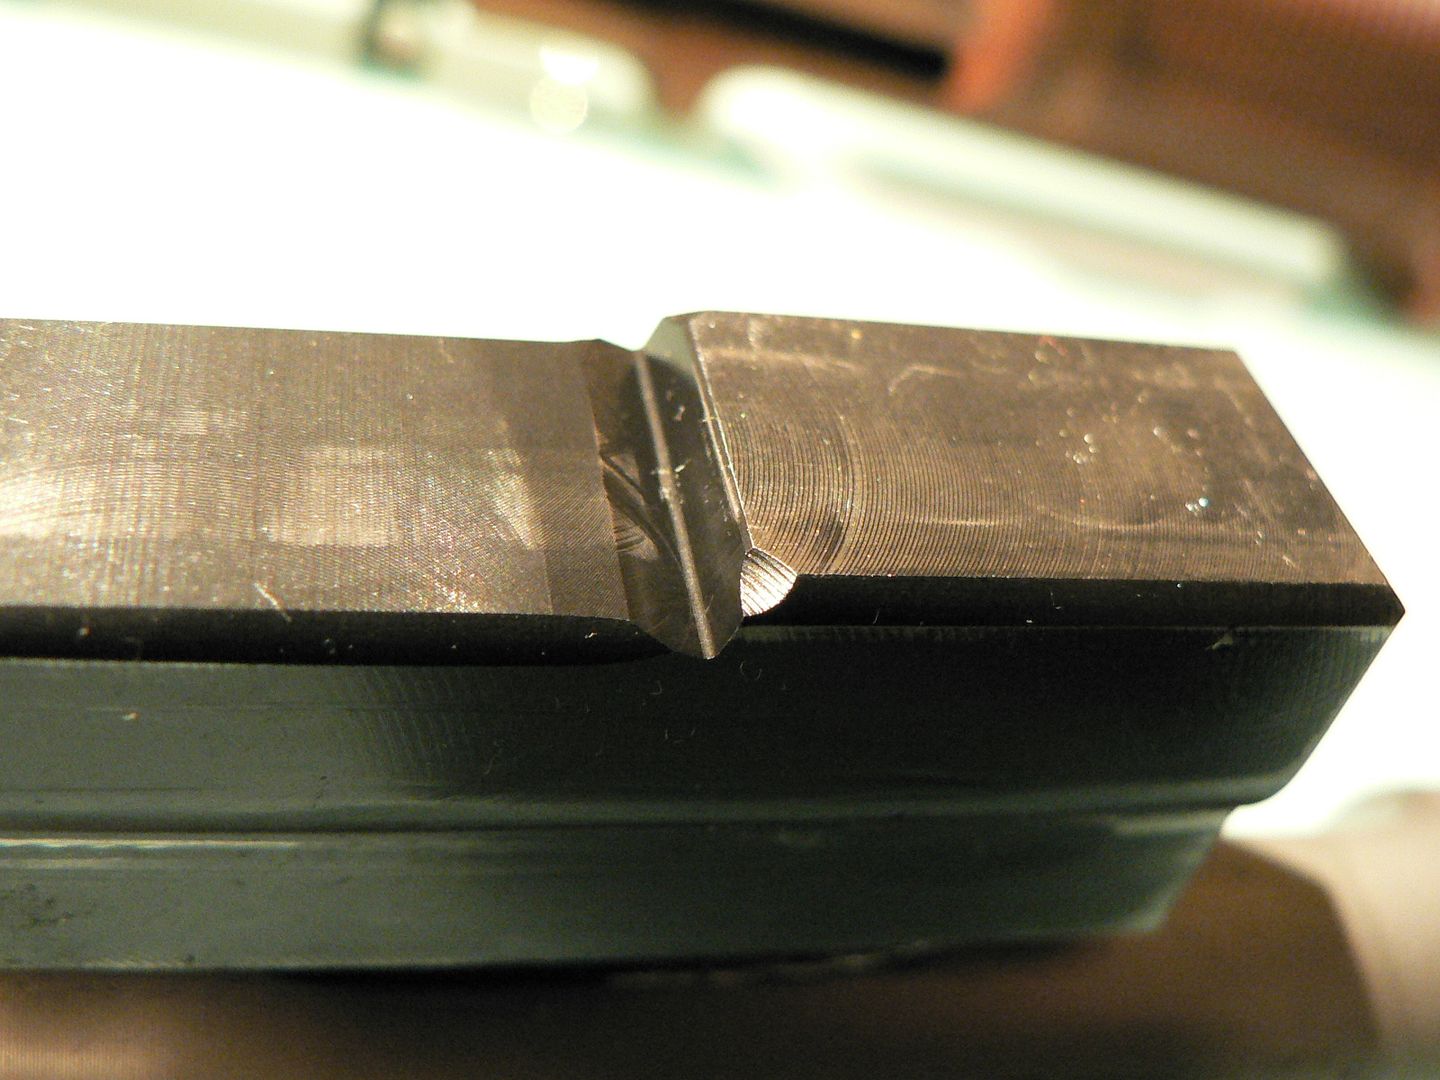 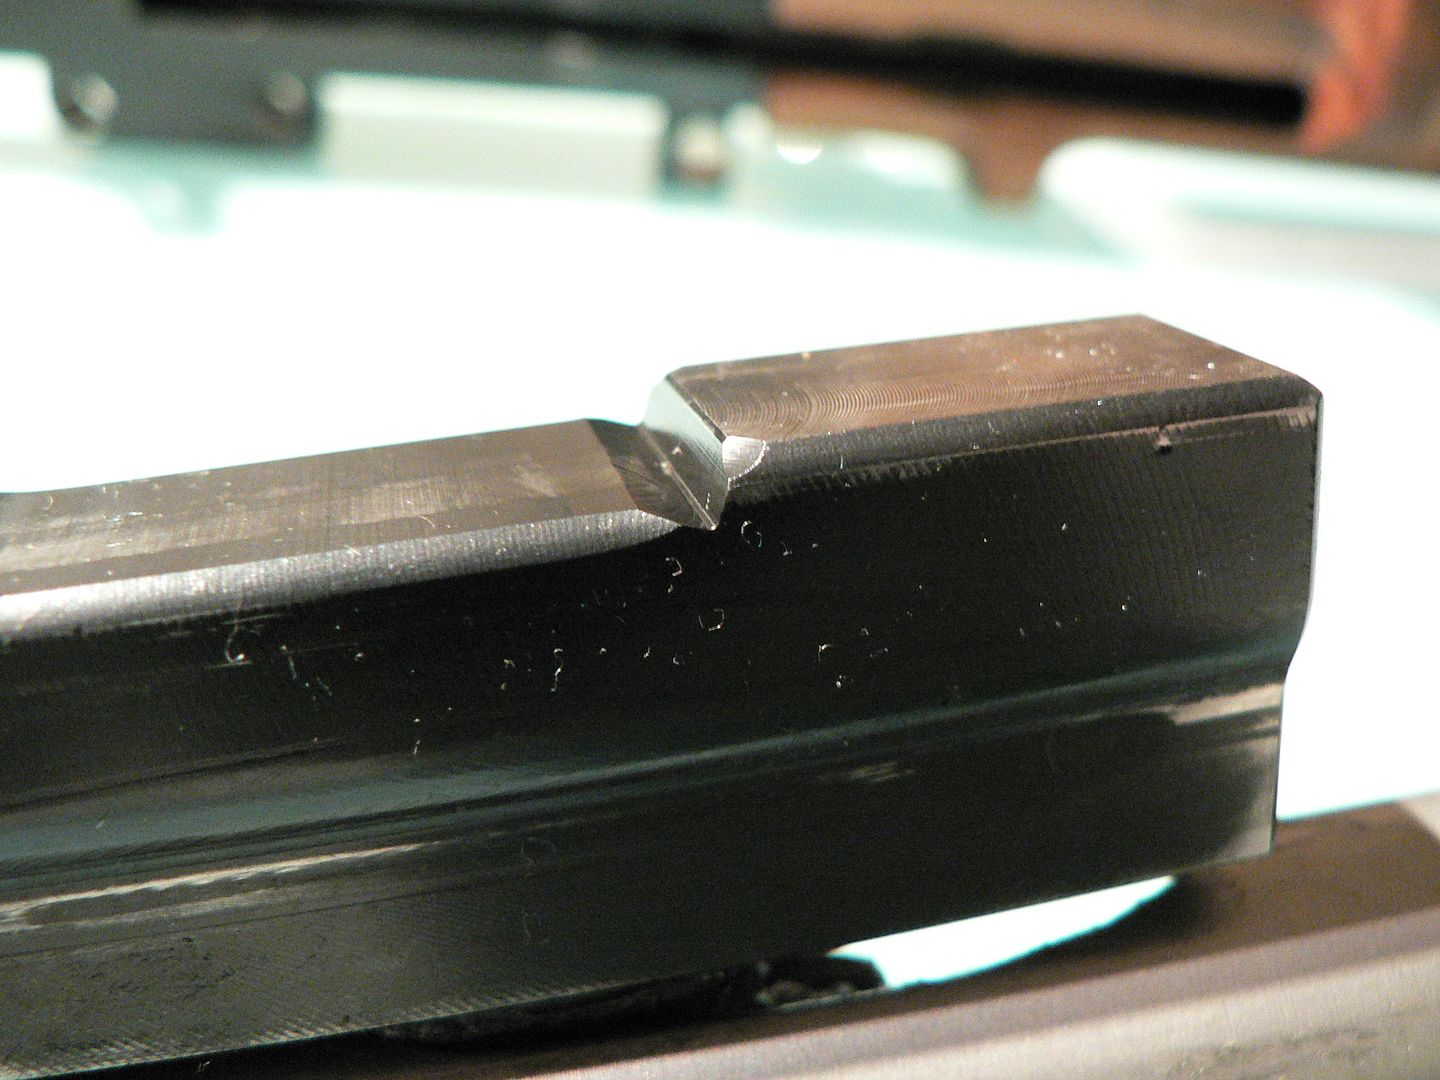 If you look very carefully, you will see that the edge is not rounded but is faceted. In these next pictures, you may be able to see that the edge is now rounded. I removed only the absolute minimum required to achieve this: 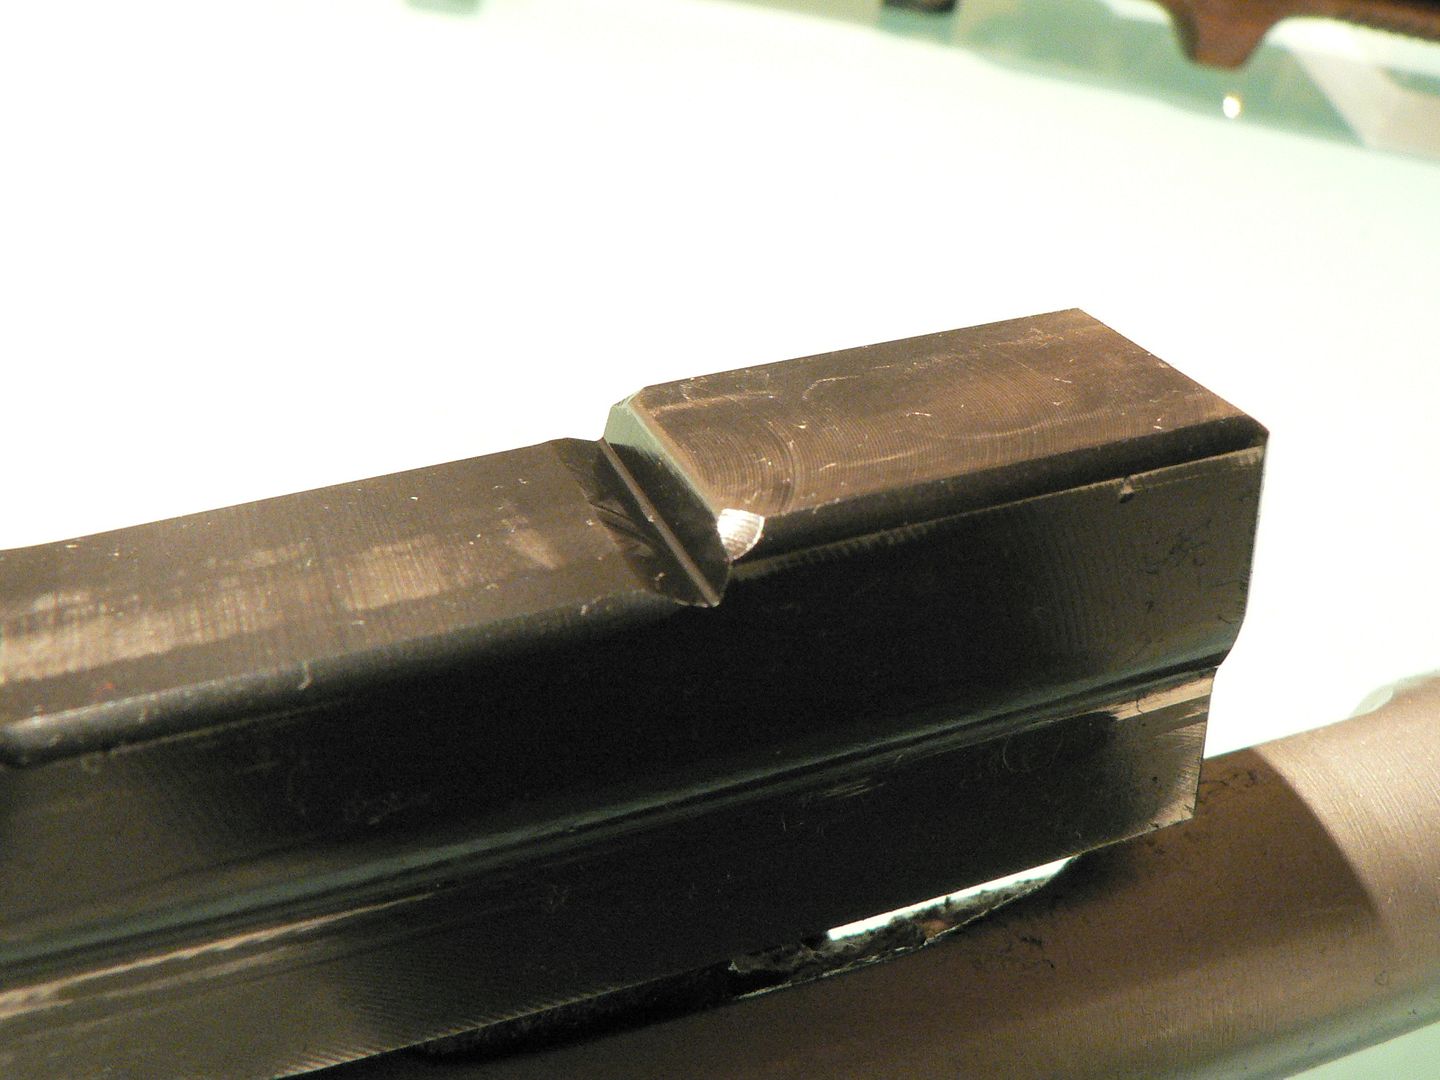 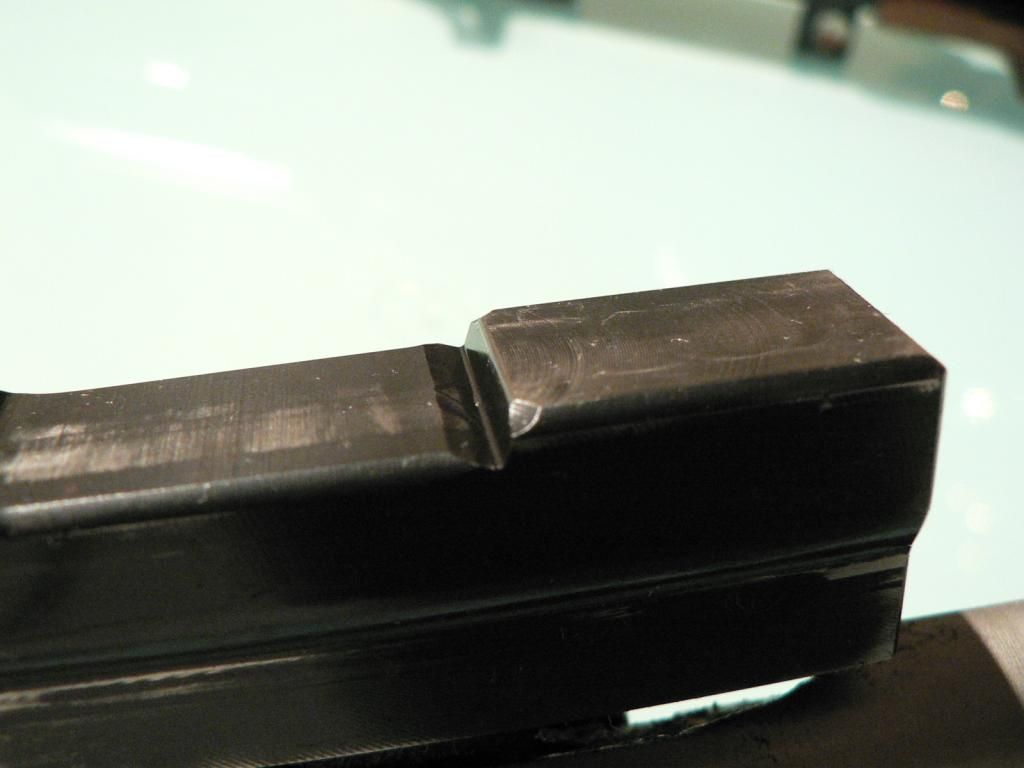 Finally, I reassembled everything and tested the trigger pull again. Now it weighs in at 14.8 lbs. but at least it is smooth and consistent all the way through the pull. As soon as I get a chance, I'll take it back out to the range and try to run another 100 rounds through it. At that time I will of course report back.
__________________
I promise to be nice and play well with others |
|
|
|
| The following member says Thank You to Wilhelm for your post: |
|
05-03-2015, 12:52 AM
|
#31 |
|
User
Join Date: Oct 2007
Location: Maryland
Posts: 340
Thanks: 43
Thanked 107 Times in 51 Posts
|
Today, I took the FG42 out to the range for the first time this year. As with each of the previous four range trips, I took 100 rounds to put through the rifle. So far, I had yet to actually get 100 rounds through it without something going wrong. Well, today, I came the closest yet with 99 out of 100. I had one failure to extract but the bolt cycled and tried to load a live round into the back of the spent casing still in the chamber. The live one was destroyed (we'll see it in a bit) and the rifle jammed of course. I removed the magazine, pulled and held the bolt to the rear, dumped out the live round and eased the bolt closed onto the spent casing in the chamber. The rifle locked up too tight to charge by hand but placing the charging handle on the edge of the table and pushing lightly unlocked the action and the spent casing was extracted. So, I had 99% reliability this time. That's acceptable to me. Less acceptable to me is the fact that the rifle is still locking up once warm if I let the bolt close (as in easing it, not letting it fly) on an empty chamber. However, today it wasn't nearly as bad as earlier trips. Maybe it's wearing in. I haven't sent it back to SMG to address this problem because I'm testing it. I want to see whether it will self correct or not. If it's still locking up, however slightly, when I finish my tests at 1000 rounds, I will be sending it back to SMG in an effort to see what can be done. So, to date, I'm at 396 rounds fired. Today was also the first time out with the new and 5 Rockwell points harder sear. The trigger pull is still very long and heavy but it's smooth. There are marks on it after 99 rounds but I don't feel any ratcheting so they may just be normal metal to metal marks. More rounds will tell the tale. Time for some pictures.
After the range but before I started ripping things apart:  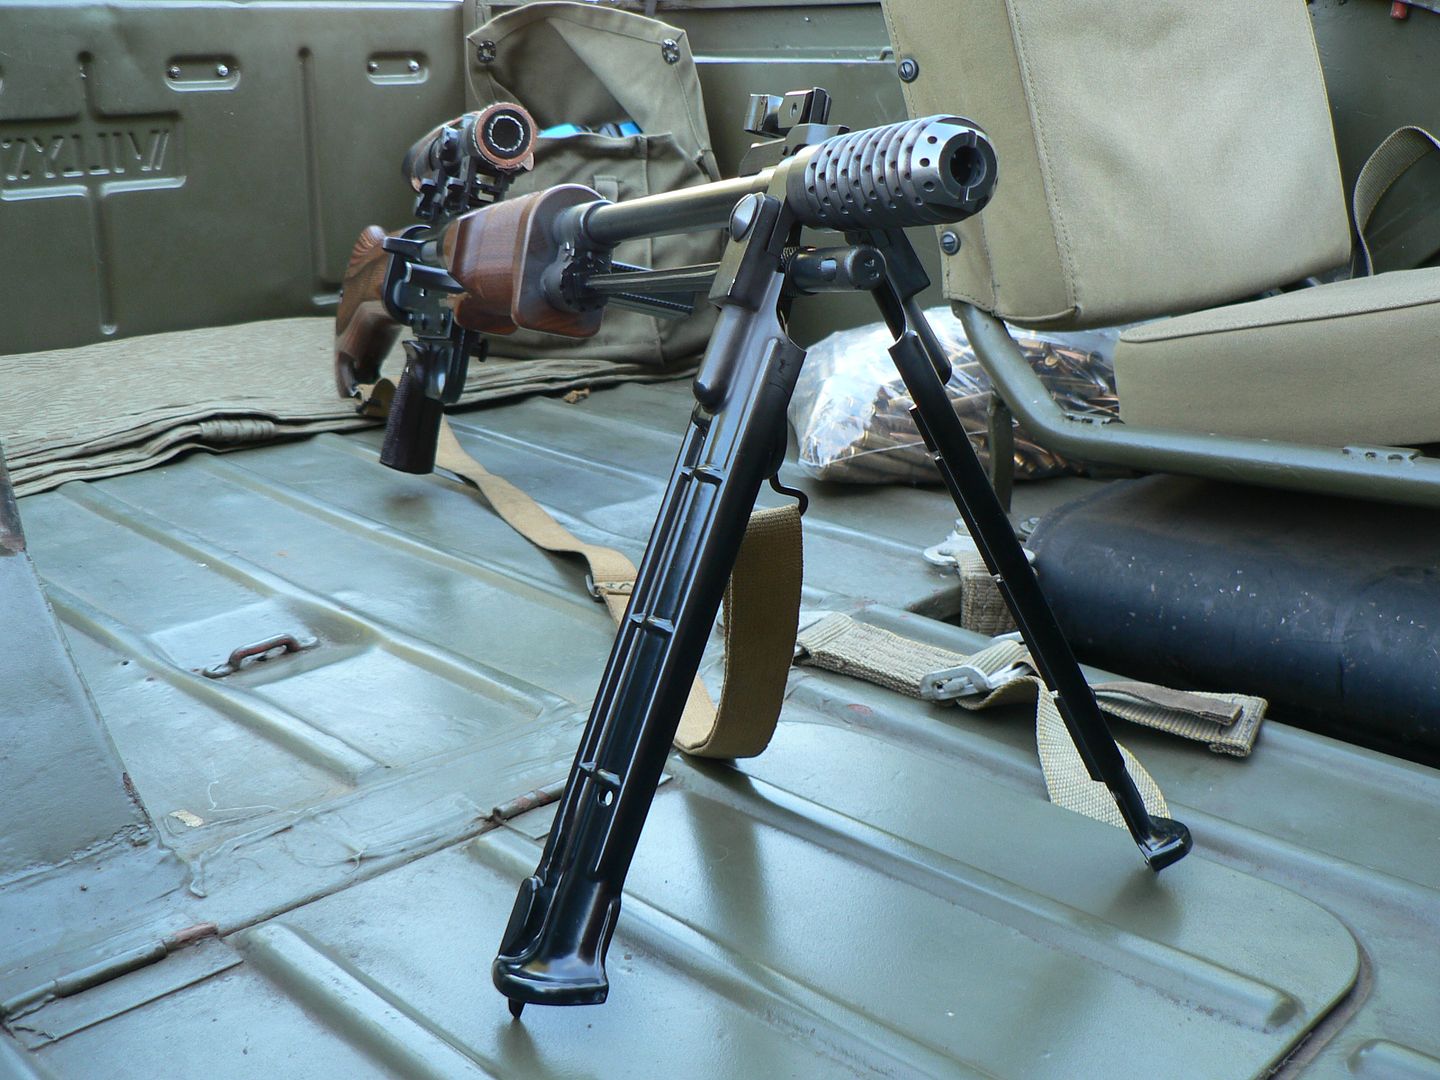 I fired 38 of the first 40 rounds at an actual target. One of the 40 was the previously mentioned jam and one was at an object in the berm (I like shooting dirt). Of the remaining 60 rounds, 20 were fired at stuff in the berm by a friend who happened to show up and the other 40 were fired by me....again at stuff in the berm. It's no target rifle but then I never expected it to be: 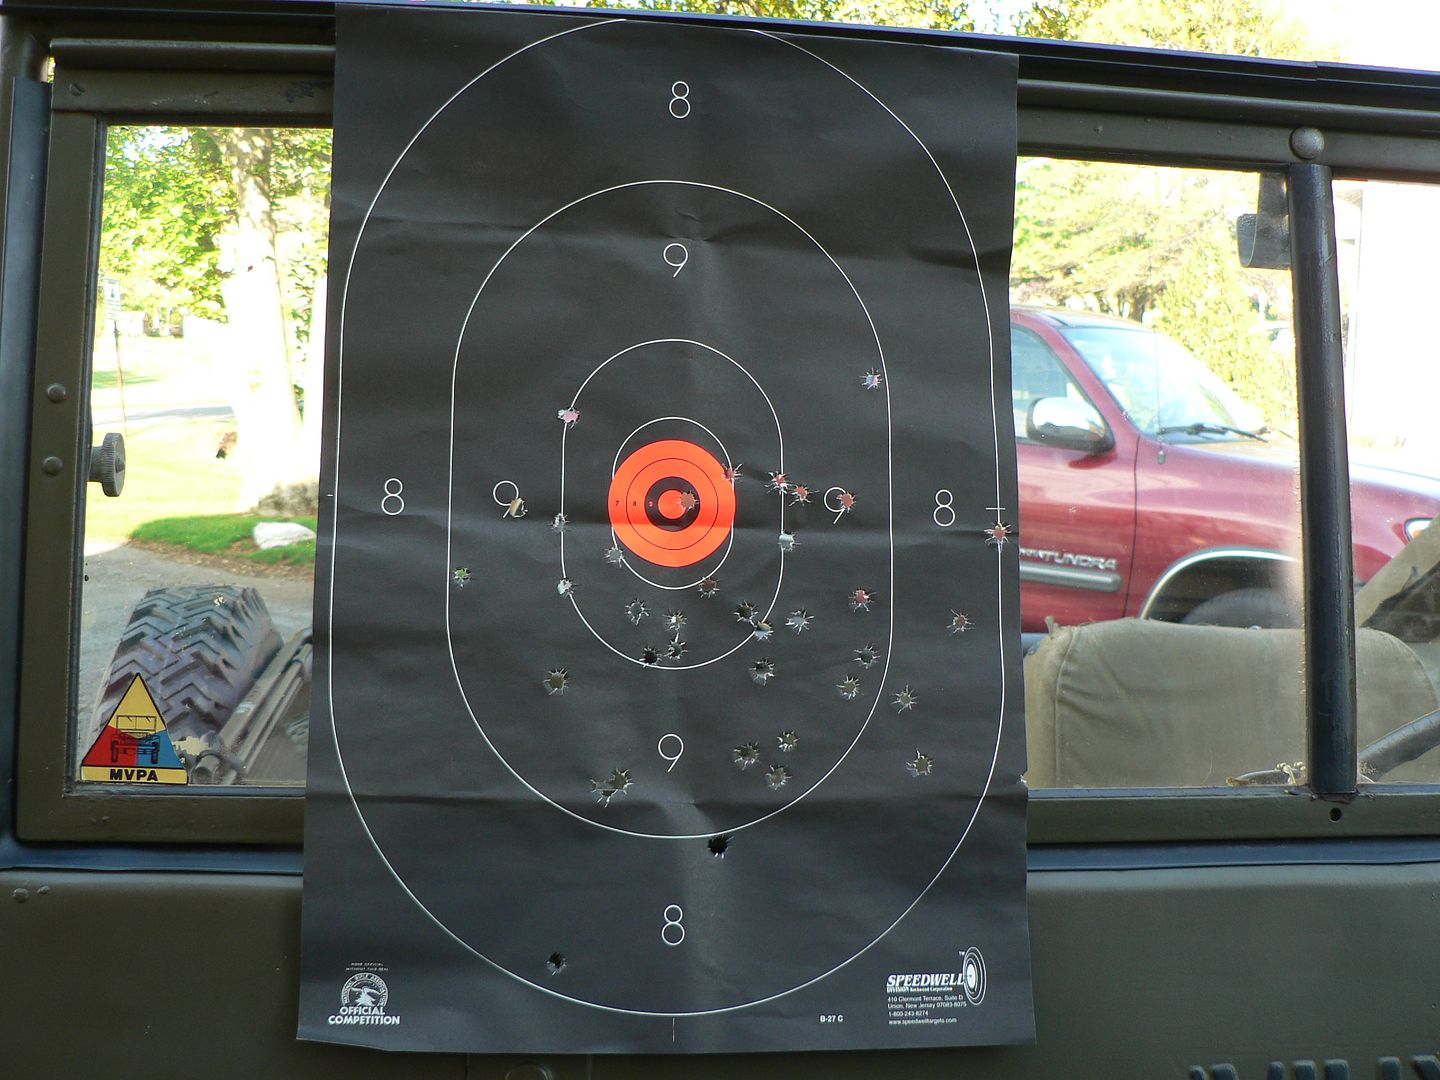 A better trigger would help. I better shooter behind the trigger would help too! Here are what 9 random spent casings and the destroyed round ended up looking like:  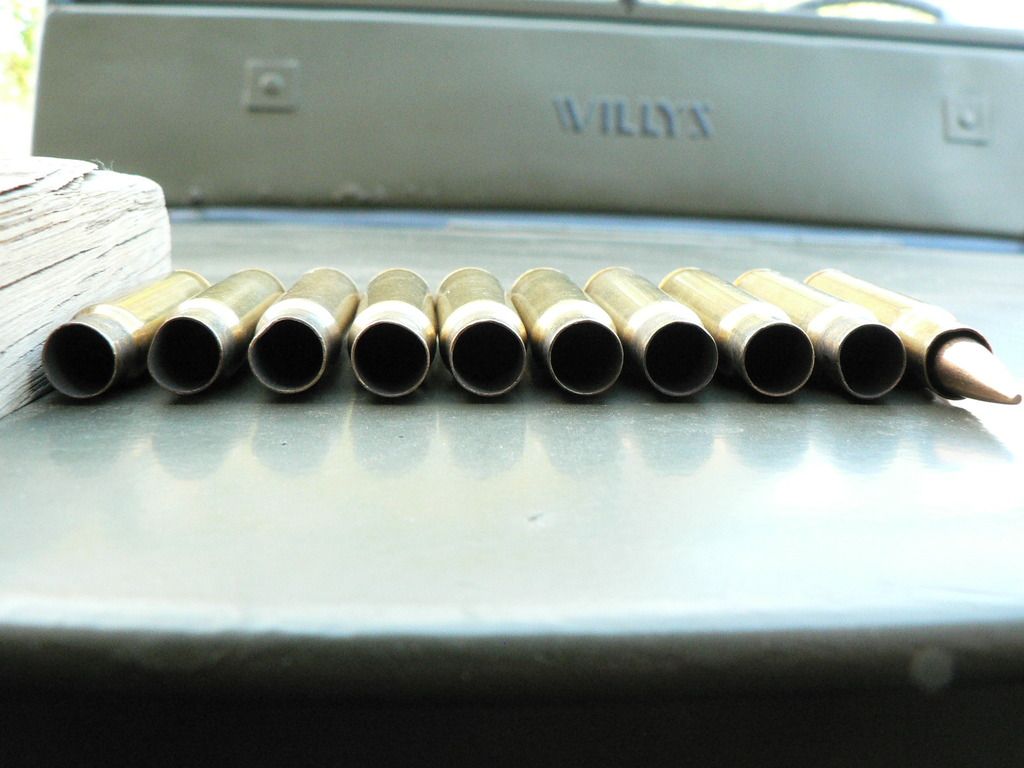 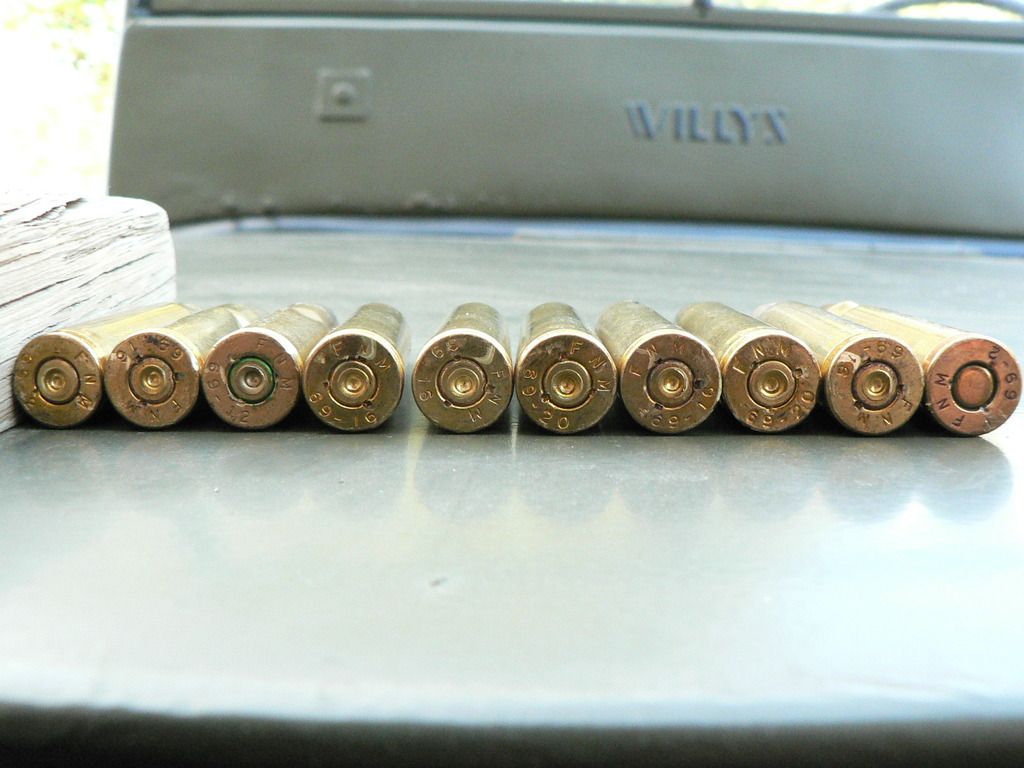 All 99 rounds were 1969 dated Portugese FNM surplus. It's considered to be the best 8mm surplus ever imported. Almost all cases ejected consistently at about 45 degrees and landed about 9-10 feet away. The blue locktite on the scope rings is holding just fine as is evidenced by the screw heads still aligning with the pencil index marks: 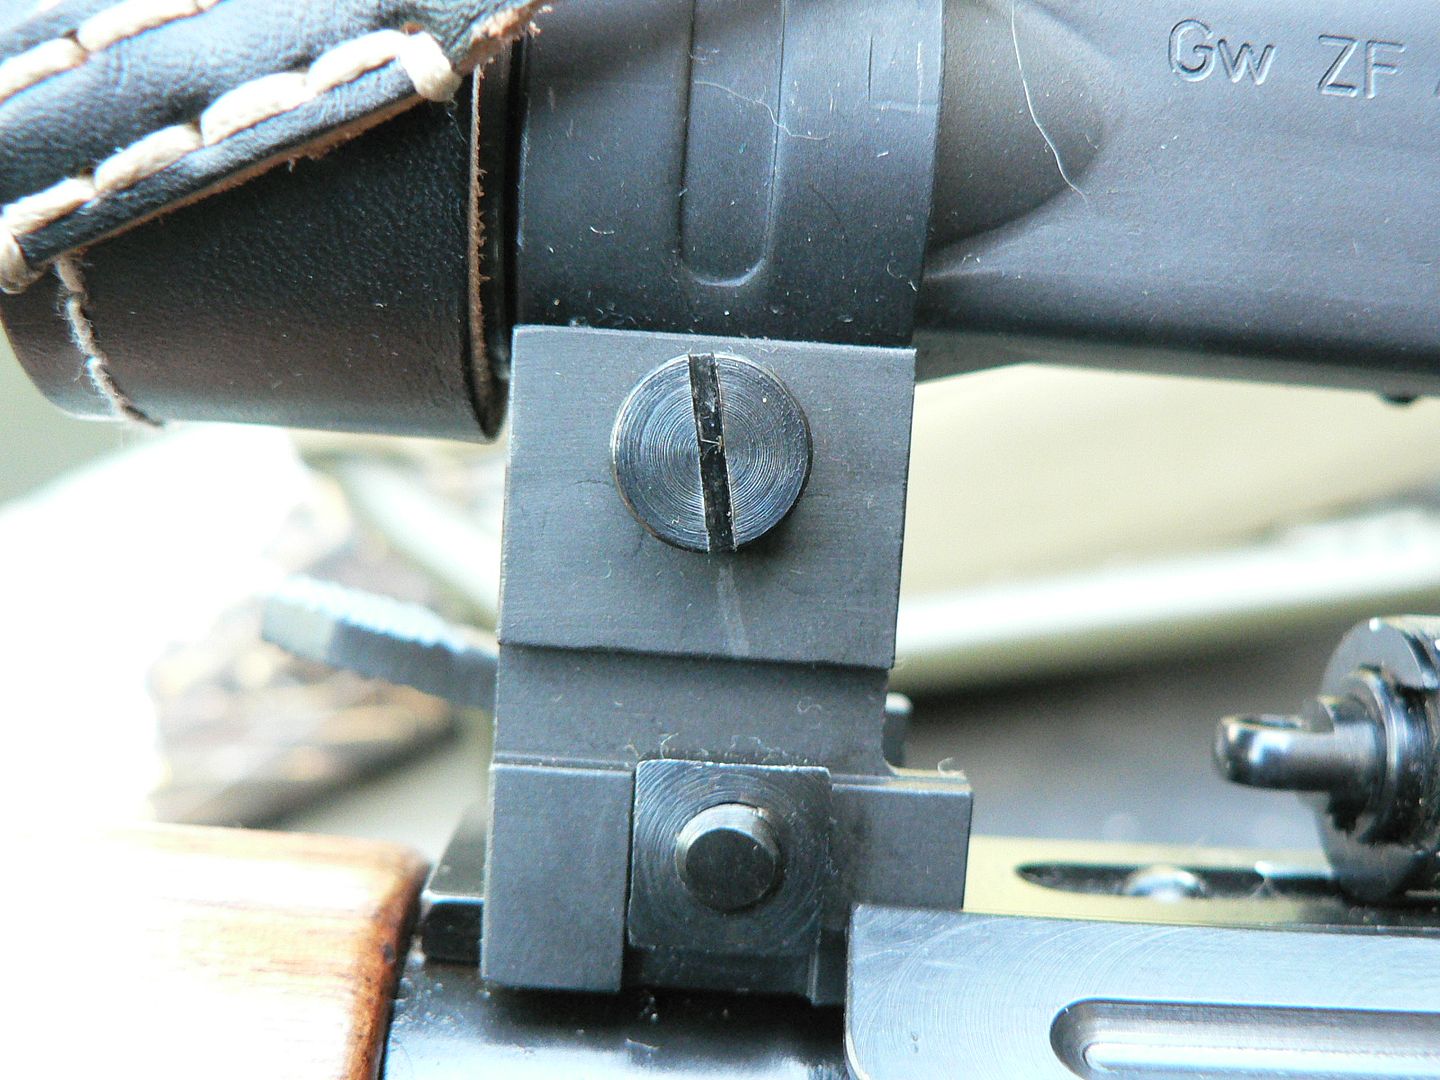 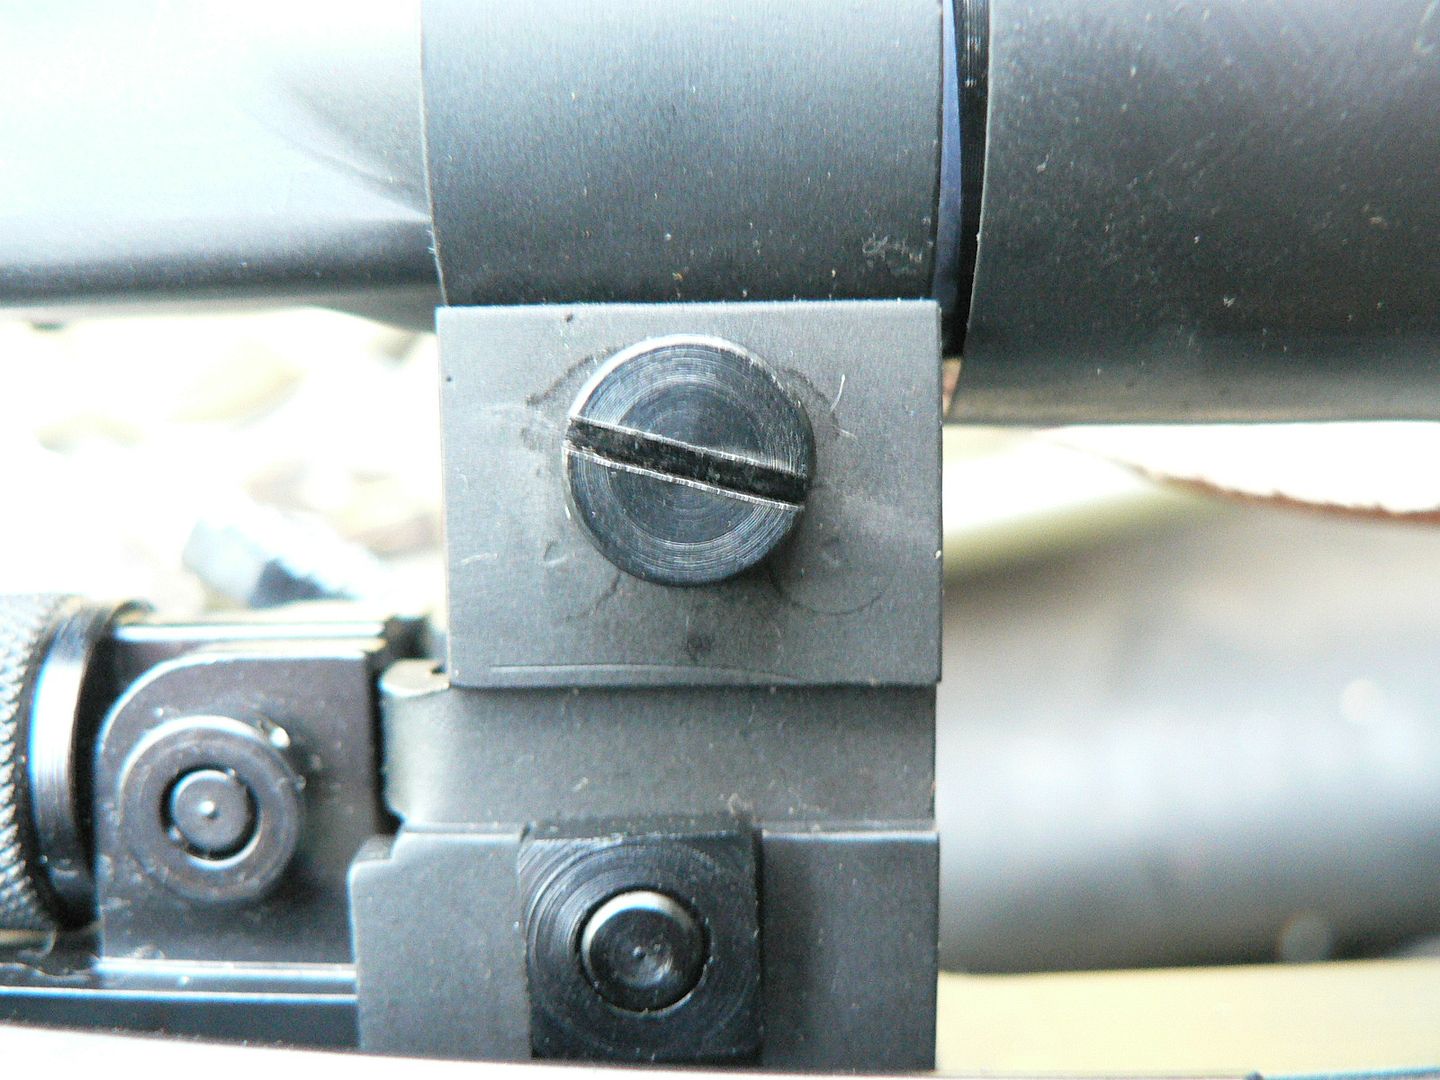 So I might have that problem solved. As usual, we'll be looking at wear areas so that we can see the ongoing progression from new to 1000 rounds. But this time, I also took some pictures of stuff dirty and after cleaning so that you can see what to expect fouling wise after a range trip. We'll start with the muzzle dirty: 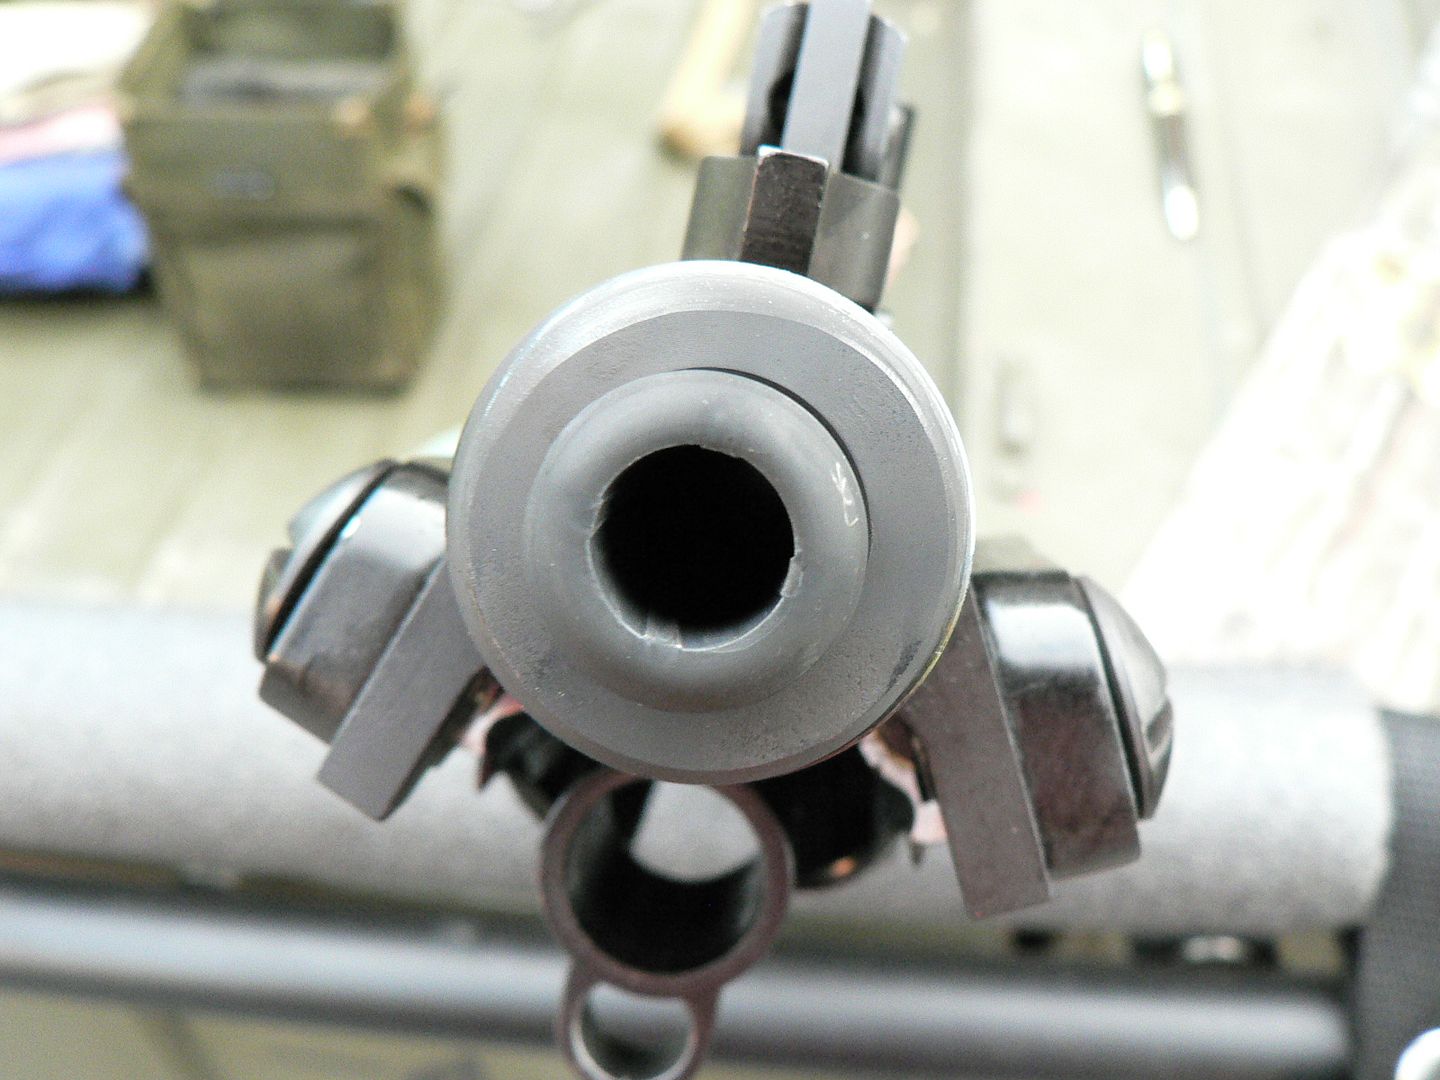 After cleaning:  The gas block and piston fouled:   I didn't take pictures of them clean...oops! The bolt and carrier removed prior to disassembly and cleaning: 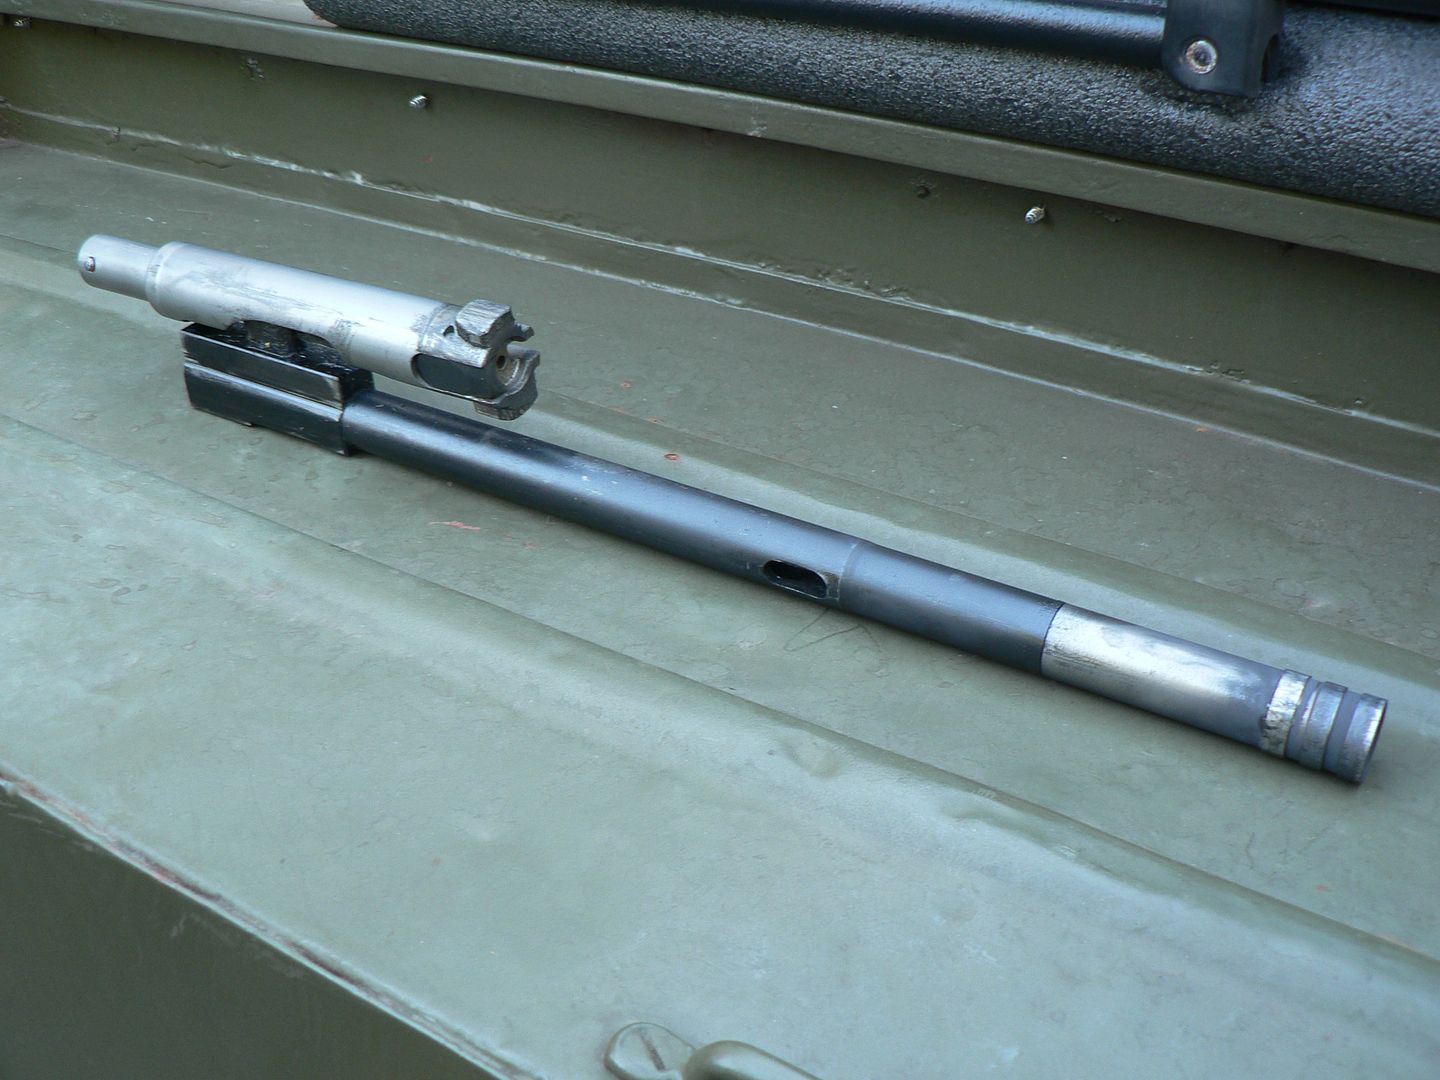 These next few pictures show you how much the grease spreads around but on the parts it's been applied to but doesn't sling around all over the place: Firing pin yoke. Notice the small piece of brass from a spent casing stuck in the grease: 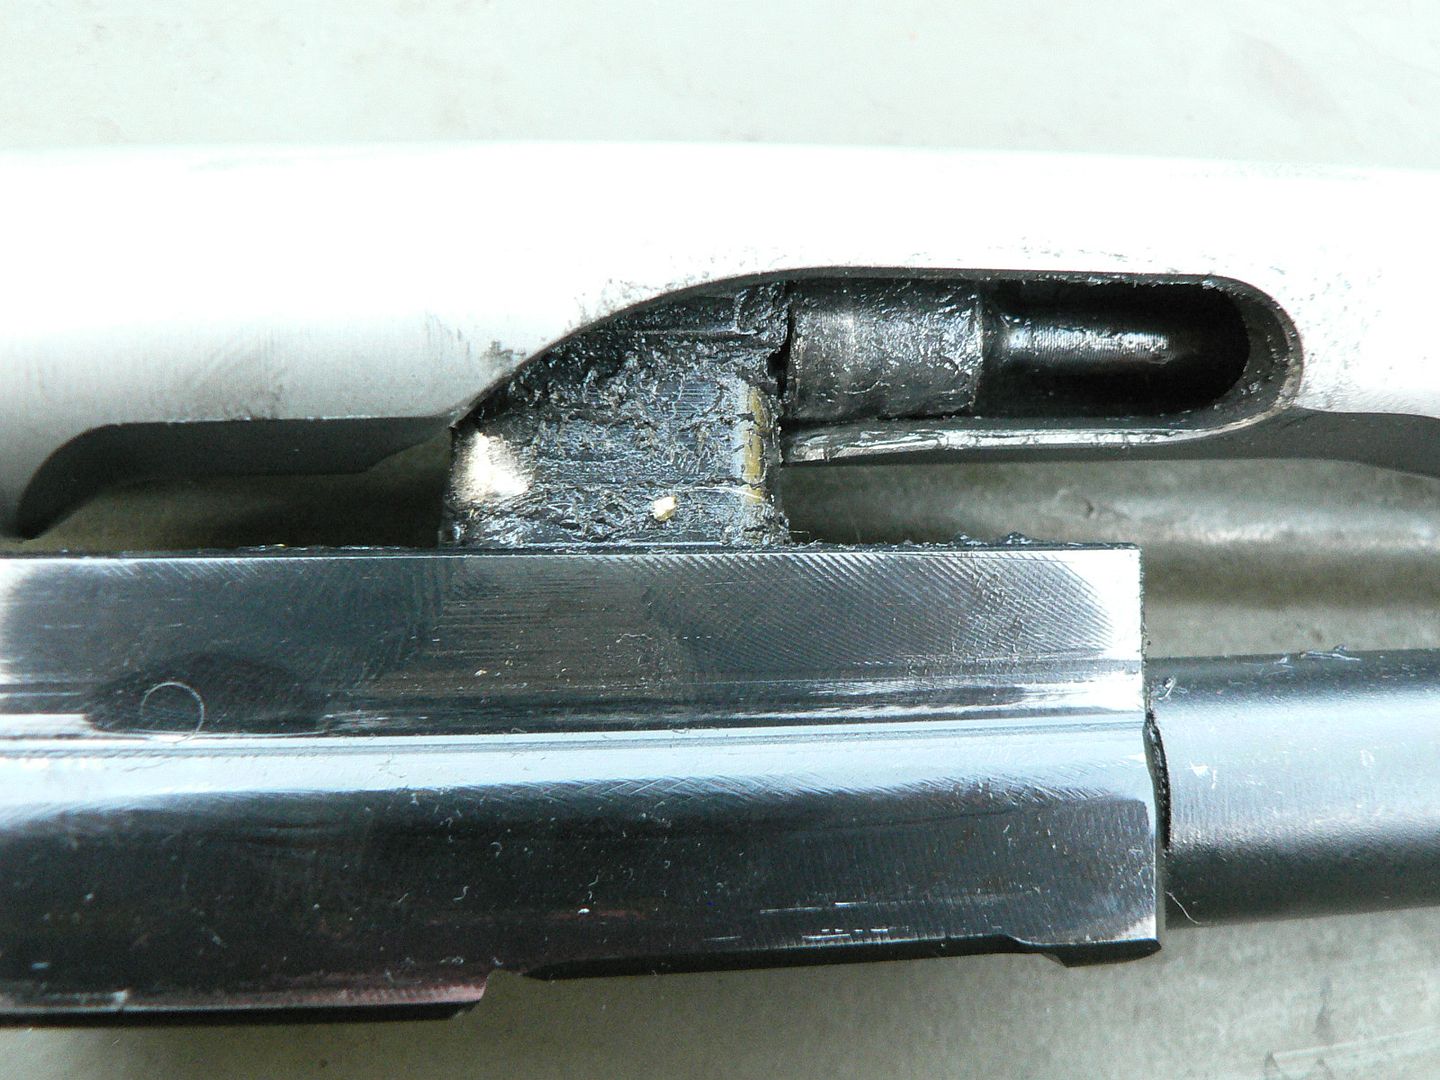 Locking lug:  Other locking lug: 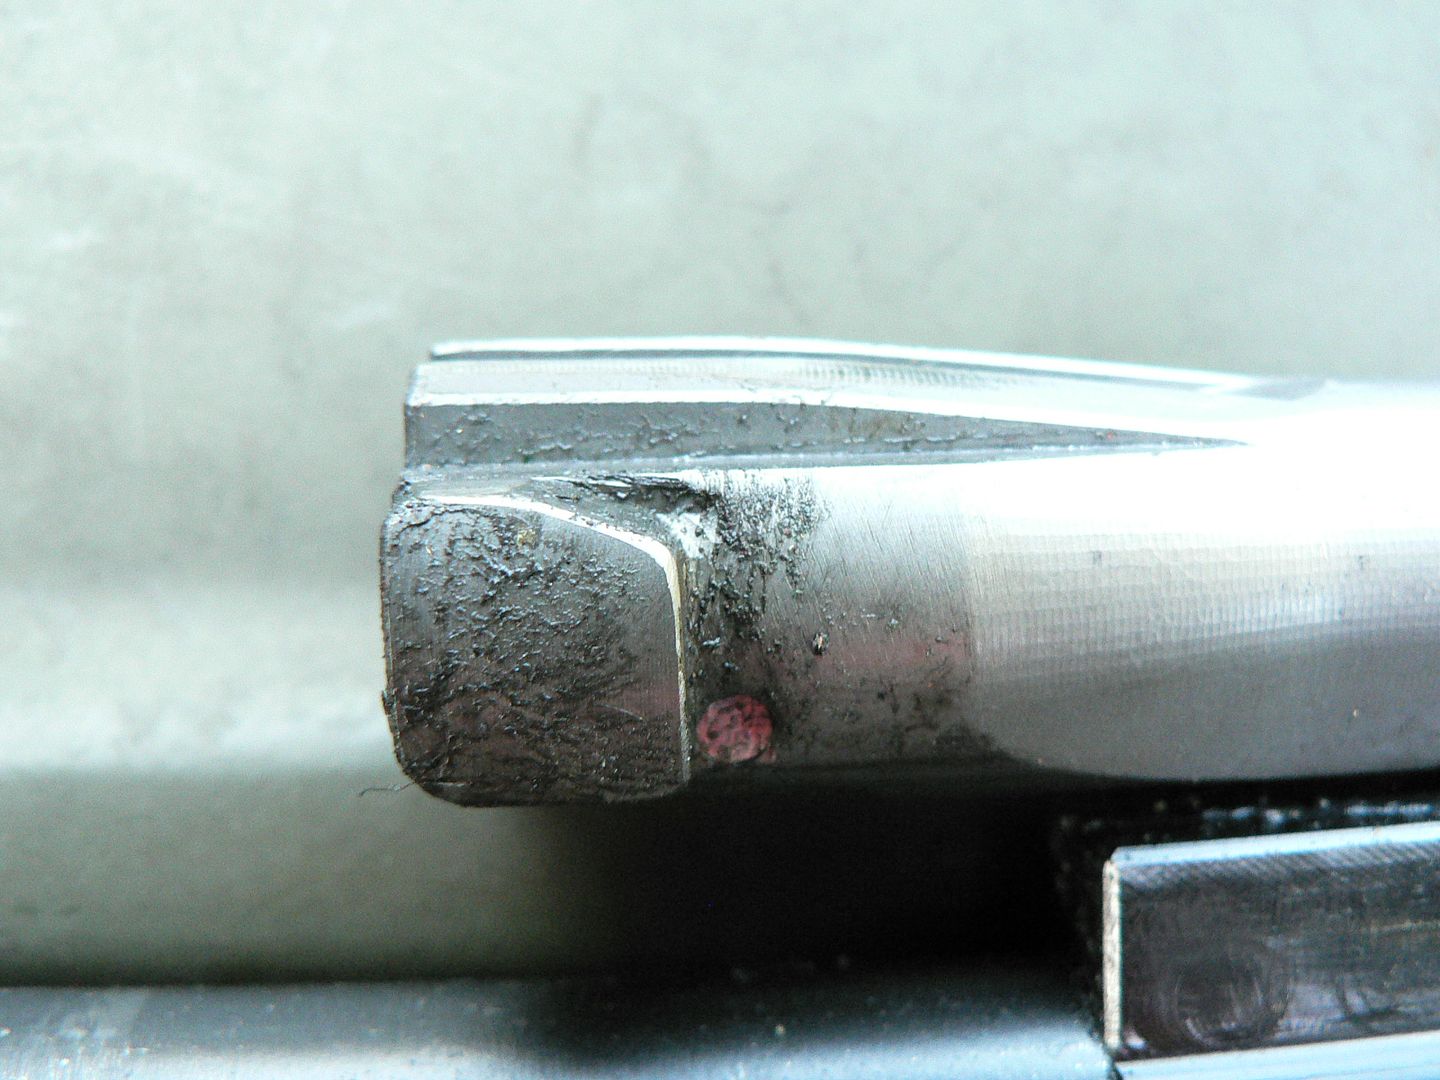 Bolt face: 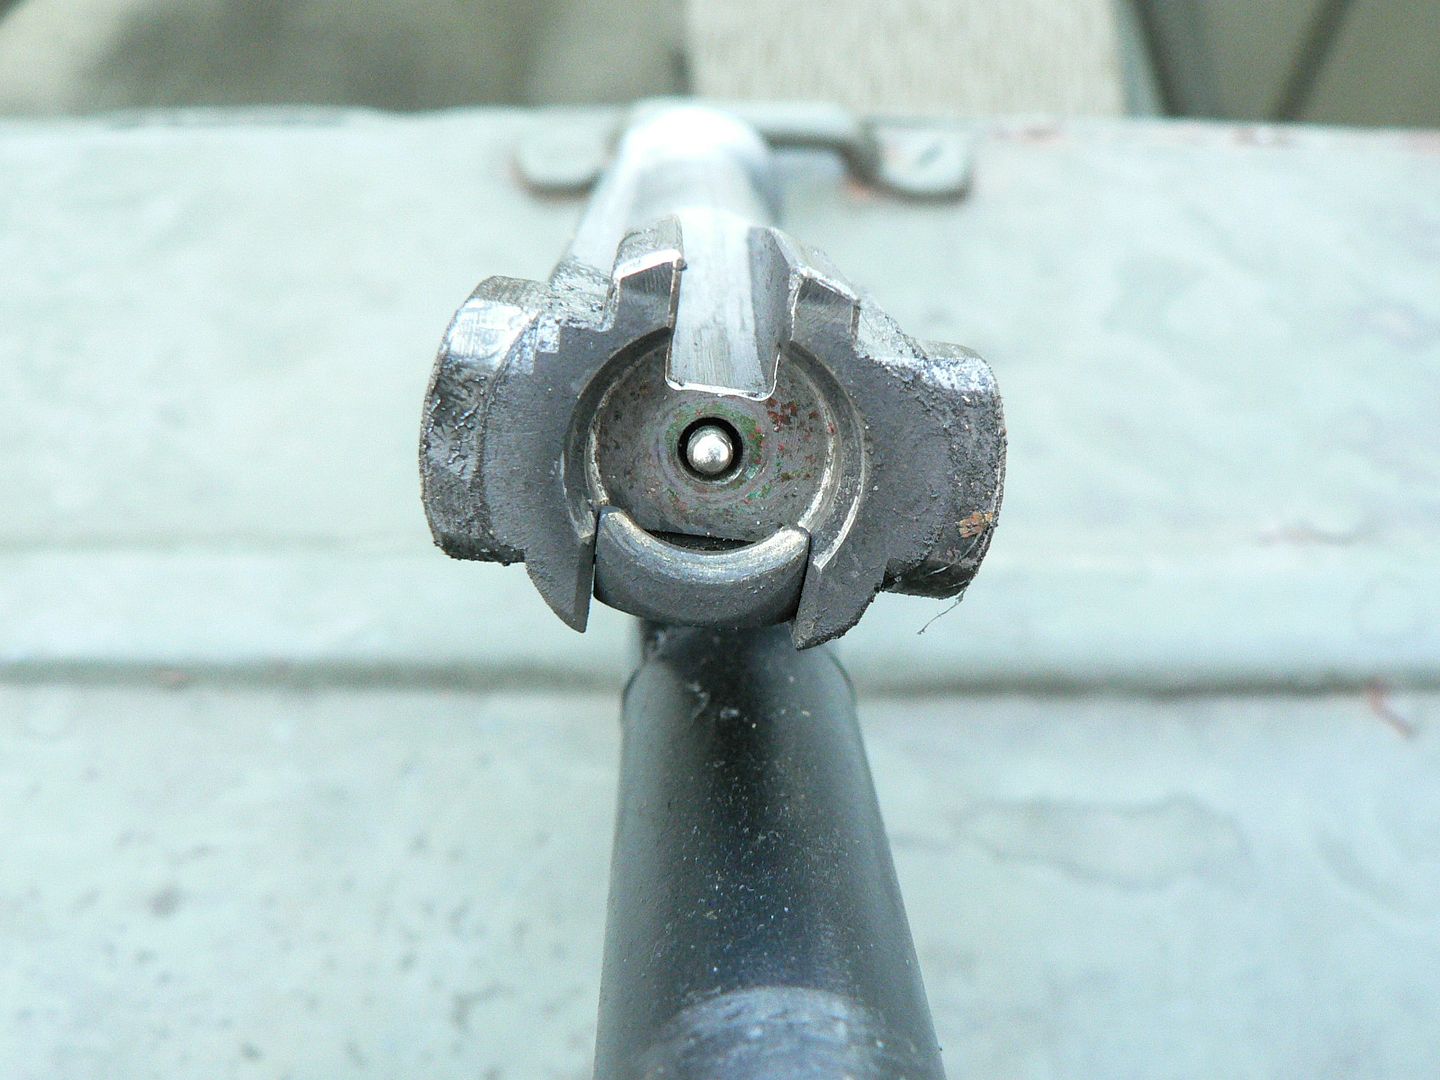 Firing spring guide and other side of firing pin yoke: 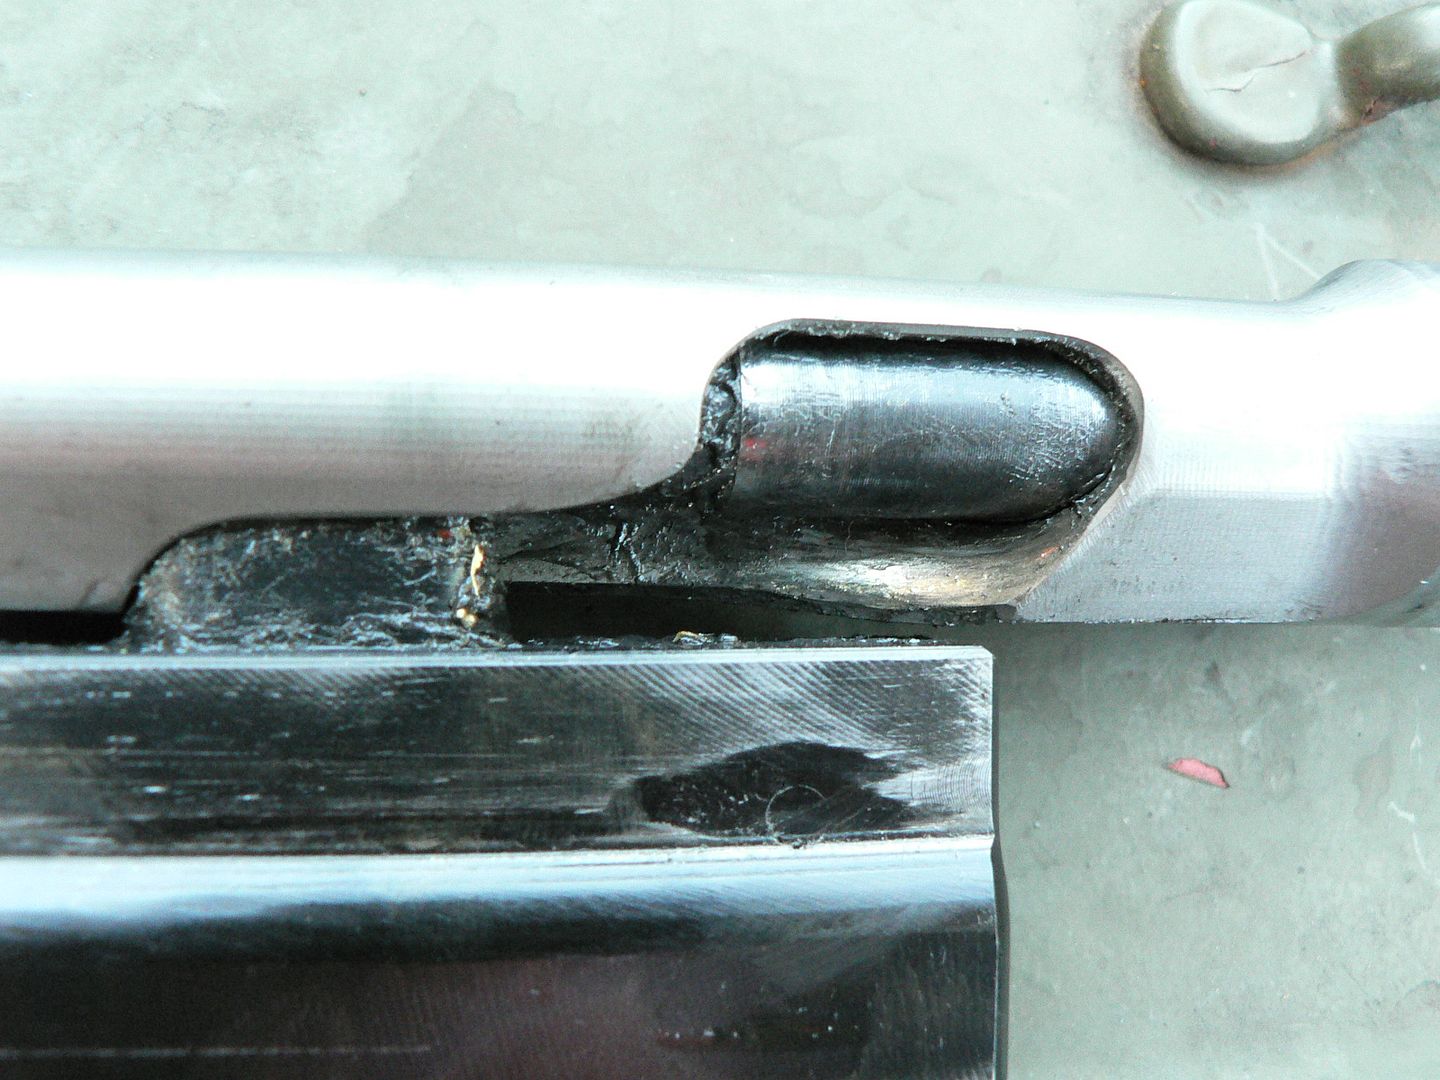 Disassembled showing firing spring, firing pin, firing spring guide, and yoke area of bolt carrier: 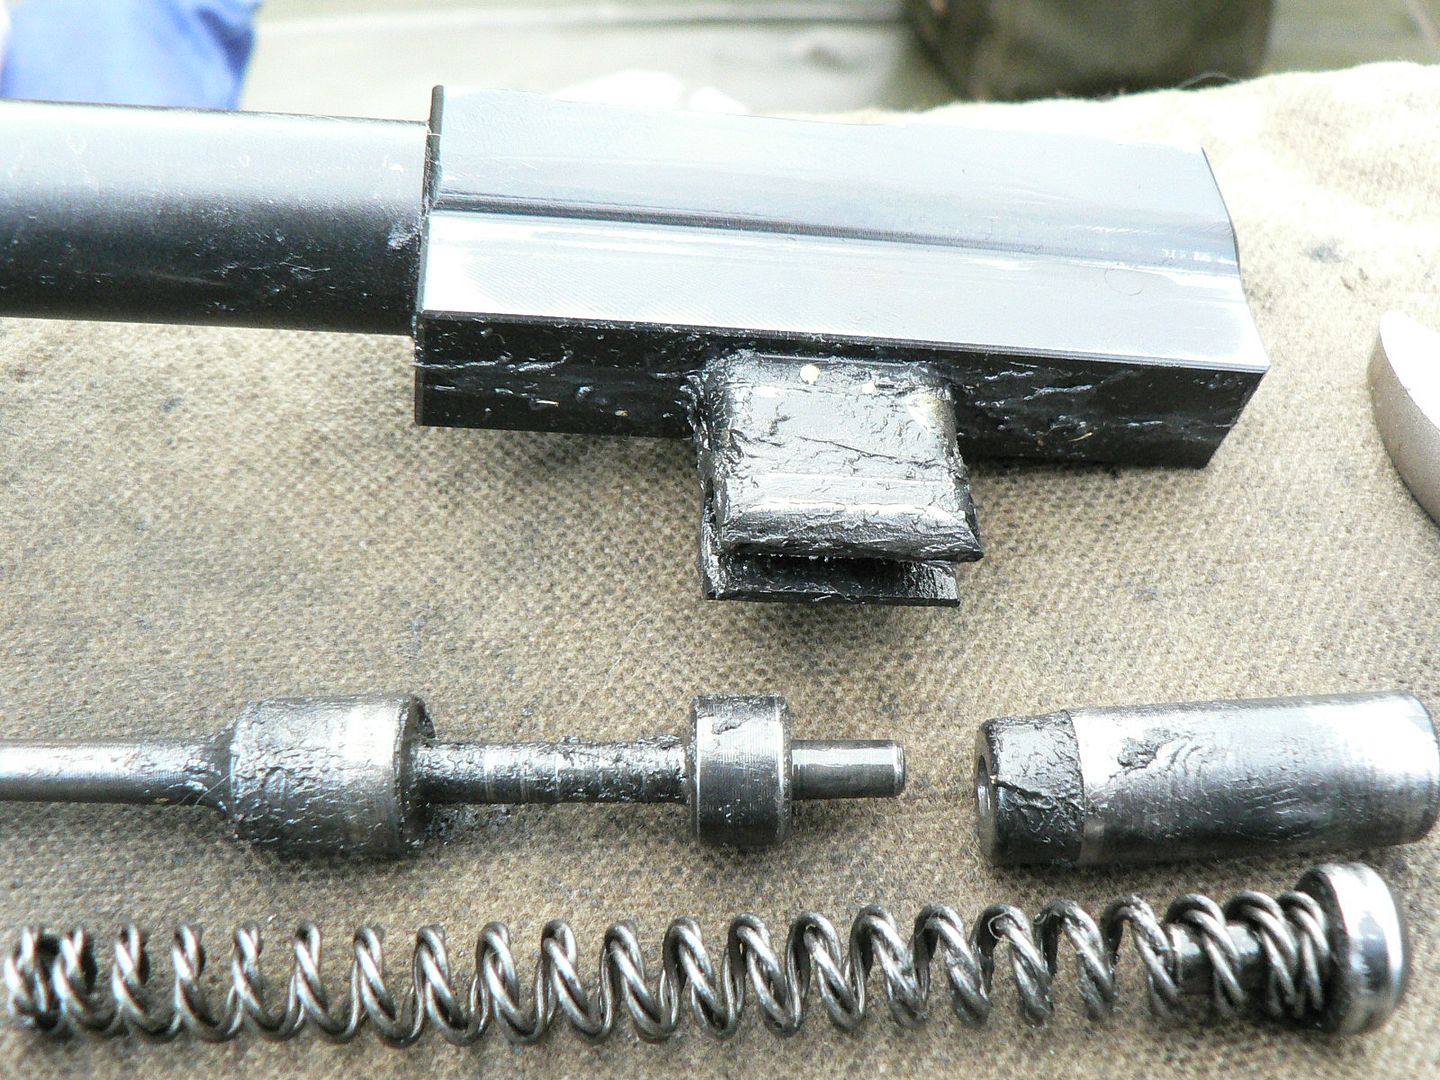 And after cleaning: 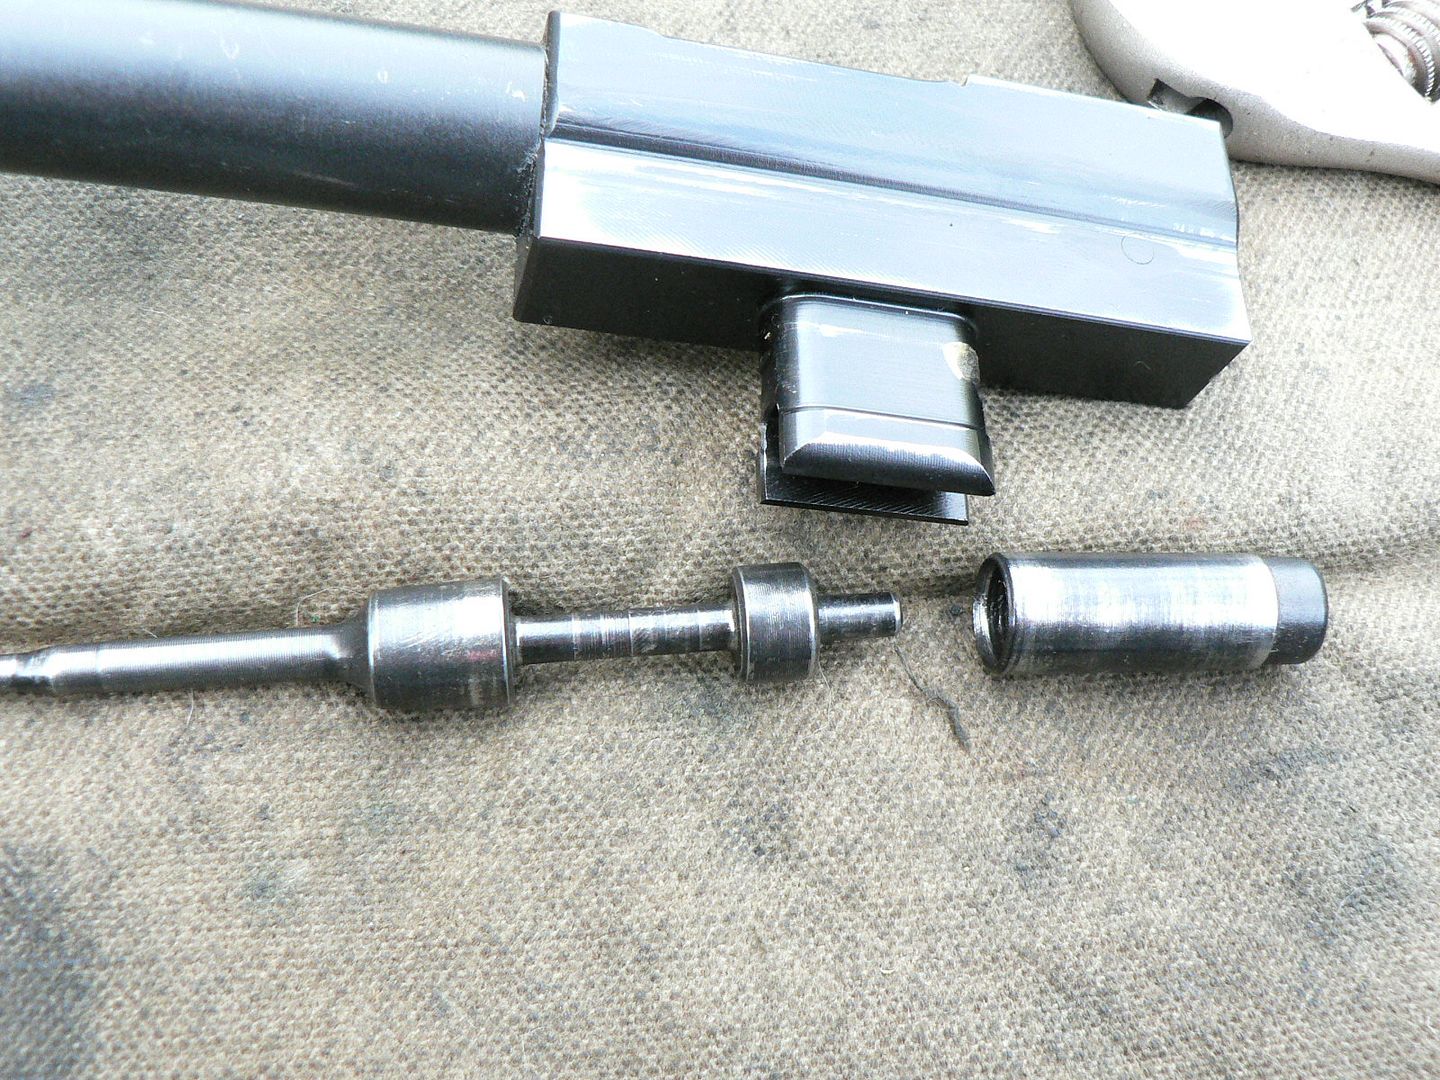 Inside of bolt: 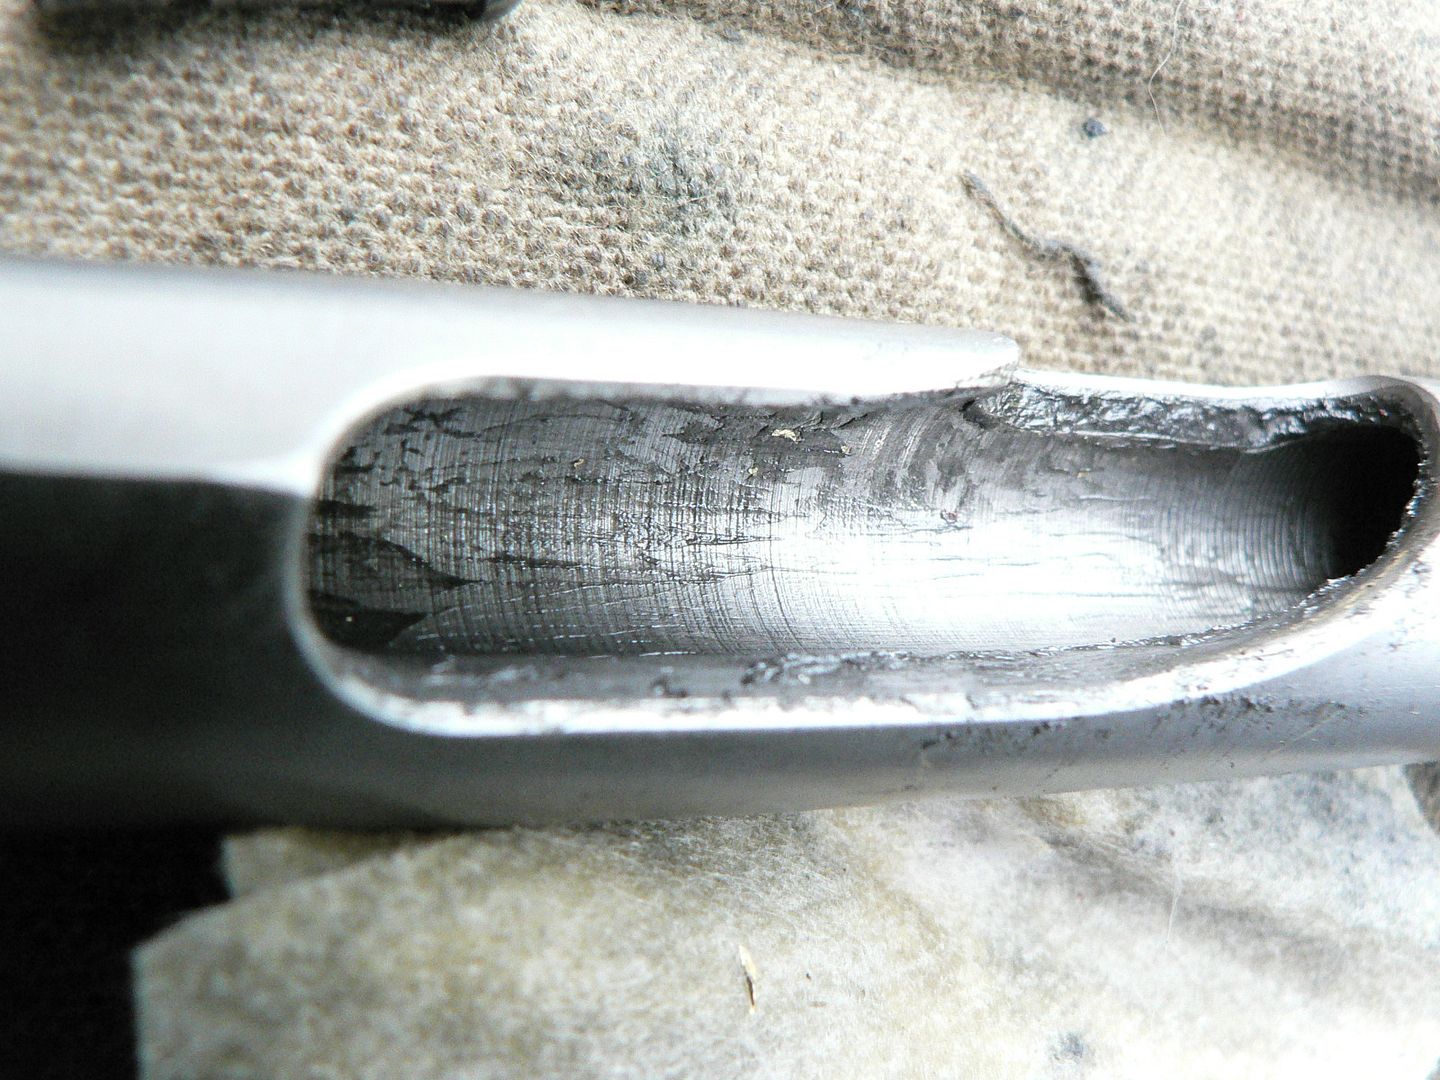 Inside of bolt after cleaning : 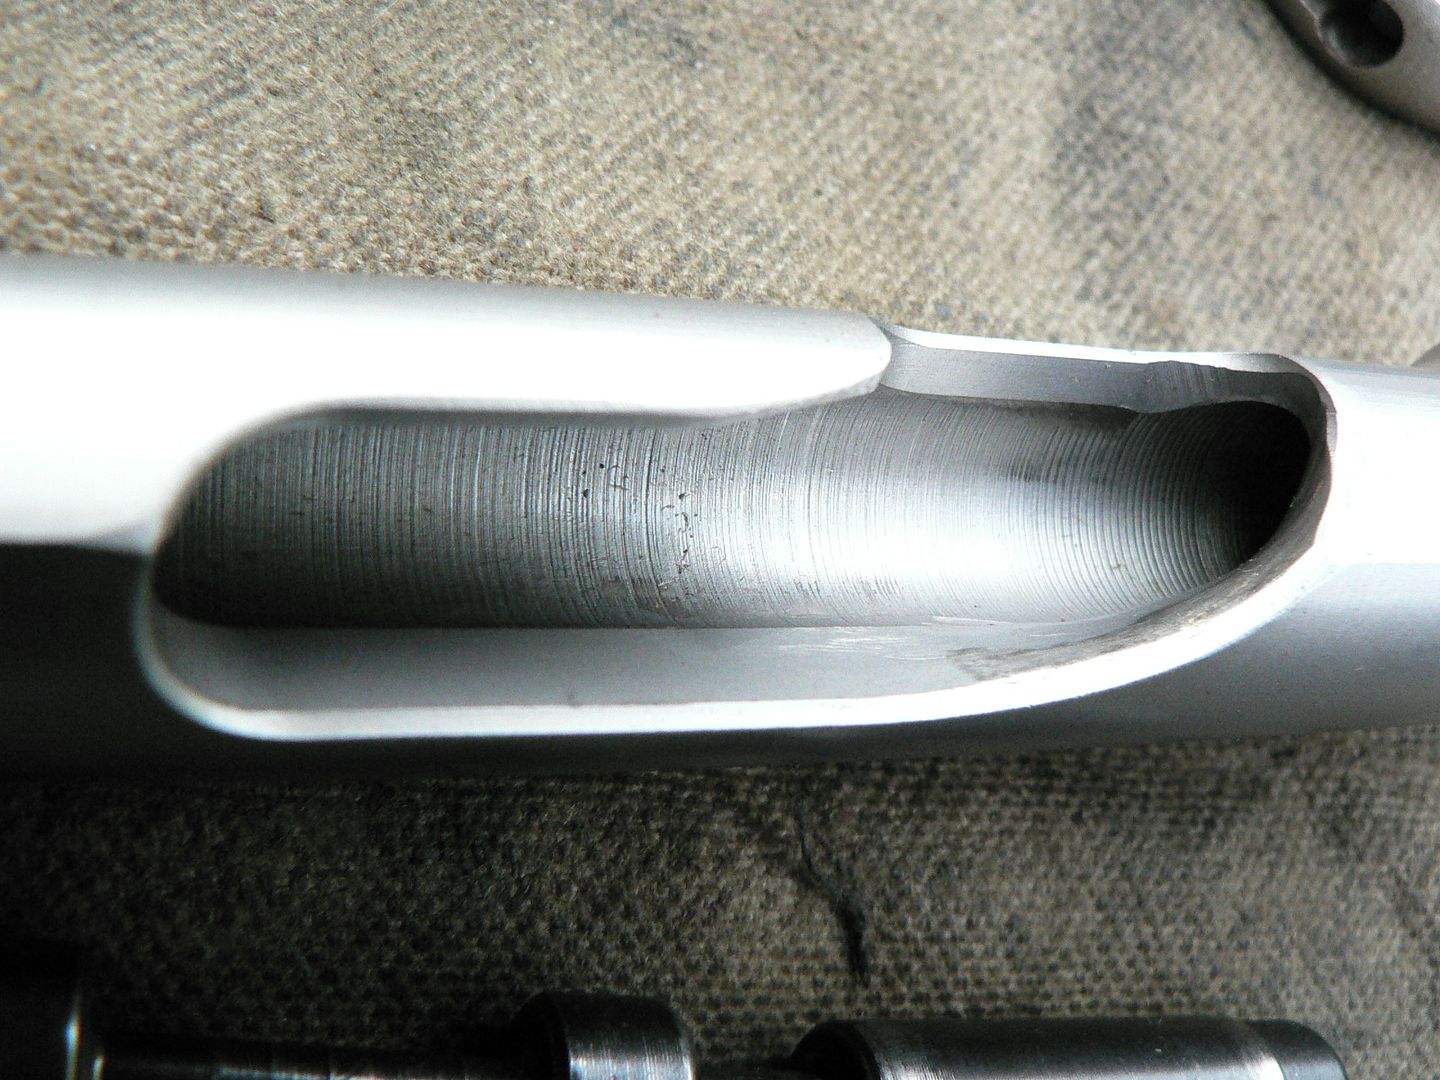 Normal wear in cam slot. The darker grey looking area is actually bright bare metal but the lighting makes it look dark: 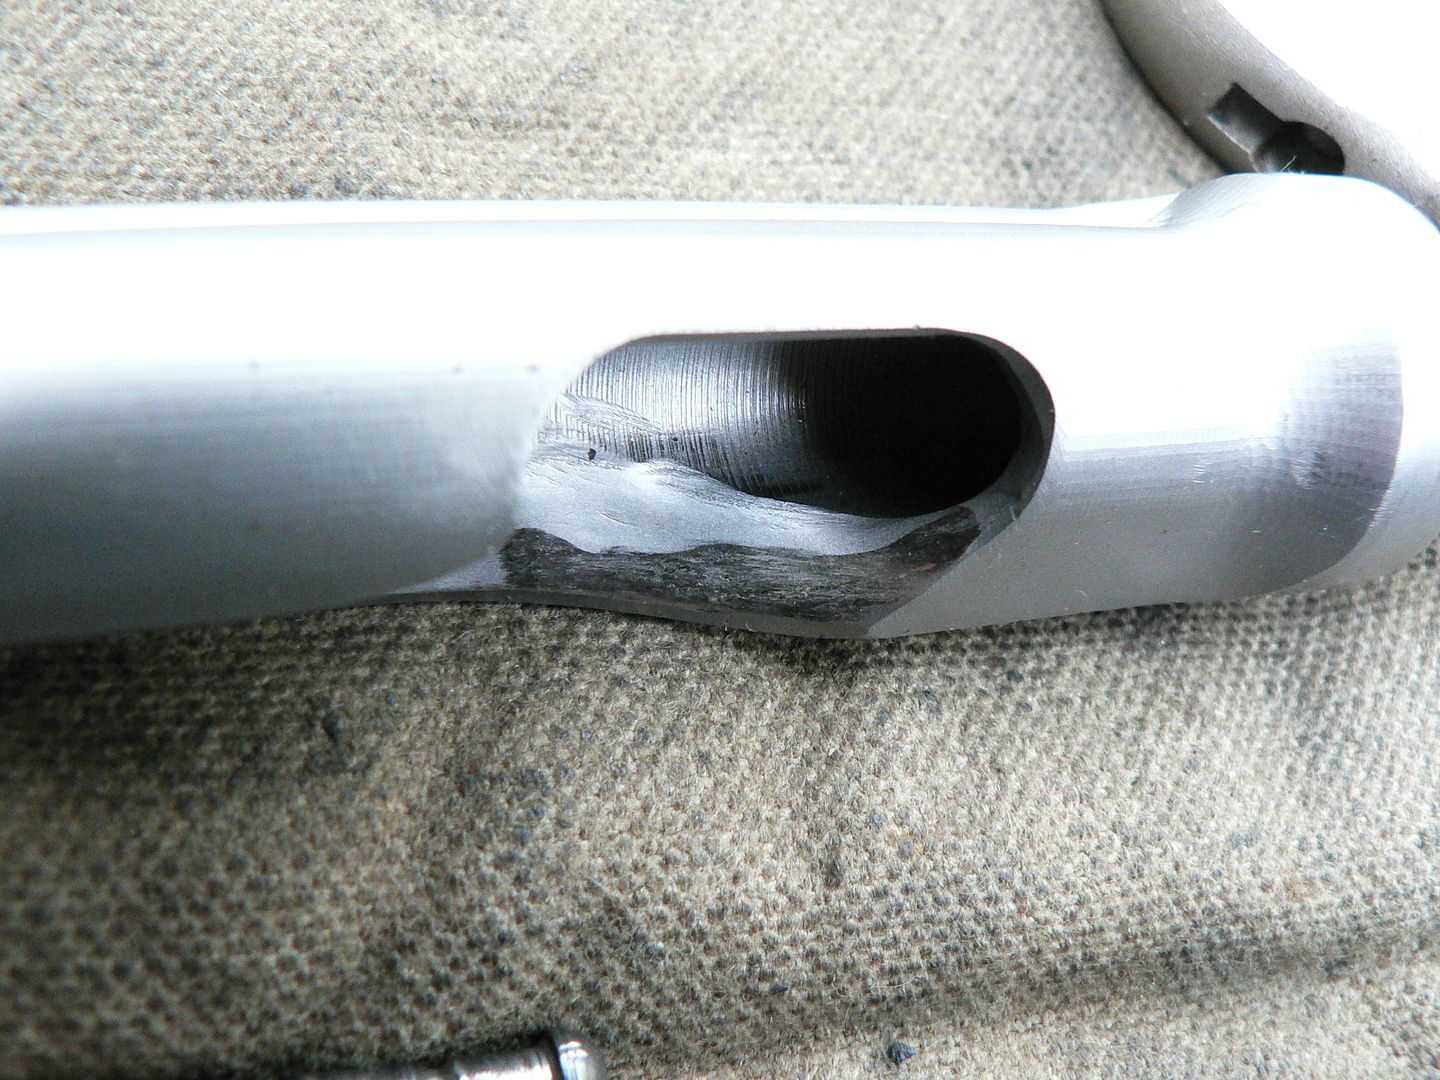 Wear areas on firing pin yoke. Front left: 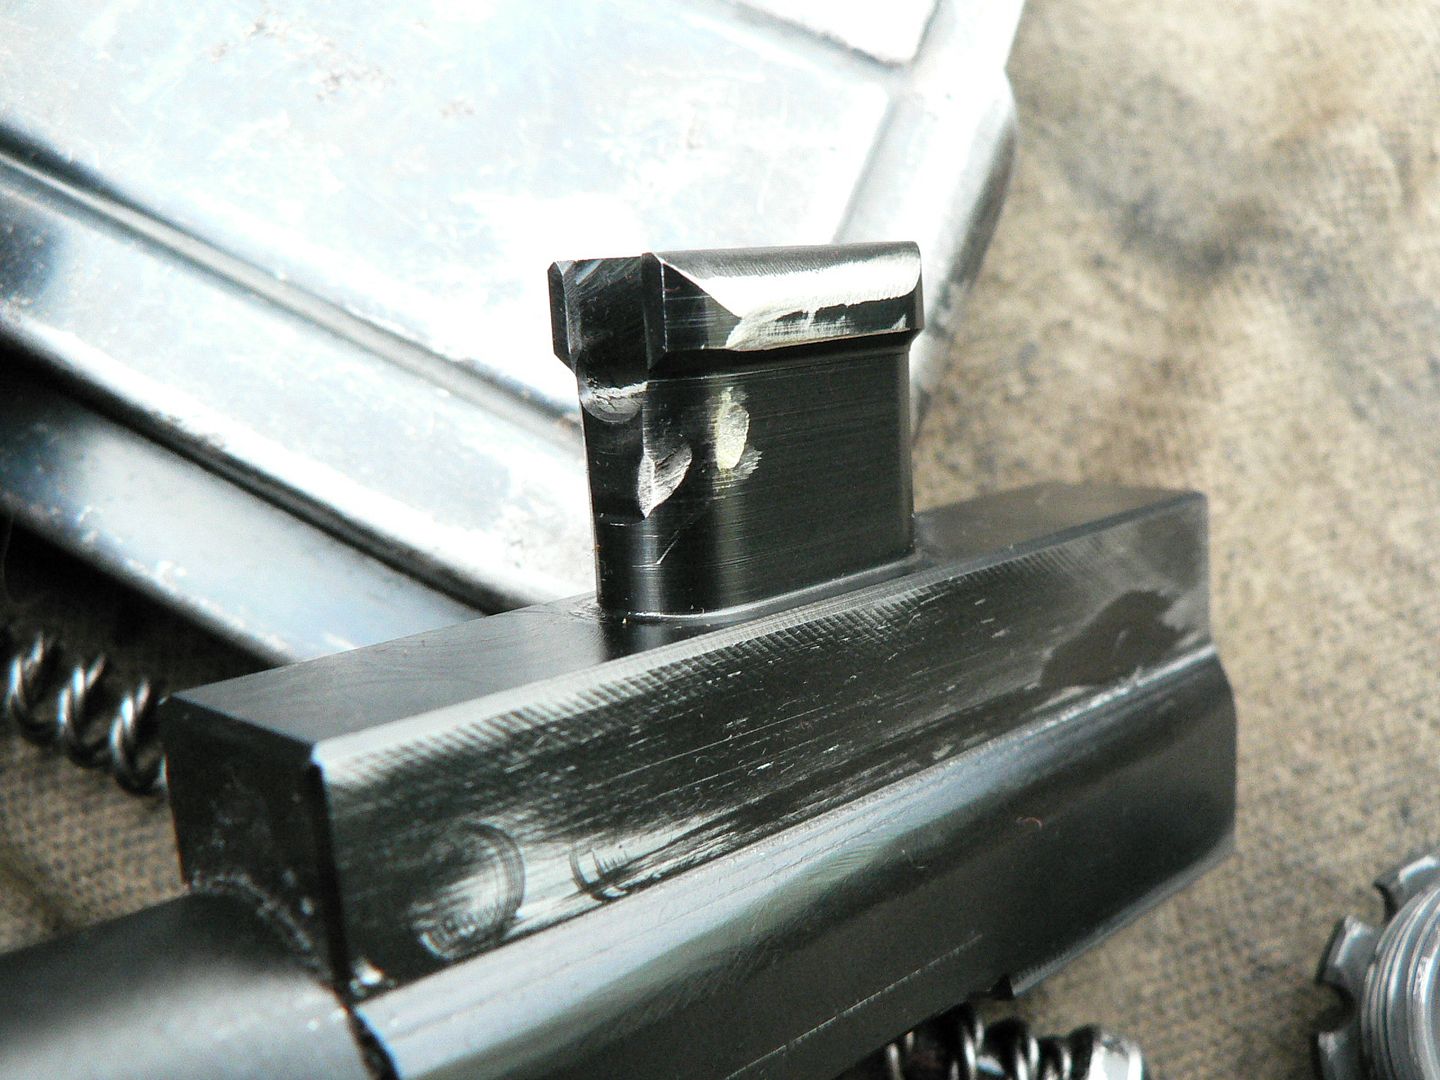 Right rear: 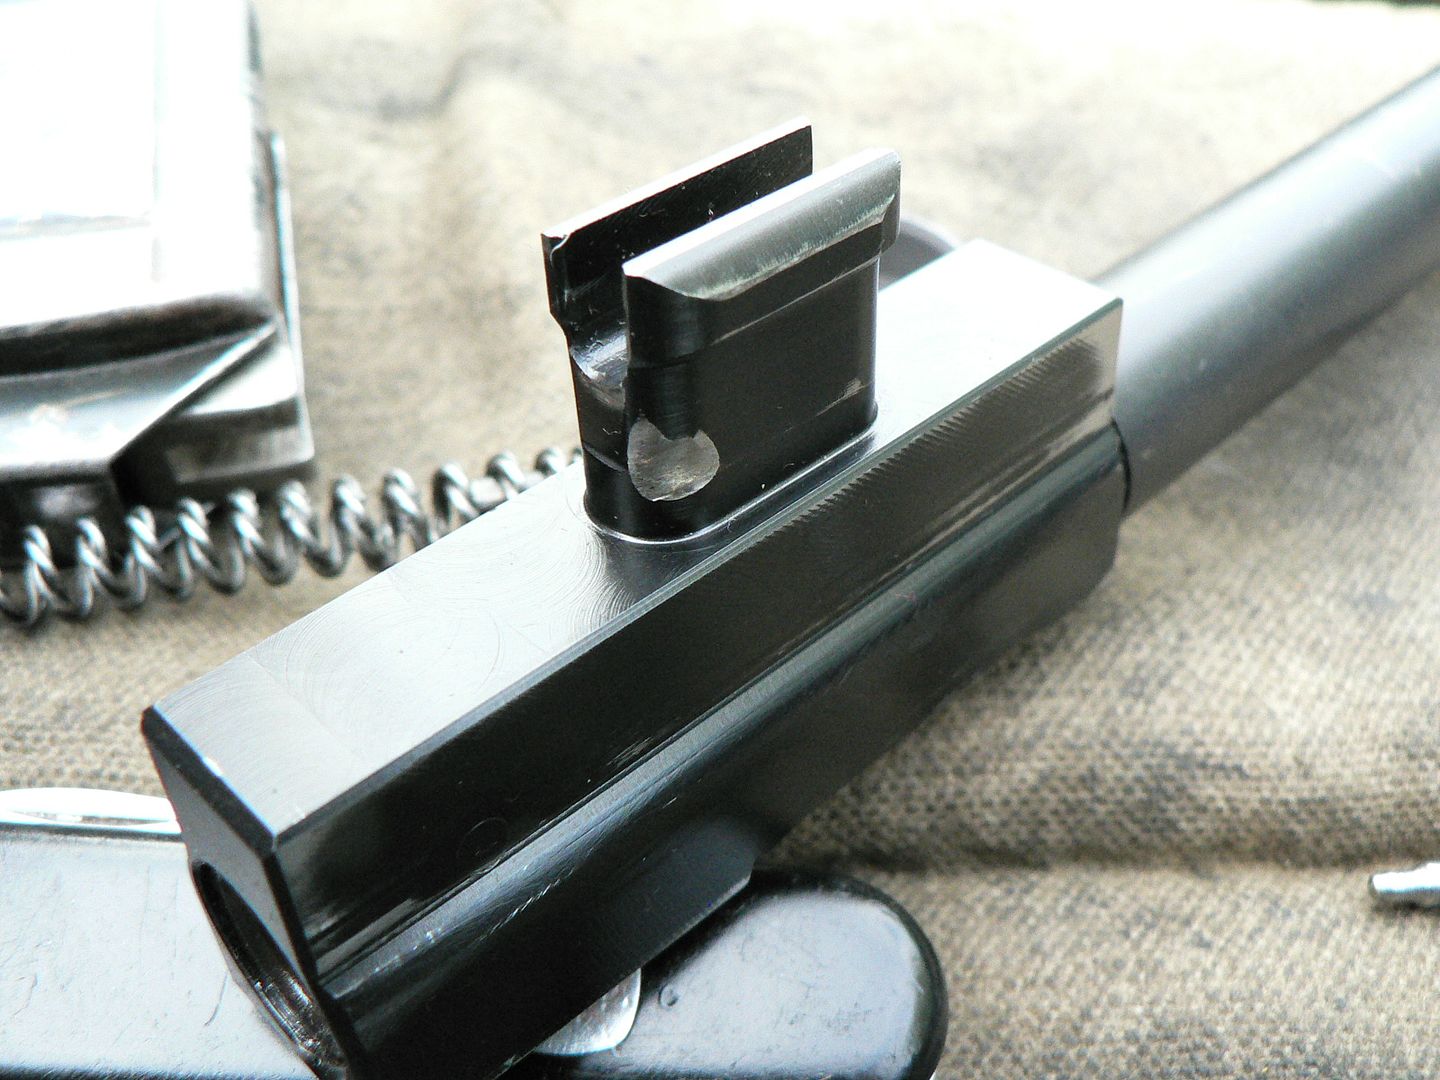 As noted in earlier posts, SMG says that this is perfectly normal. Firing pin and firing spring guide. They're finally starting to look nice and worn in: 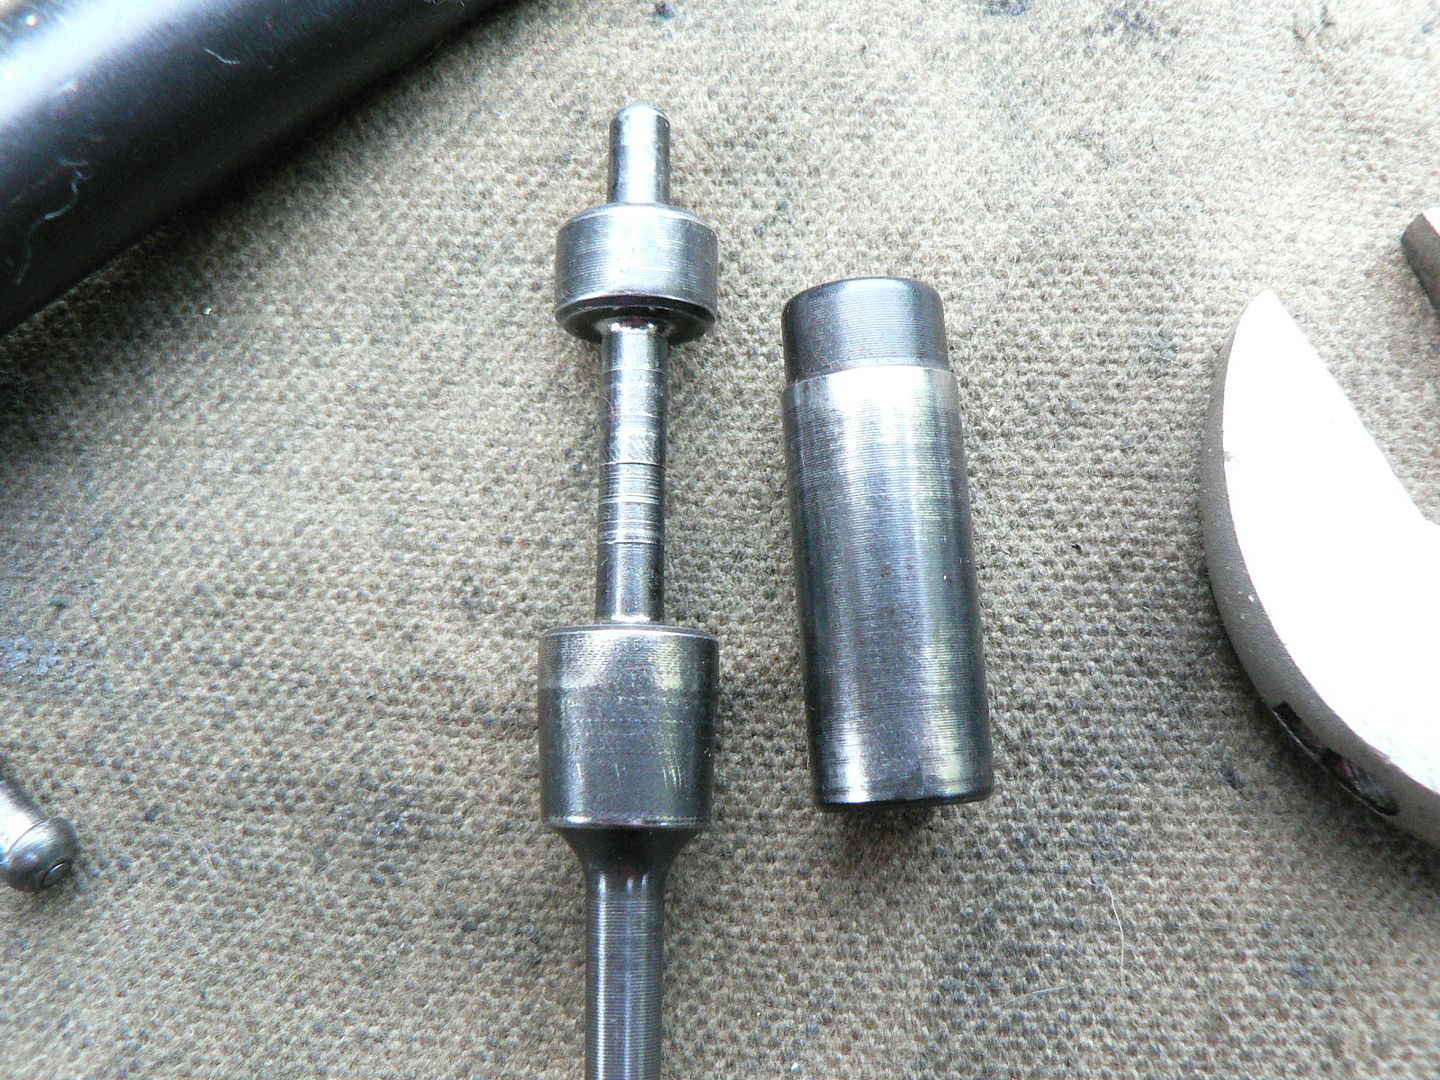 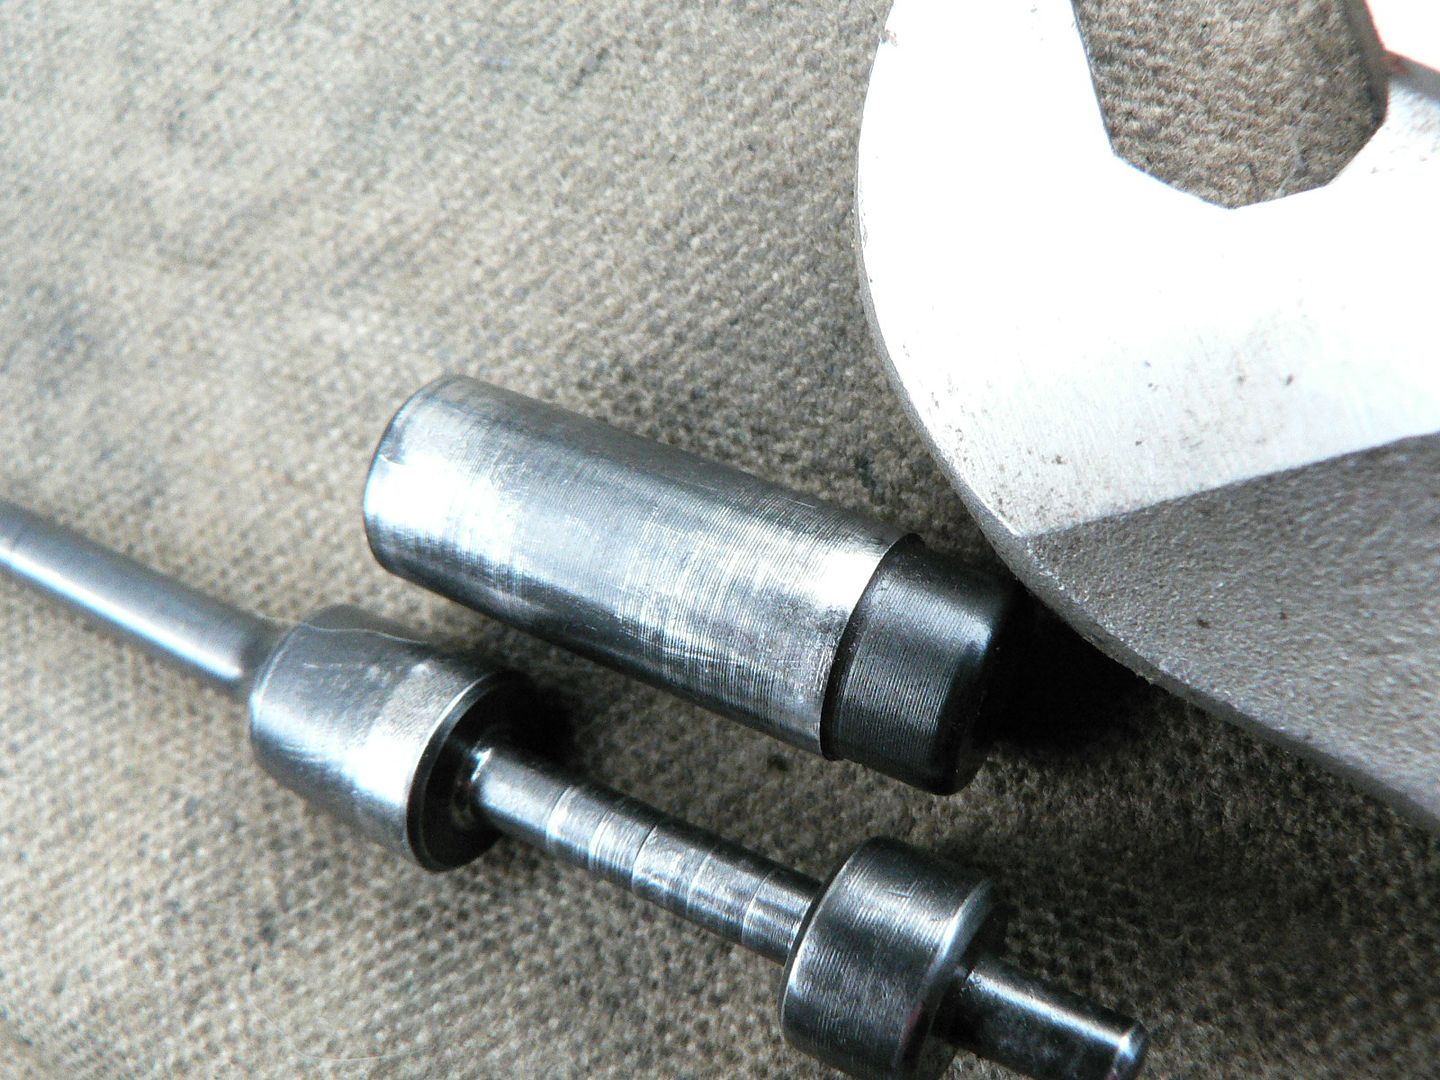 Rifling for no other reason than I haven't shown it before: 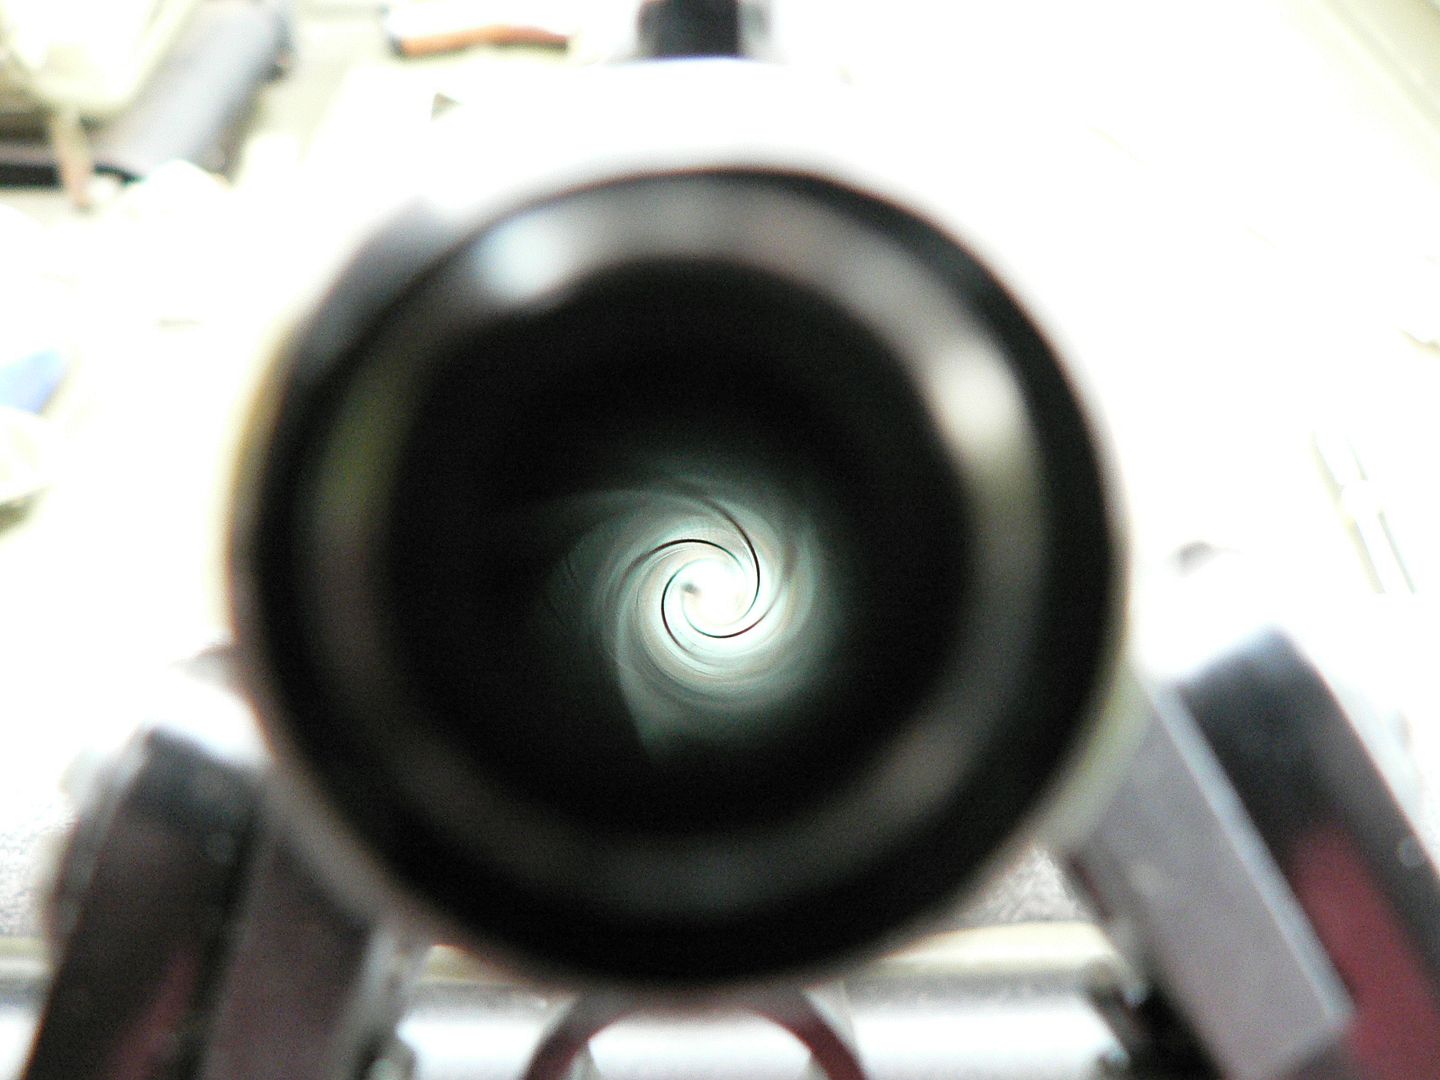  Breech/trunnion area dirty. This also shows some wear on the sear after only 99 rounds. Again, the trigger isn't ratchety so I'm not worried about that yet: 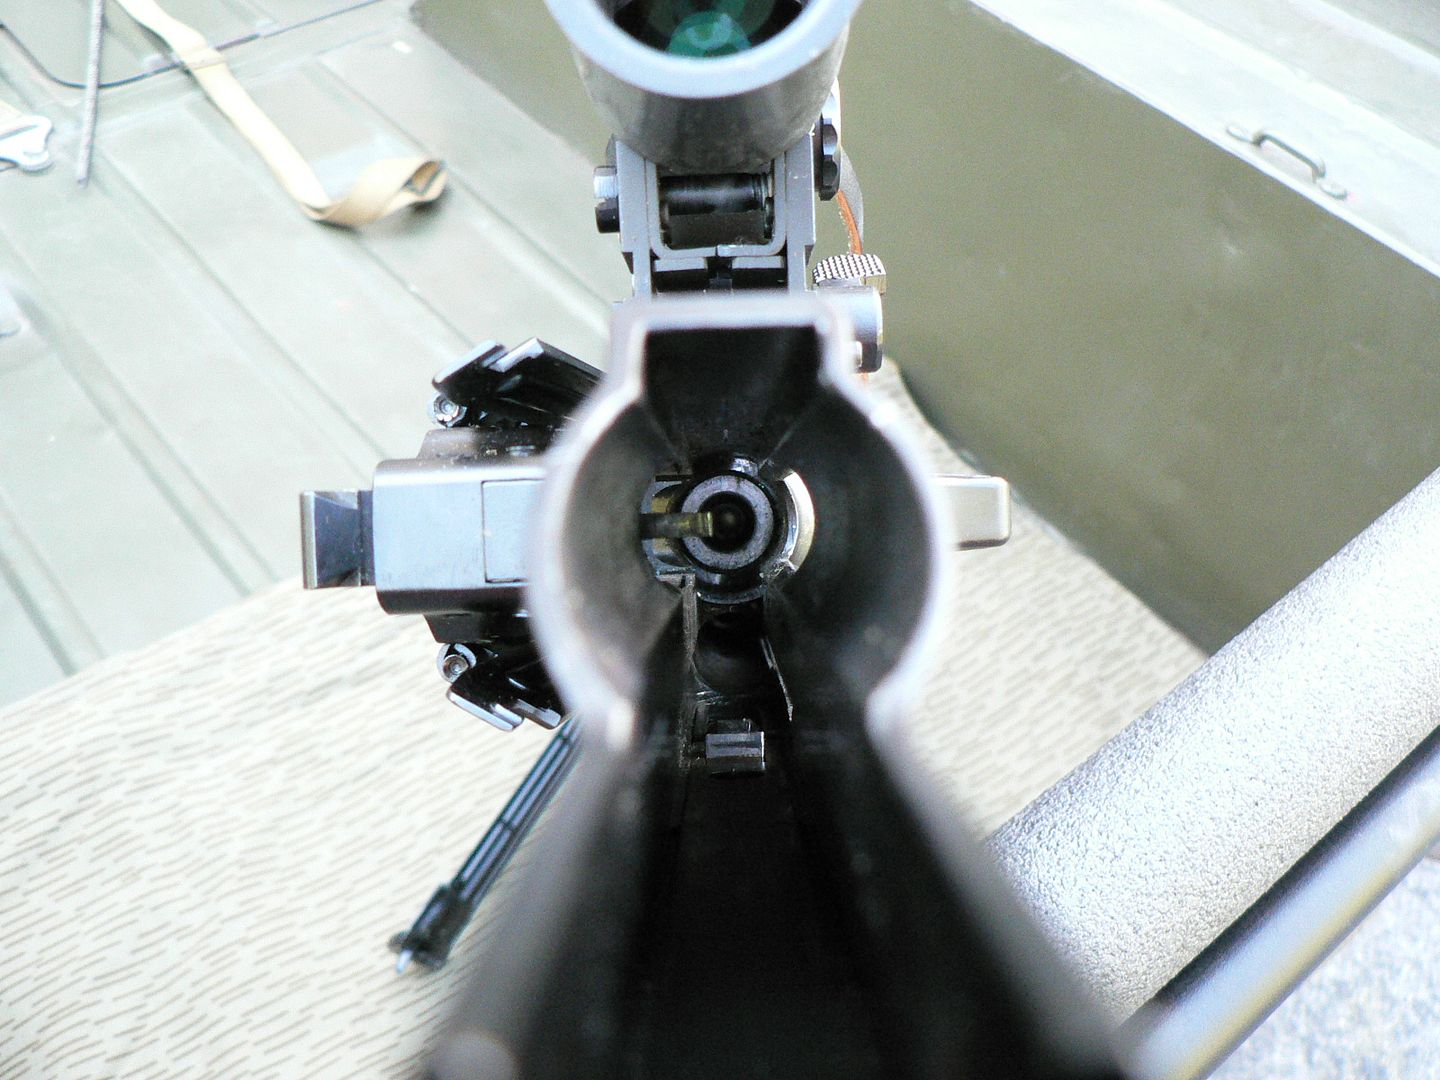 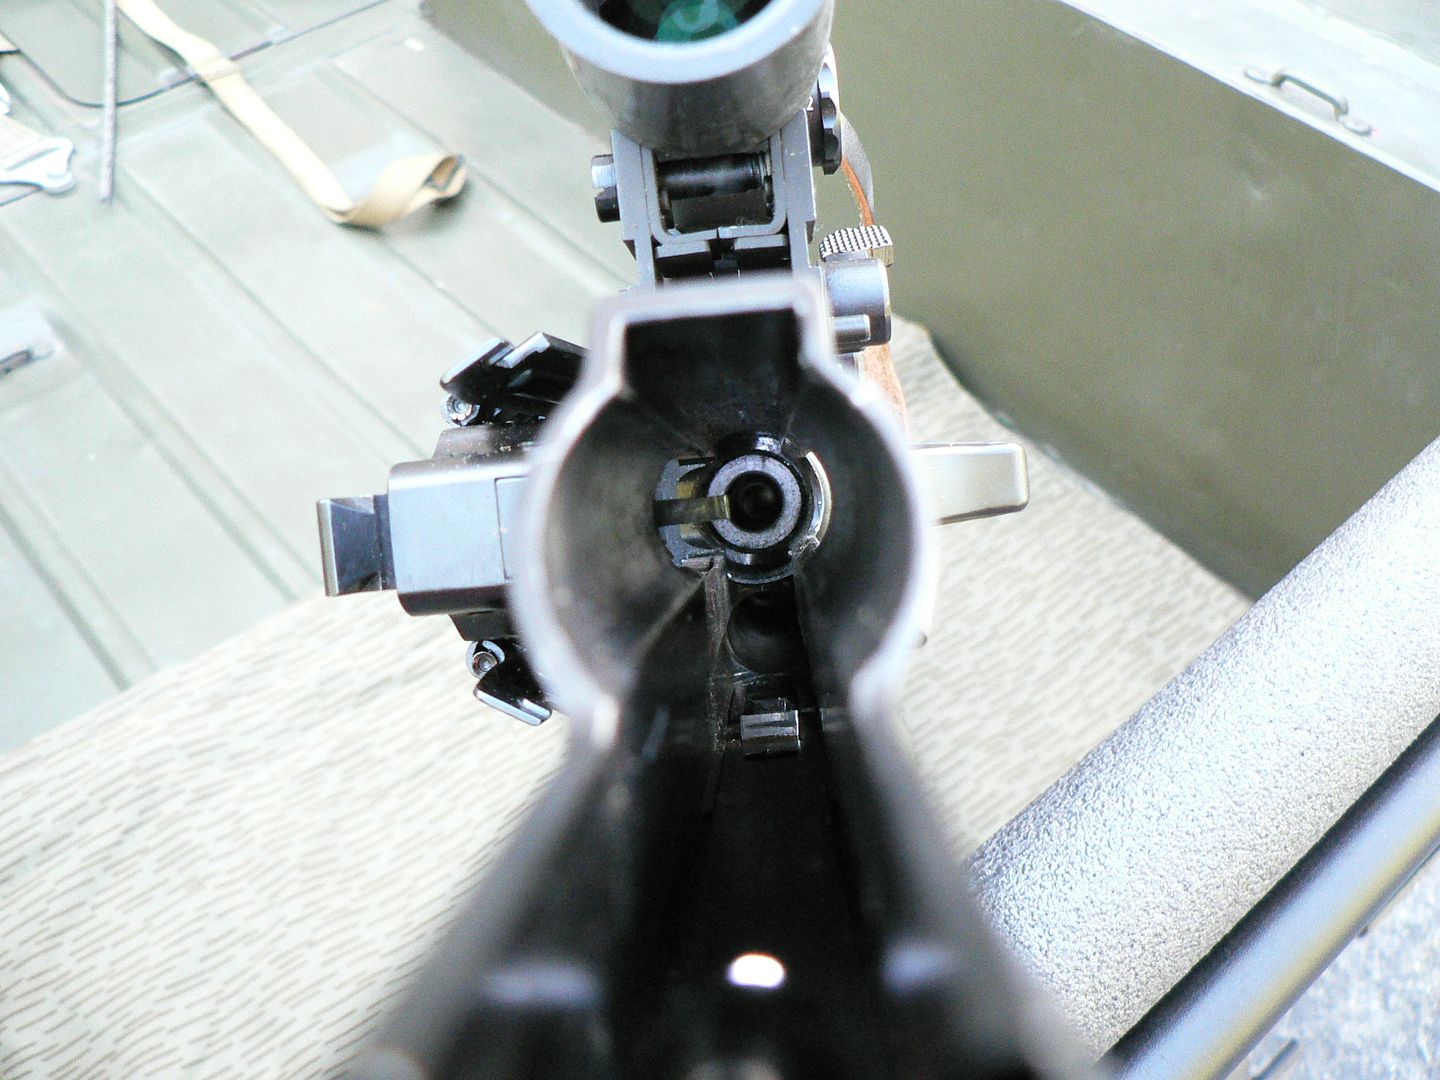 After cleaning: 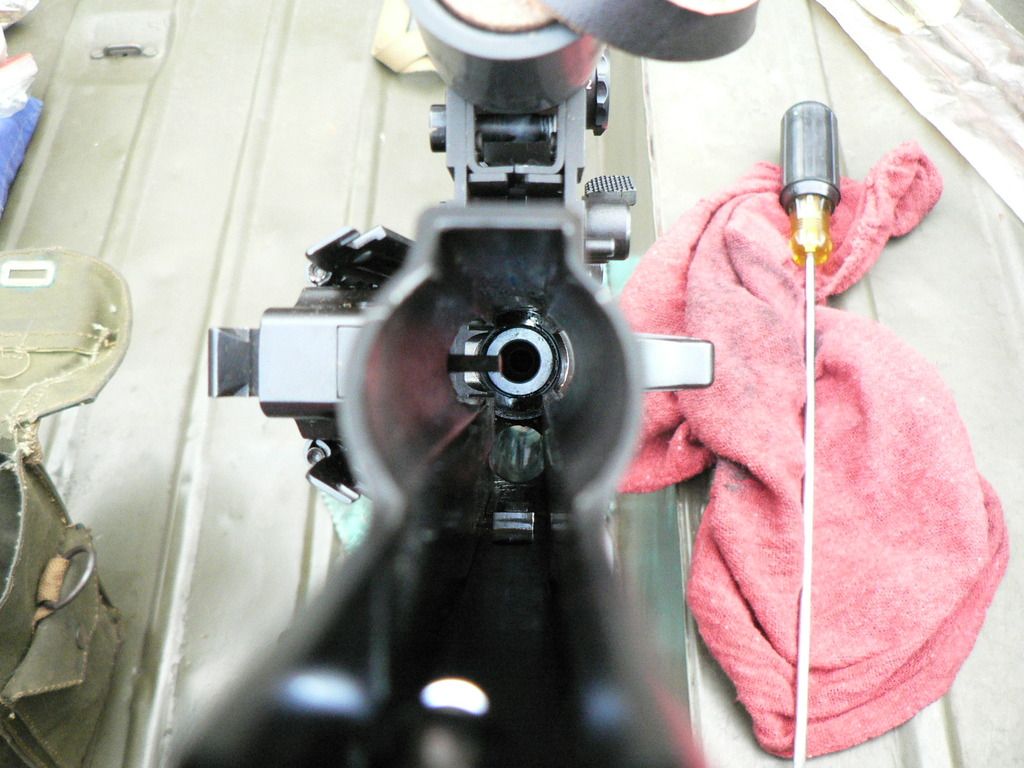 You have to periodically clean the breach and trunnion because the bolt lug locking recesses are up in there and it gets funky but it's almost impossible to get to because it's up in there deep. What I do is CAREFULLY spray some Brake Cleaner in there and flush all the gunk down the barrel. USE THE LONG STRAW ATTACHMENT so that you are squirting a stream rather than a mist and go with small bursts. You don't want to get that stuff on the wood because it will strip the finish right off on contact. The Brake Cleaner liquefies the grease and lifts the carbon fouling too. After you are satisfied that it's clean enough, dab a cotton rag down in there to soak up any remaining Brake Cleaner. This method of cleaning the quick, easy and effective. About grease. I've posted it before but I'm posting it again. I use Swiss Automatenfett. It comes in little plastic tubes with a screw lid and a brush in the lid. It came in the dirt cheap (as in cost NOT Quality) surplus Swiss cleaning kits for the STG57 that were all over the place just a few years ago and can still be easily found with minimal searching. This stuff is absolutely top notch Quality (it's Swiss so of courst it's the best) and just a little bit of the stuff goes a long way. I have a lifetime supply and love it. It doesn't break down with age or use and it stays where you put it. Here's what it looks like:  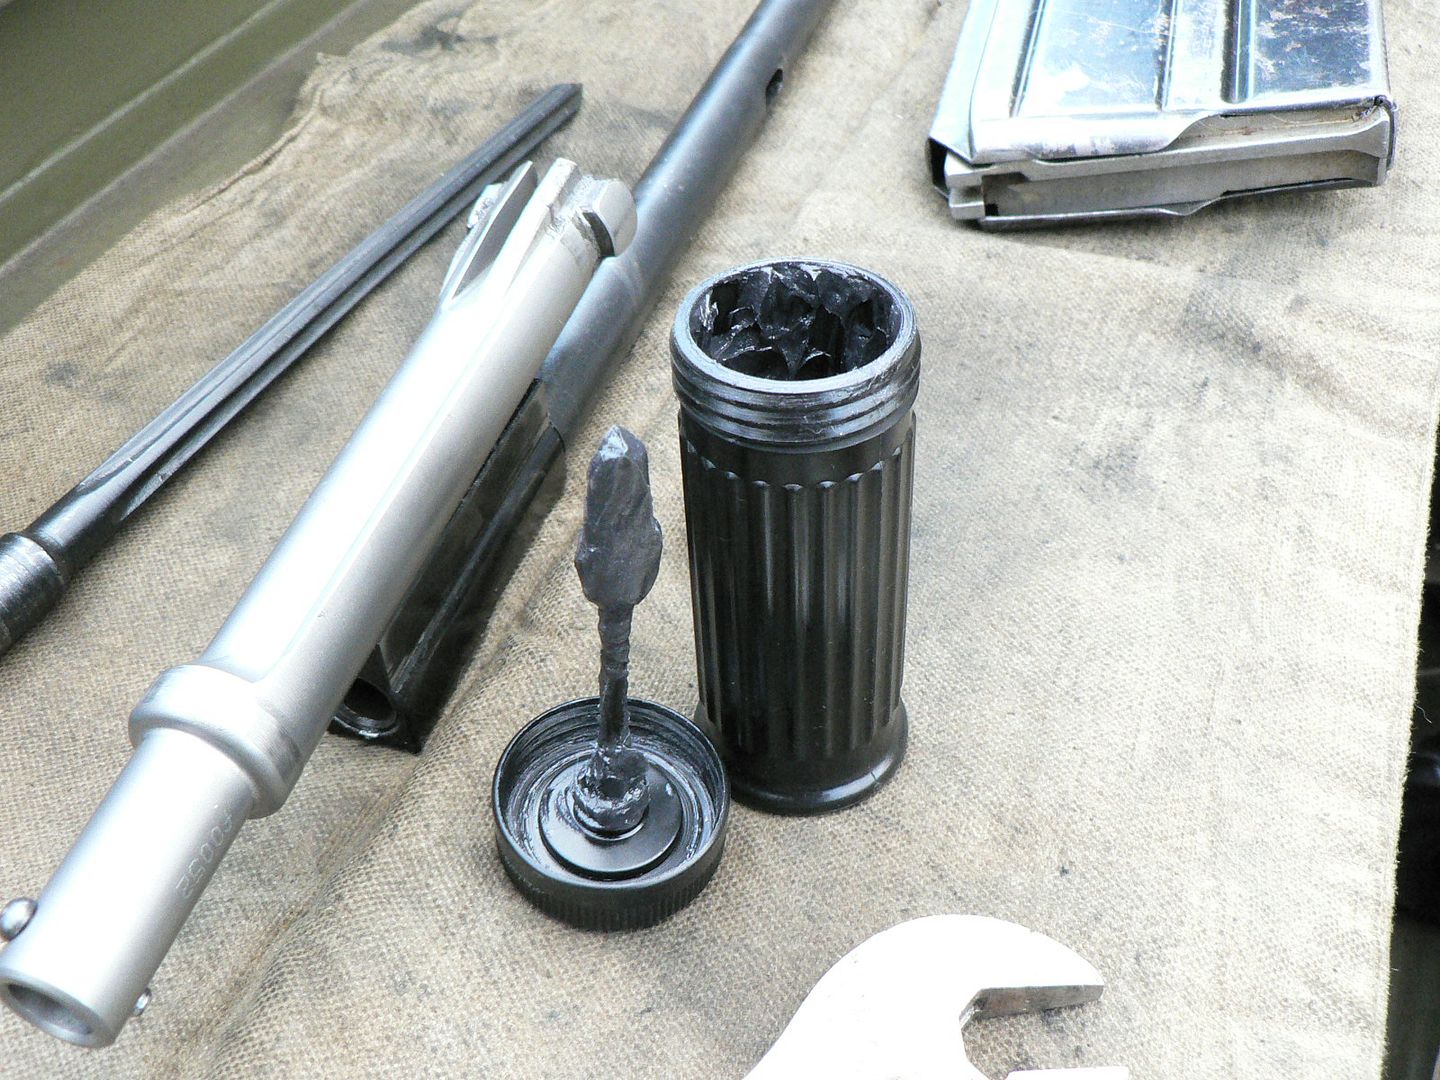 I use it on lots of firearms, not just the FG42. Get some....you will NOT regret it. Last are a couple more shots of the sear: 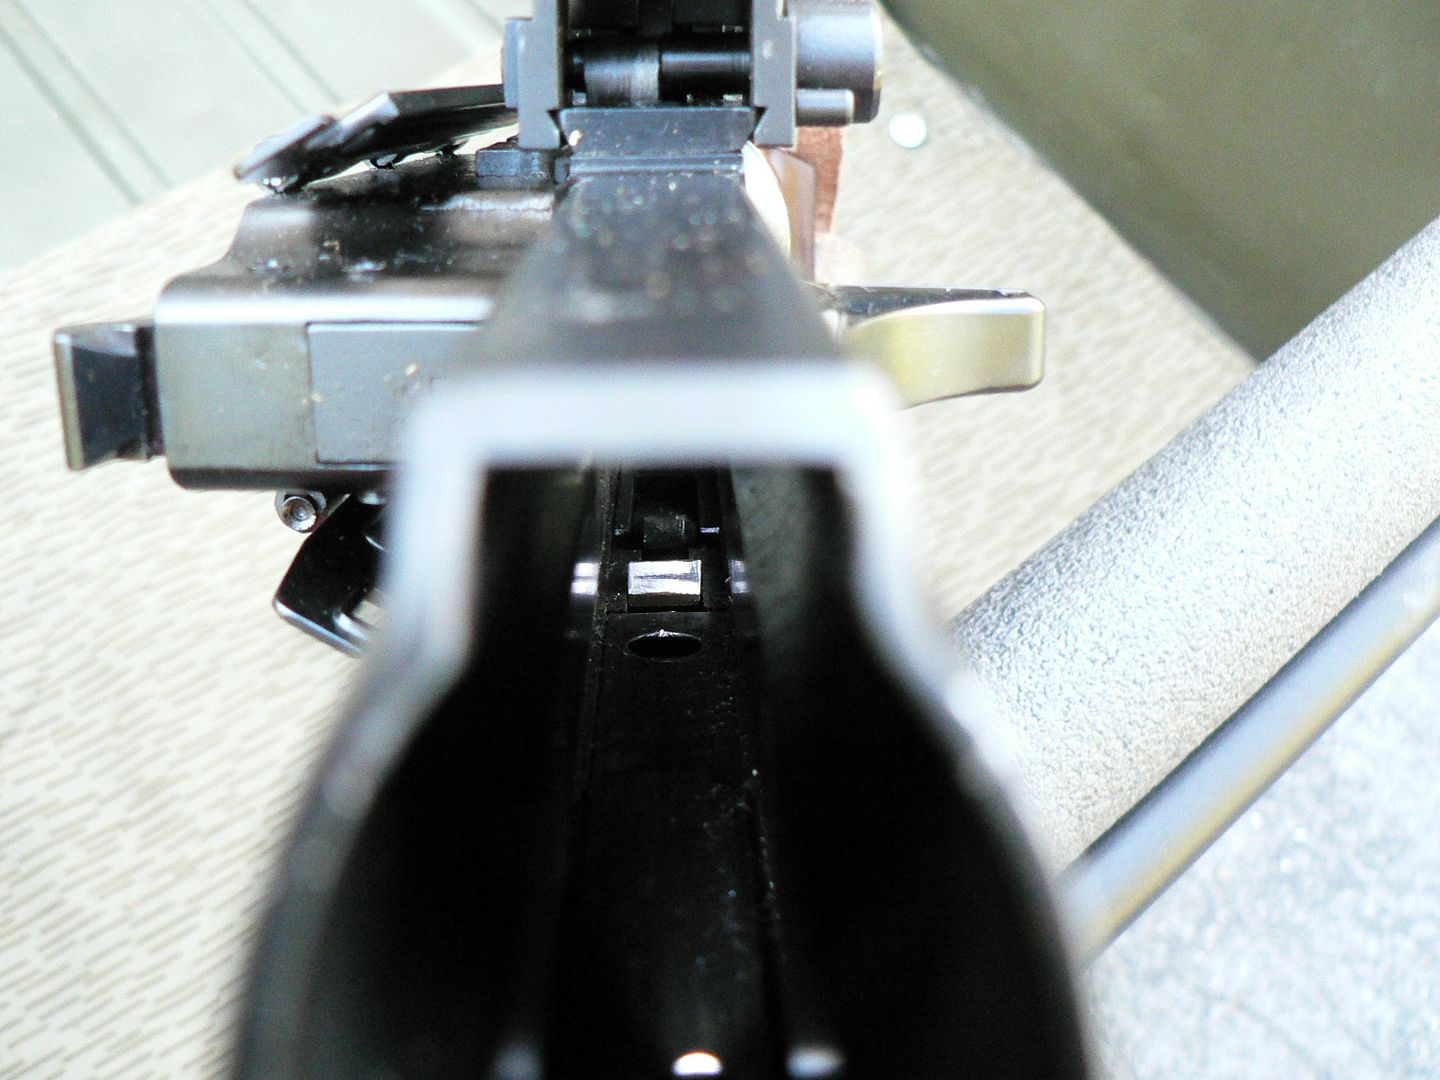 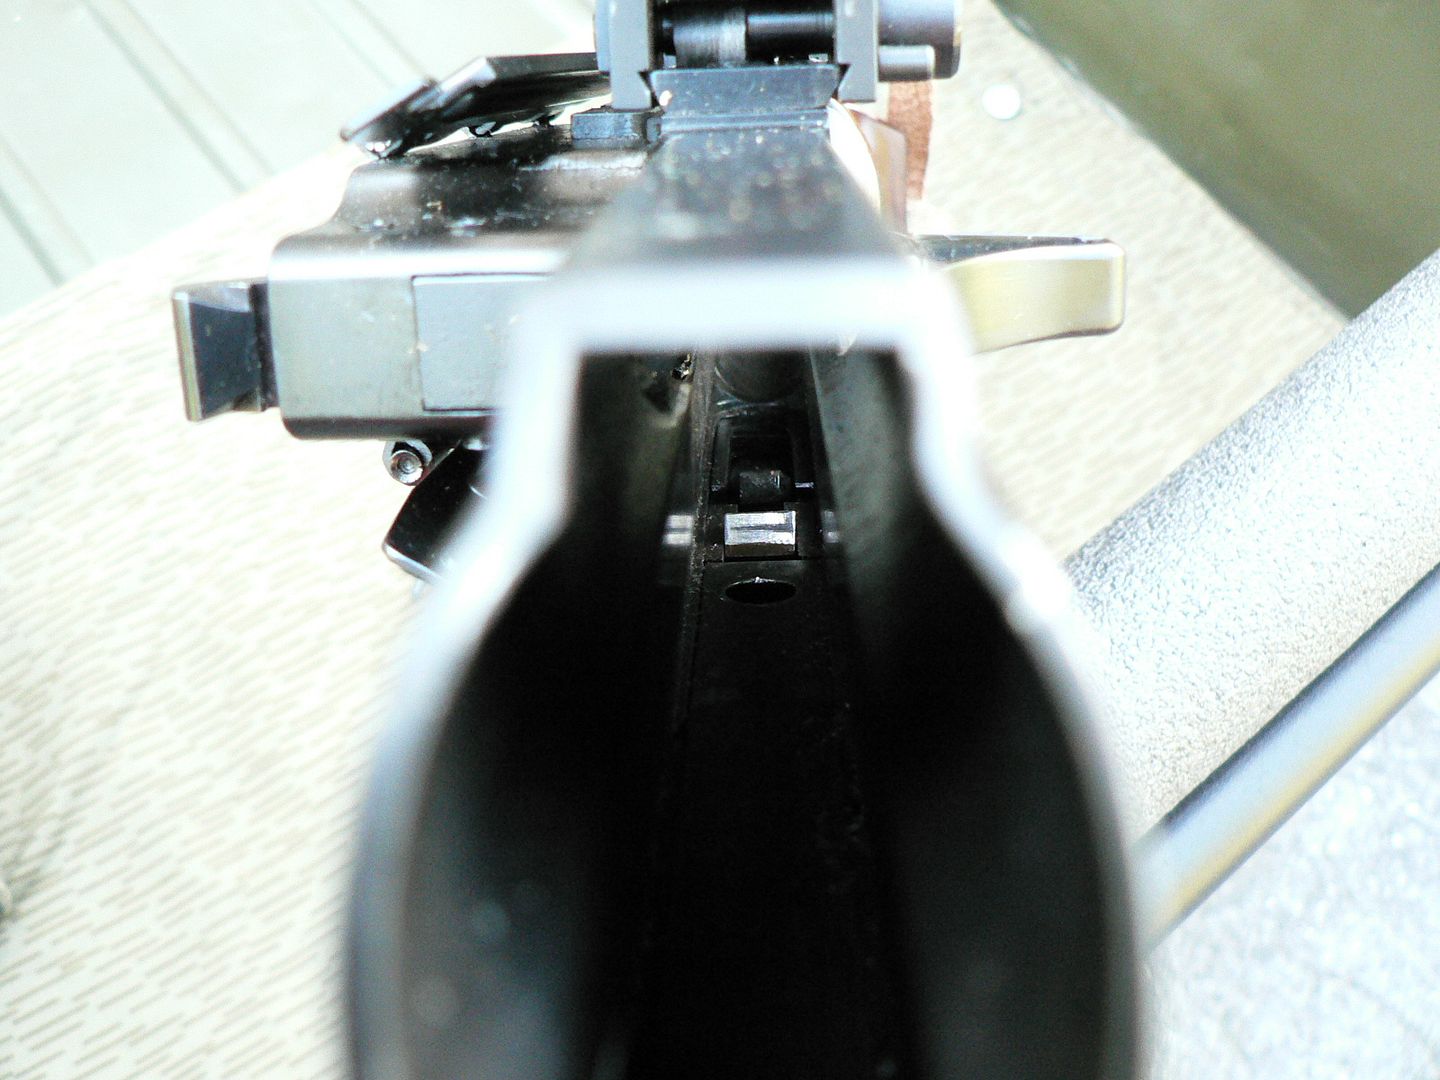 You can clearly see marks in the middle of the face but it's smooth (heavy but smooth) so far. I really do hope it holds up. If this one doesn't, I will send the rifle back to SMG prior to 1000 rounds to see what they can do. I can live with the locking issue until 1000 rounds but a scratchy ratcheting trigger is a deal breaker for me. I'm not spending 75 cents per round if I can't enjoy doing it. We'll see. That's it for today's range trip. I'm hopeful.......... See you soon.
__________________
I promise to be nice and play well with others |
|
|
|
| The following 4 members says Thank You to Wilhelm for your post: |
|
03-07-2017, 11:58 AM
|
#32 |
|
Lifer
Lifetime Forum Patron 
Join Date: Feb 2009
Location: ...on the 'ol Erie Canal...
Posts: 8,182
Thanks: 1,398
Thanked 4,440 Times in 2,328 Posts
|
Wilhelm -
Great writeup and excellent pics!  A couple questions... - Does the basic rifle come with a printed manual? One showing disassembly? - How many magazines come with the basic rifle? - Does the rifle need to be in Safe or Fire to remove the grip assembly? Are there any interior parts (in the receiver or gripframe) which could fall out when the grip assembly is removed? I am interested in the forthcoming Type 1 version and would like to get all the information I can about them... 
__________________
I like my coffee the way I like my women... ...Cold and bitter... 
|
|
|
|
|
03-08-2017, 12:22 PM
|
#33 |
|
Lifer
Lifetime Forum Patron 
Join Date: Jun 2002
Location: The Capital of the Free World
Posts: 10,152
Thanks: 3,003
Thanked 2,304 Times in 1,096 Posts
|
Wonderful Pictoral Essay on this rifle. Thanks for sharing and putting so much work into your article.
__________________
regards, -John S "...We hold these truths to be self-evident that ALL men are created EQUAL and are endowed by their Creator with certain UNALIENABLE rights, and among these are life, LIBERTY, and the pursuit of happiness..." |
|
|
|
|
03-08-2017, 12:55 PM
|
#34 | |
|
Lifer
Lifetime Forum Patron
Join Date: Feb 2009
Location: ...on the 'ol Erie Canal...
Posts: 8,182
Thanks: 1,398
Thanked 4,440 Times in 2,328 Posts
|
Quote:
Wilhelm had a follow-up to this thread - FG42 First Range Trip http://forum.lugerforum.com/showthread.php?t=33082
__________________
I like my coffee the way I like my women... ...Cold and bitter...
|
|
|
|
|
|
03-14-2017, 10:22 AM
|
#35 | |
|
User
Join Date: Oct 2007
Location: Maryland
Posts: 340
Thanks: 43
Thanked 107 Times in 51 Posts
|
Quote:
Yes, it comes with a manual that shows disassembly. The manual could be better but it gets the job done. I have extras so I forget exactly how many actually came with it. IIRC, it comes with two magazines. It might come with three but I'm leaning towards two. Guaranteed more than one. It MUST be on fire. Also, it MUST be on fire when charging the rifle. If it is on safe, you will lock things up at a minimum (requiring disassembly to correct). At worst, you will damage the fire control components. Nothing will fall out when you separate the grip from the receiver BUT be aware that the trigger axle pin is held in by the locking plate and it can easily be pushed out without the locking plate holding it in place.
__________________
I promise to be nice and play well with others |
|
|
|
|
| The following member says Thank You to Wilhelm for your post: |
|
03-14-2017, 10:43 AM
|
#36 |
|
User
Join Date: Oct 2007
Location: Maryland
Posts: 340
Thanks: 43
Thanked 107 Times in 51 Posts
|
Also, there have been updates that I forgot to post here. I will post them now:
08/27/16 Today, I took the FG42 out for the first since May of last year. I got to the range and a local C&R club was there so there was a decent number of people with a bunch of WWI and WWII firearms. One guy even had a semi auto 1919. As I walked down the line, people actually set their rifles down and got up to follow me. By the time I got to my bench, there was actually a crowd a people around me gawking and making "oohs" and "ahhs" sounds. I hate attention. So, I answered a bunch of questions (Where did you get that? , How much did it cost?, etc,) and made nice until everyone went back to what they were doing. I set my target up at 100 yards and loaded up two magazines. By the time I was halfway through my first magazine, there was a crowd again. Did I mention that I hate attention? The first magazine went off just fine. Magazine two, round thirteen.......the right bipod leg snaps at the axle and the muzzle falls flat on the bench. In the process, the bolt cycles but the round does not extract so a live round rams up into the back of the spent casing and rams the bullet into the case causing a jam. So, I pull the bolt back, remove the magazine, dump out the live round and let the bolt go home on the empty casing. I try to pull the bolt back to extract the spent casing and it's LOCKED....again. A 19-20 year old kid walks up to me with his $100 Mosin rifle that has been functioning perfectly and says, "That's some well built German steel ya got there. How much did you say you paid for that??" 20 minutes later, I'm home and the rifle has cooled down. The bolt opens easily and the empty casing falls out on my kitchen floor. After approx. 429 rounds through this thing, I'm done with commercial firearms. Pictures: 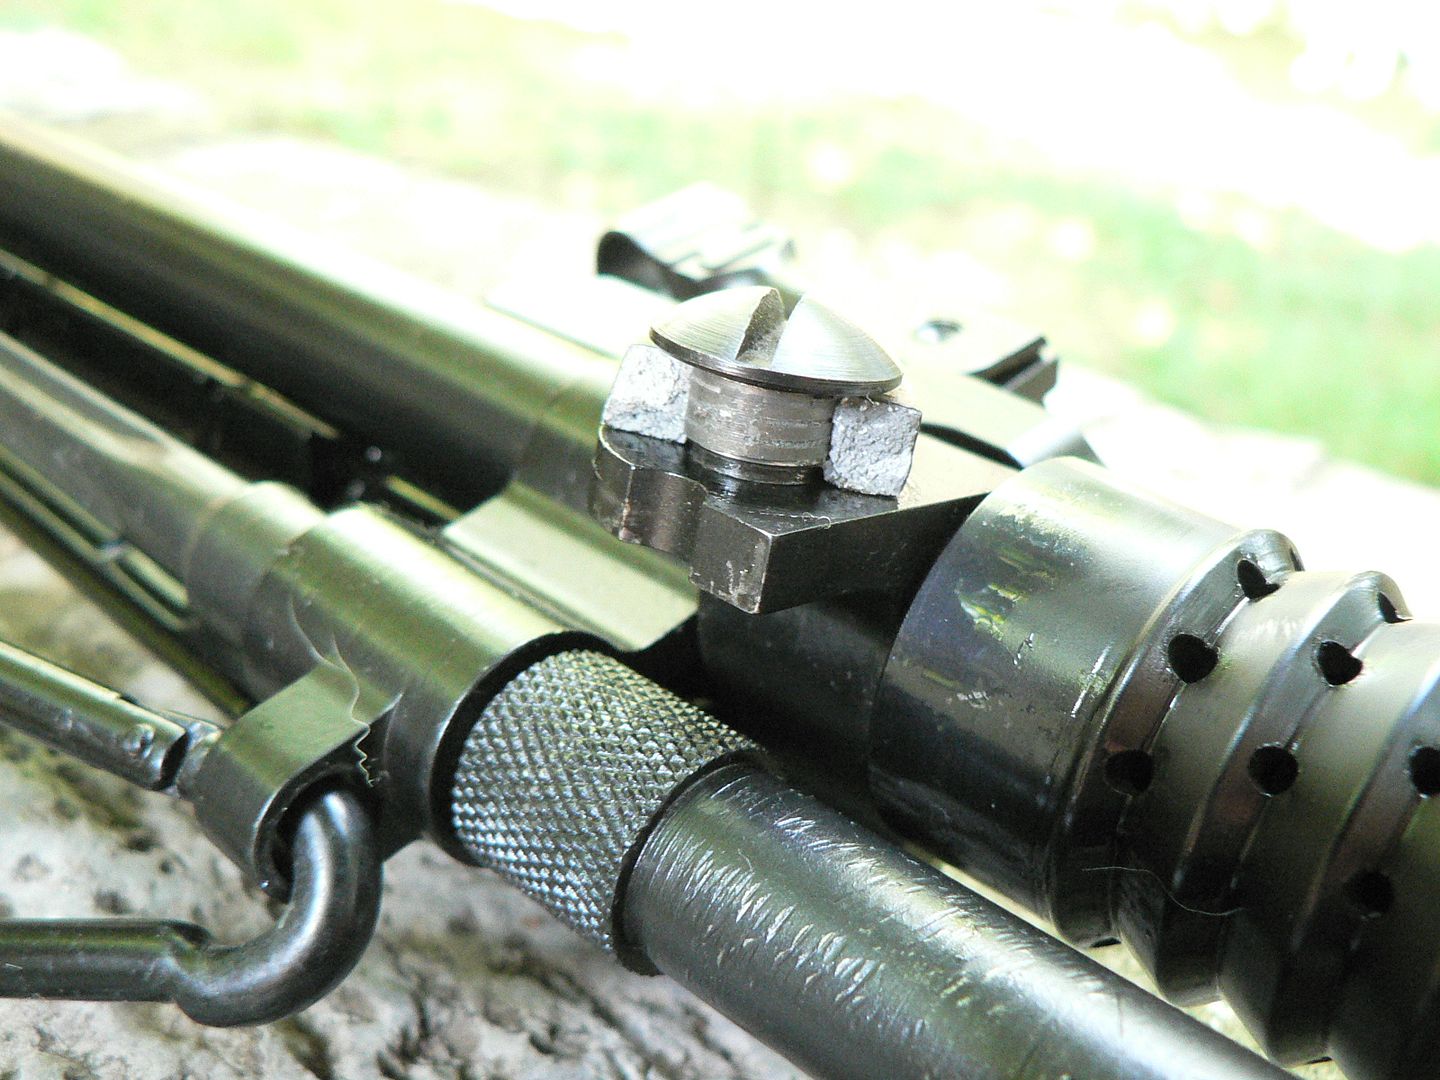 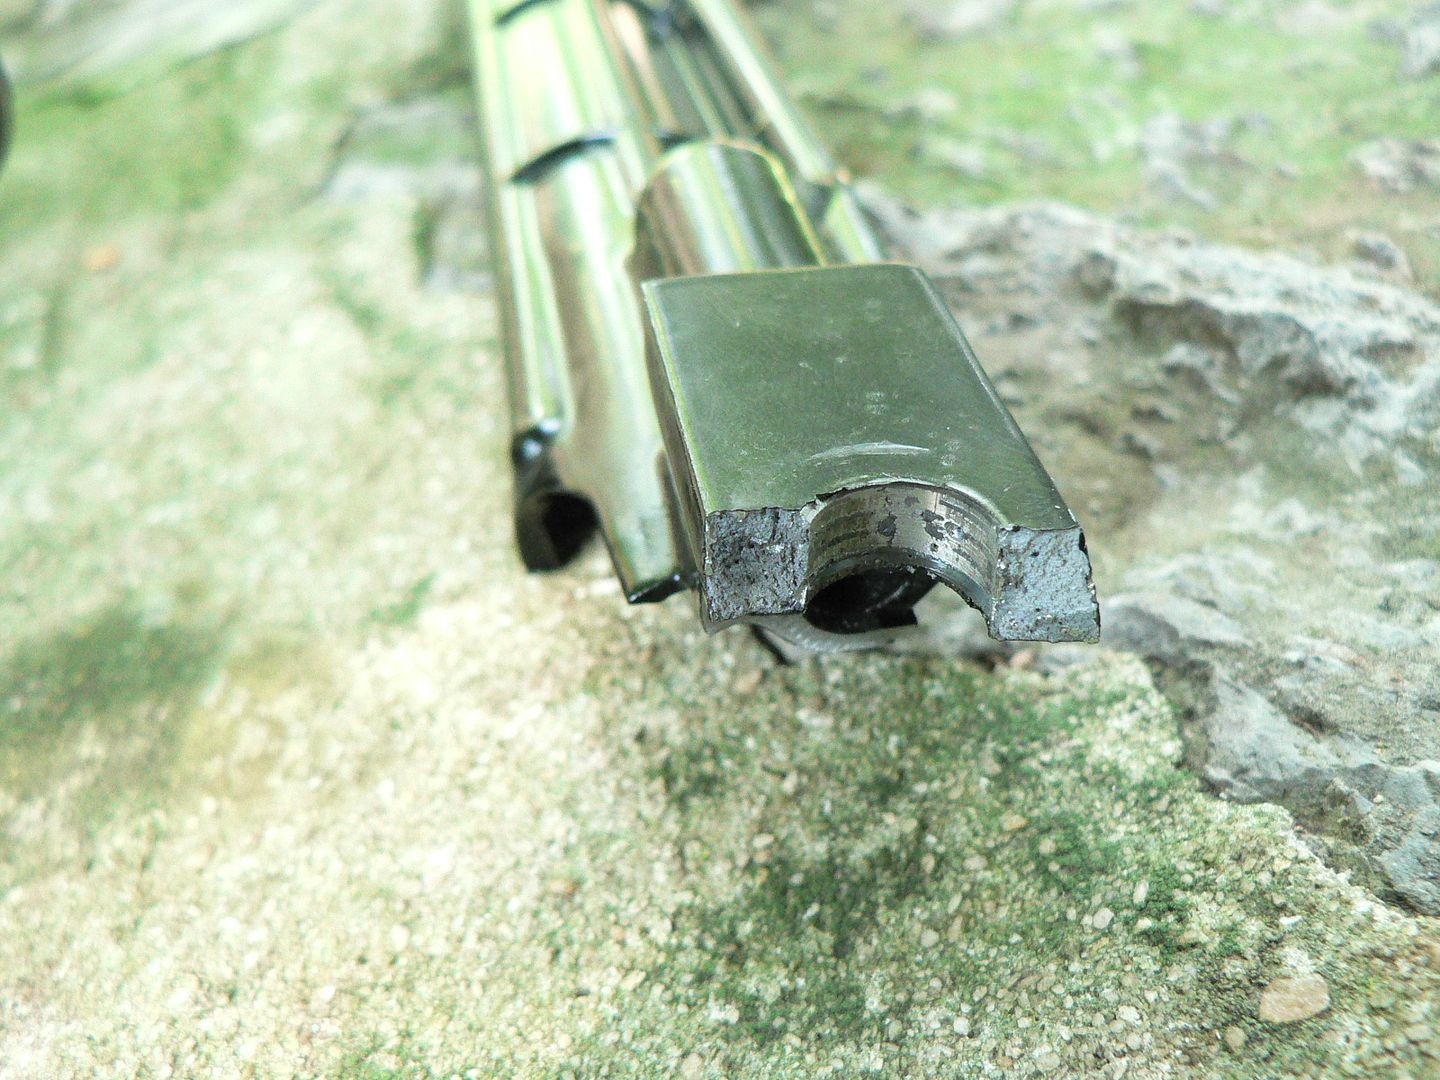 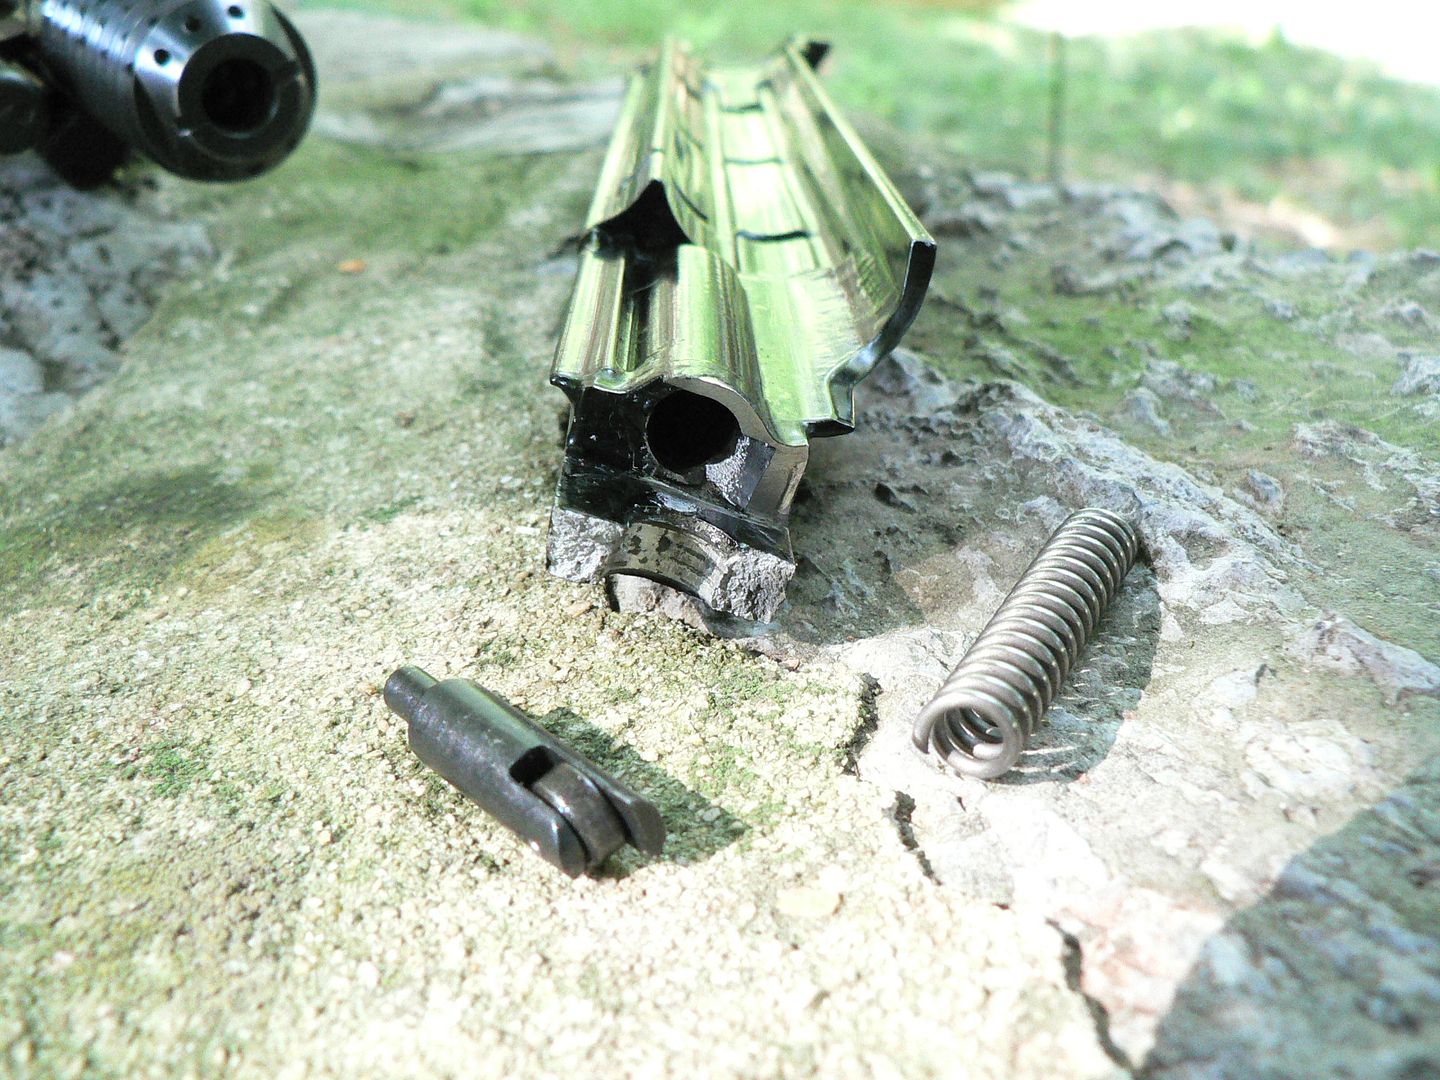
__________________
I promise to be nice and play well with others |
|
|
|
|
03-14-2017, 10:44 AM
|
#37 |
|
User
Join Date: Oct 2007
Location: Maryland
Posts: 340
Thanks: 43
Thanked 107 Times in 51 Posts
|
09/21/16:
Today, I received my bolt and replacement bipod leg back from Rick Smith at SMG. I figured that, while I was sending the bipod leg back for replacement, I might as well send the bolt in for resizing too because Rick says that will clear up the lockup issue I have been experiencing with a hot rifle since it was new. I sent the parts out to him via registered mail and he must have begun work on them as soon as they arrived because he contacted me just a couple days (at most) after receiving them to tell me that they were ready to be shipped back. They arrived via FedEx packed just literally exactly as I had shipped them to him. He used the same box and even the same packing material. This was perfectly fine by me as I tend to over-pack things for protection. When I unwrapped the parts, I was pretty amazed at what I saw. I expected the bipod leg to be new and it was so no surprise there. What amazed me was the bolt. It's 100% guaranteed my bolt but it looked absolutely new. I had cleaned it off with carb cleaner prior to sending it in to Rick so that he wouldn't get a funky bolt to work on but the wear marks were a bright silver and contrasted with the overall dull grey finish on the part. I don't know what Rick did but, while the wear marks can still be seen upon close inspection, the finish is back as it was when new. Perhaps he bead blasted it? I don't know but the work is VERY professional As an example, here's what the cam slot looked like when I sent it in: You can clearly see the bright spot where the cam on the carrier rubs. Now, here is what that area looks like now: 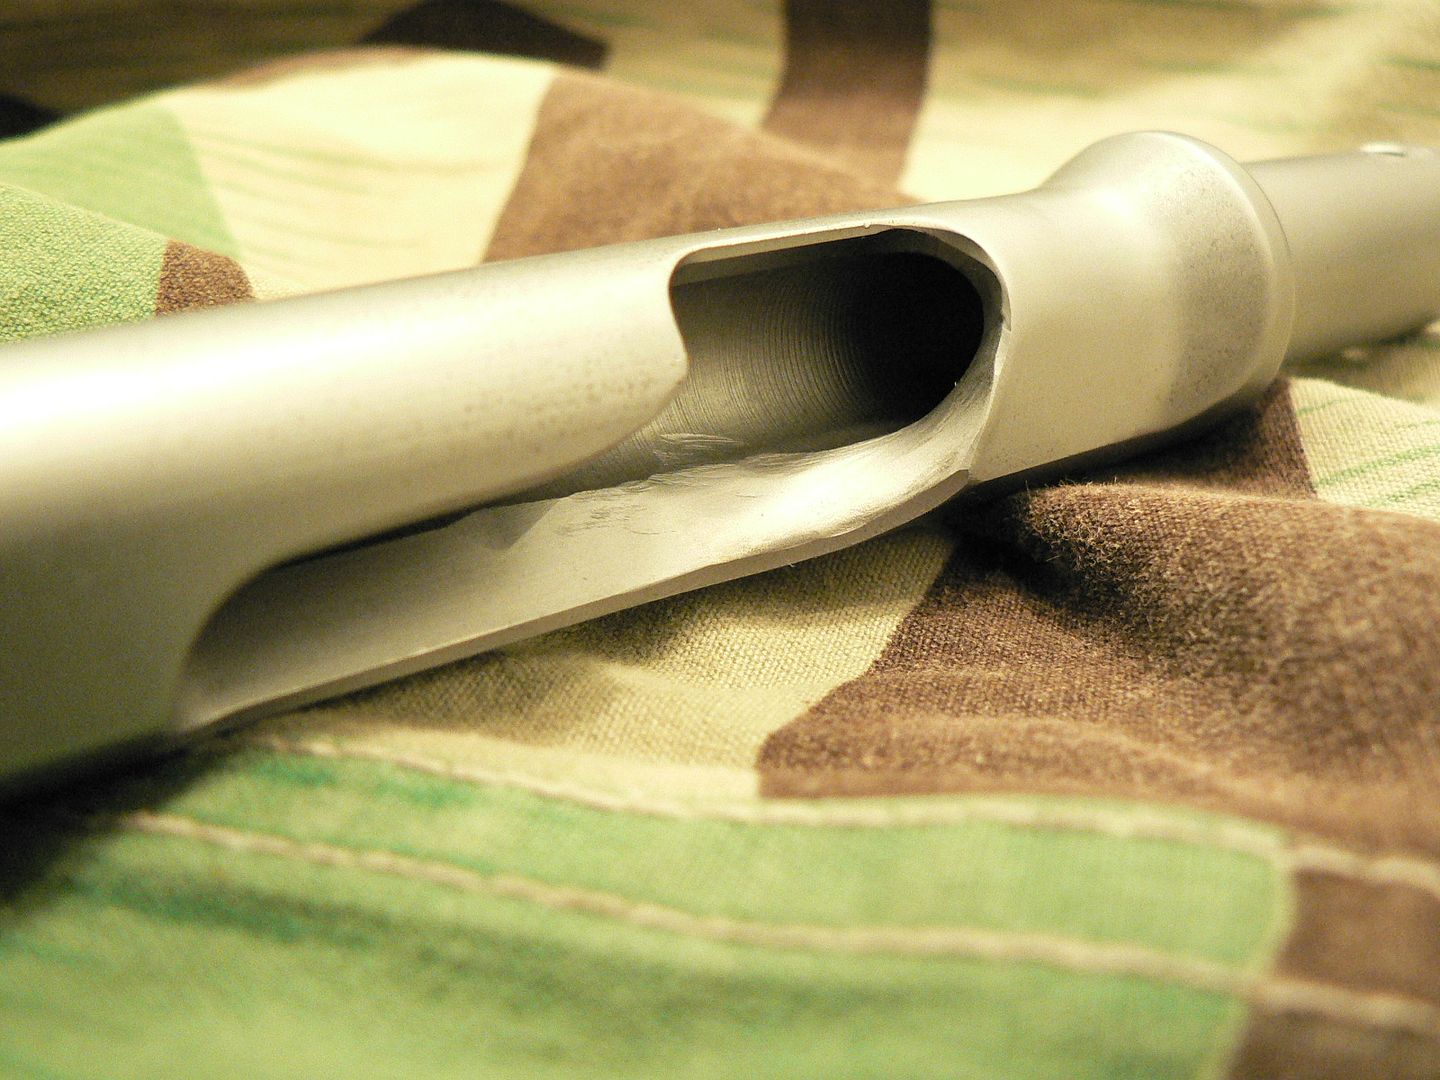 Schweet! To be clear, it doesn't appear that any metal was removed. No polishing or work of any kind appears to have been done. It's just that, whatever SMG did, the original look of the finish was restored. Of course, one range trip will put it back to how it was; I just want to impart how thorough it appears Rick is. This is Excellent attention to detail and that equates to Excellent customer service. Here's the bolt overall: 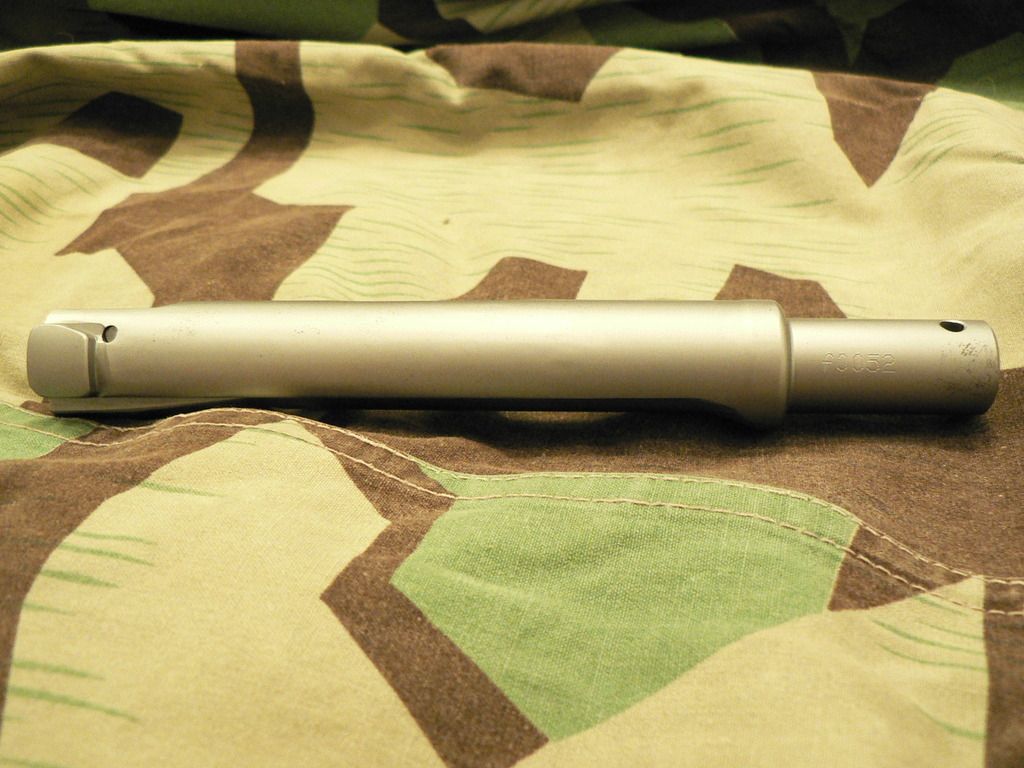 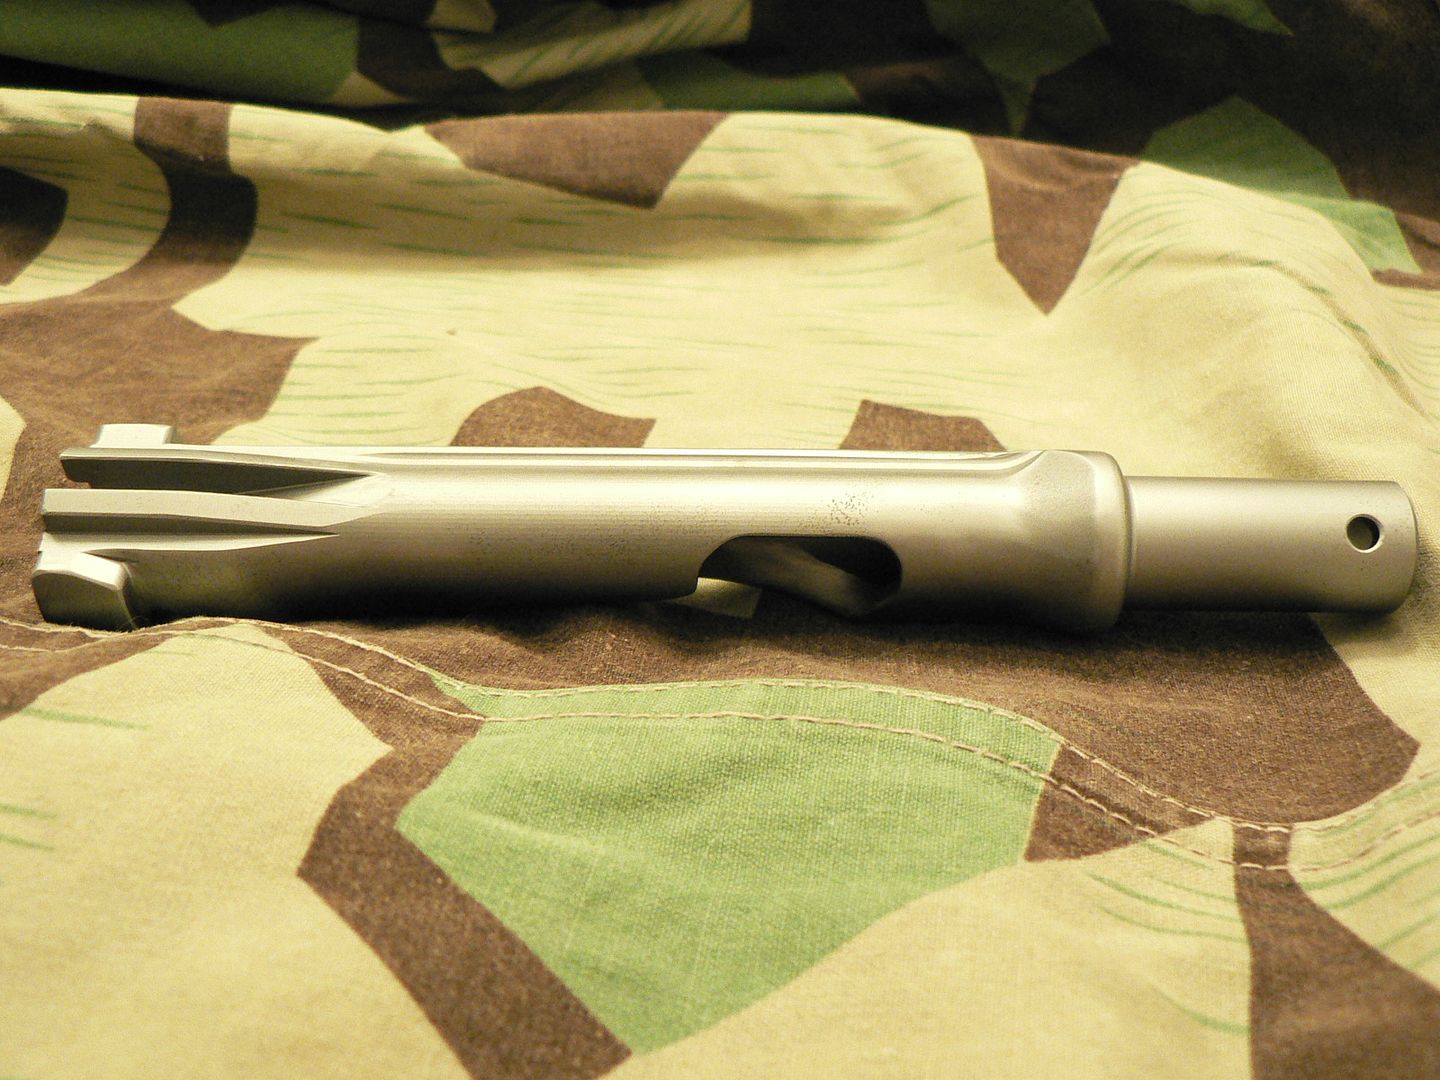 Rick also replaced the extractor spring. He said that the one on it seemed a little weak. A few close-ups: 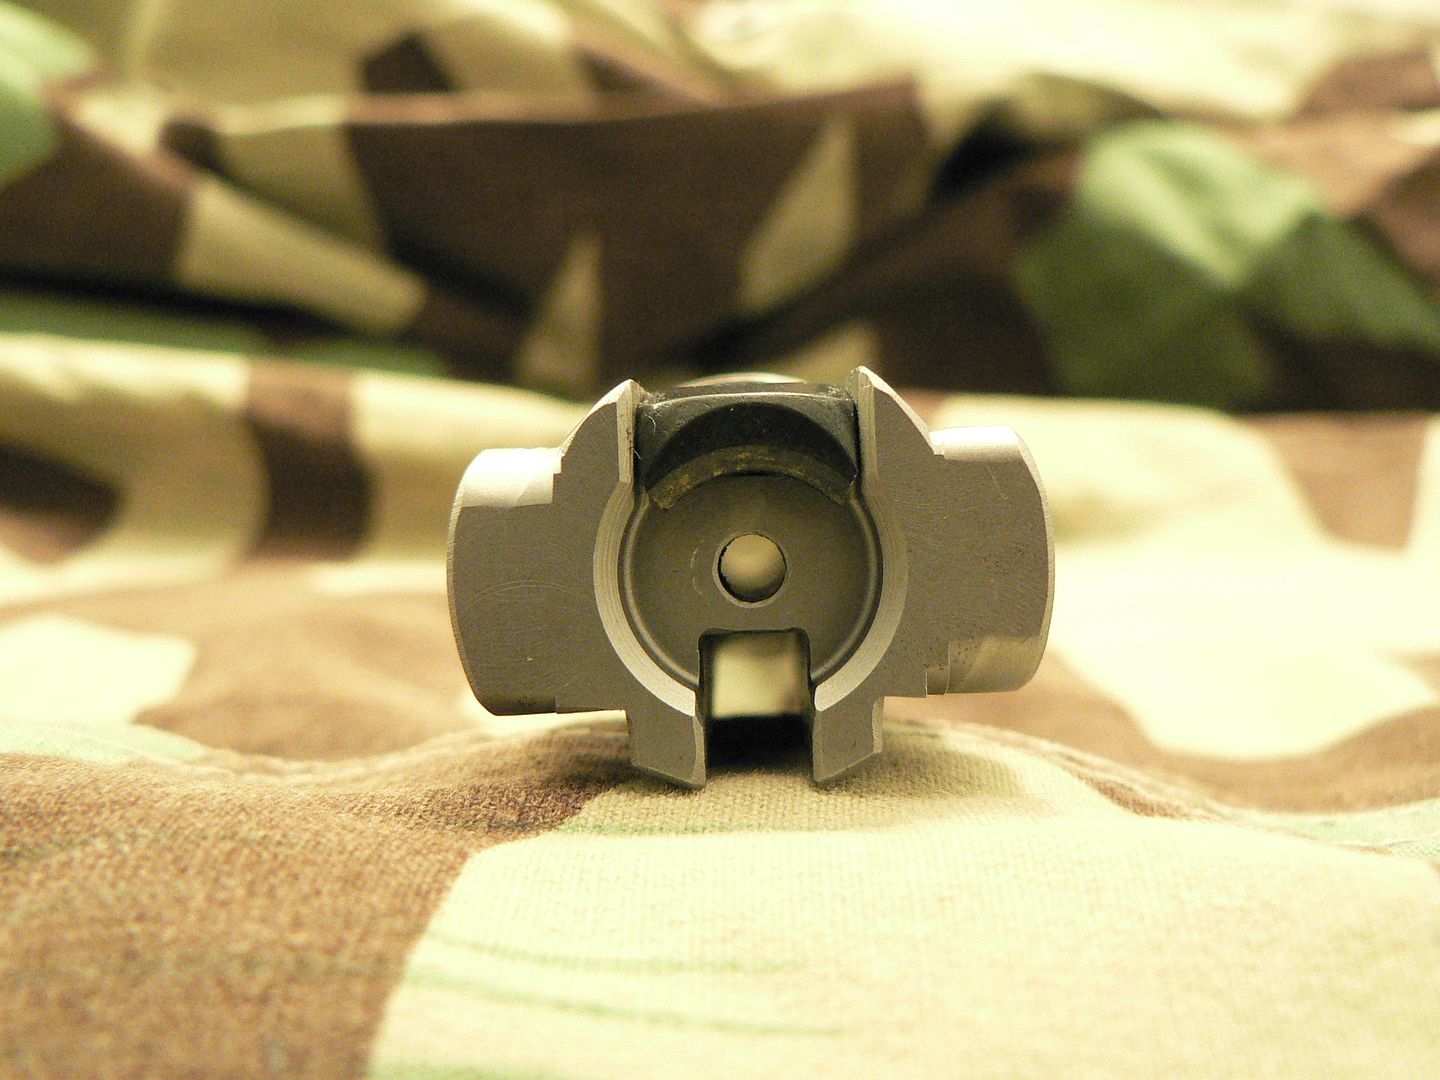 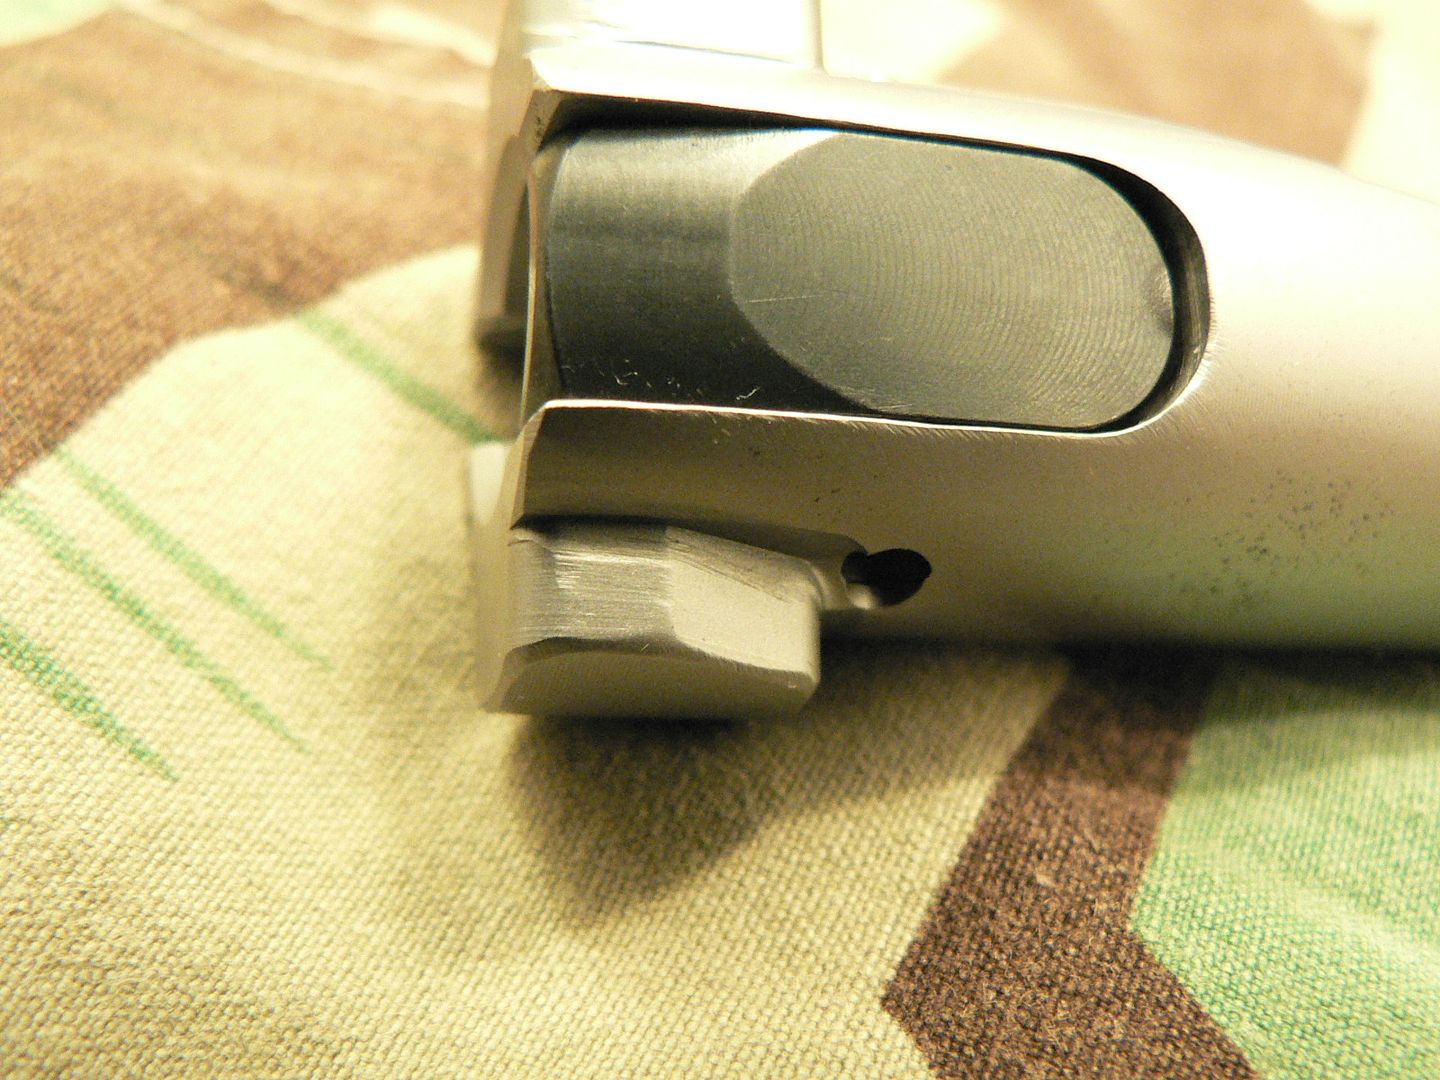 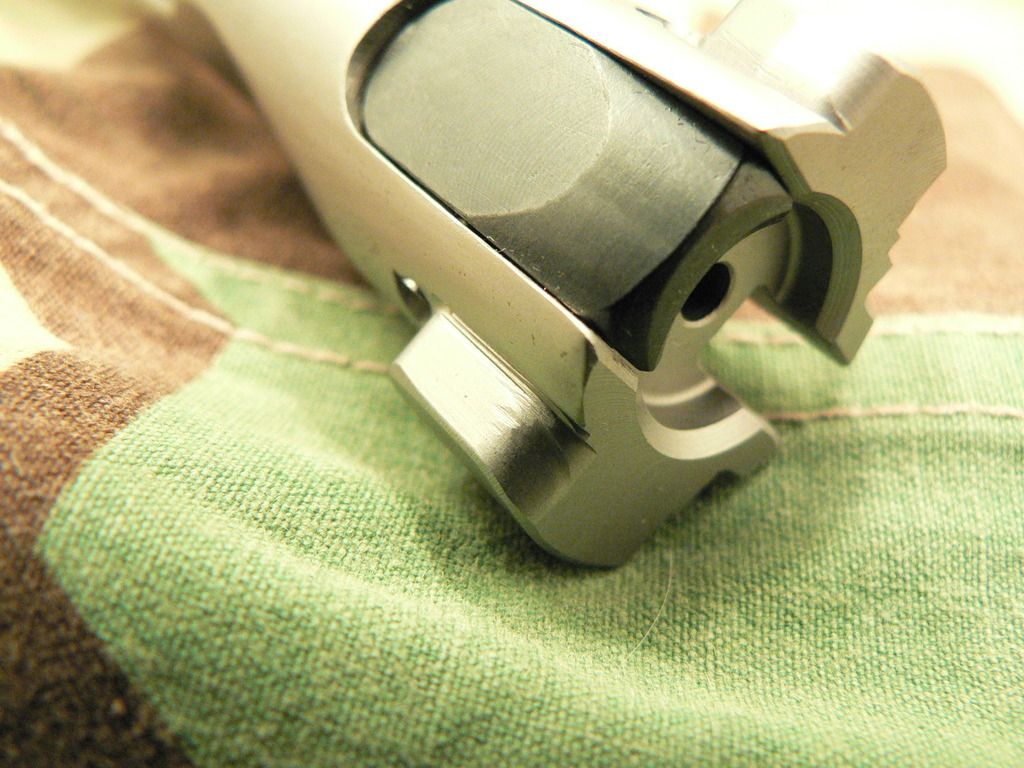 This brings me to what was actually done to the bolt. According to Ricks' email, he "updated" it. What this means, I think, is that he ground the bolt down in some areas to give just a bit more clearance between it and the trunnion at the front while also reducing the rear collar a hair where it rides in the receiver. I hate to use the words "ground the bolt". That sounds rough and like a rig job. Rather, he appears to have reshaped it only where necessary paying VERY close attention not to touch the locking lugs. He also blended in the work so as to make it almost invisible. Only under close scrutiny can you even tell that any work was done. For example, in the picture below, can you tell where the bolt was resized? 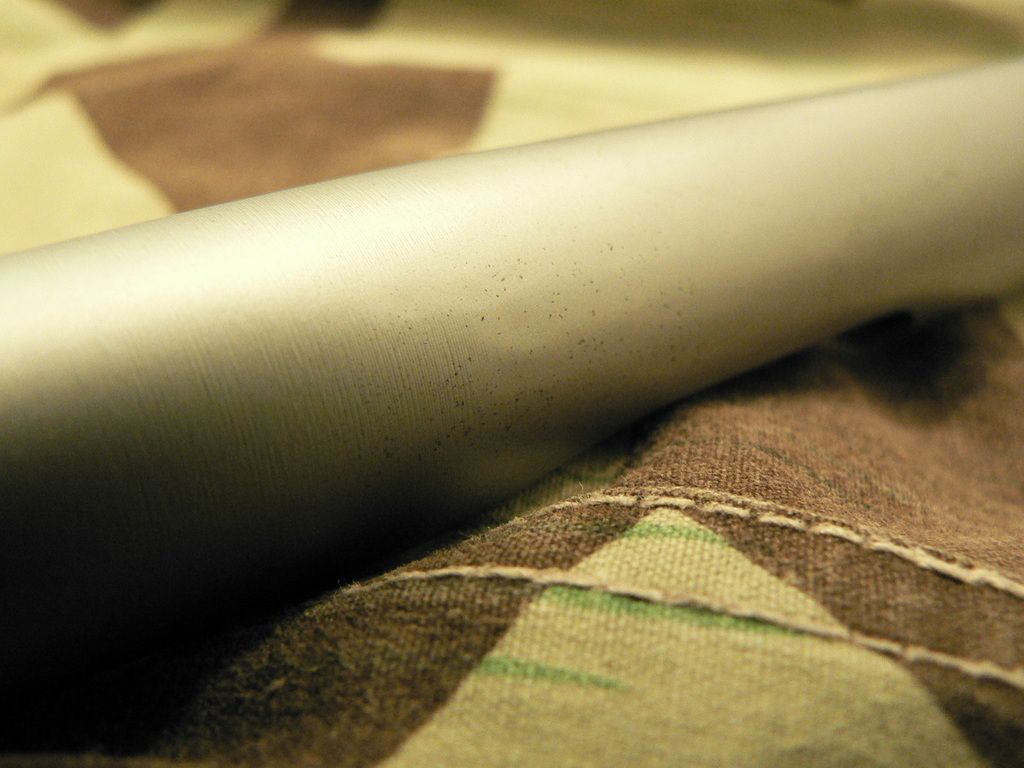 I myself am not 100% sure but I think I can see it. To the left of the picture and stopping approximately where the stitching on the zeltbahn intersects the bolt, you can see fine annular rings where the part was turned in a lathe. To the right of the stitching, those rings disappear. That is where the resizing was done......I think. The work is so finely done that I cannot be 100% sure. Below are four pictures showing all four sides of the bolt. I have used a China marker to show the areas where it appears Rick did his thing: 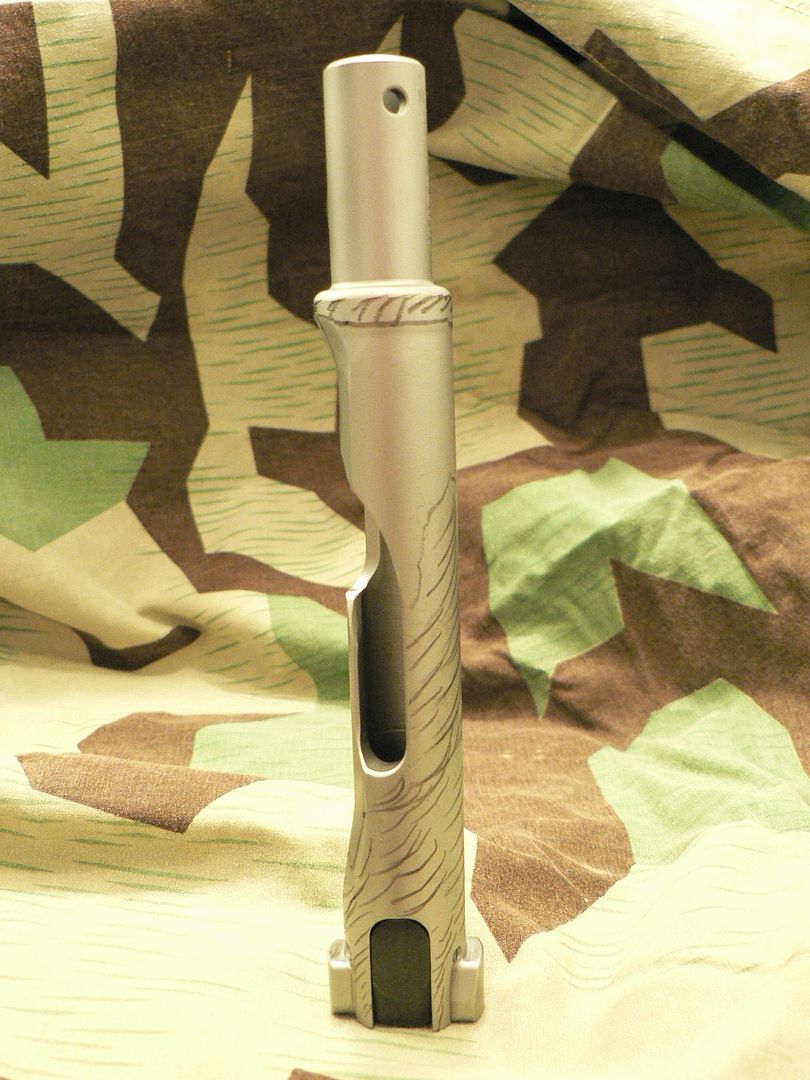 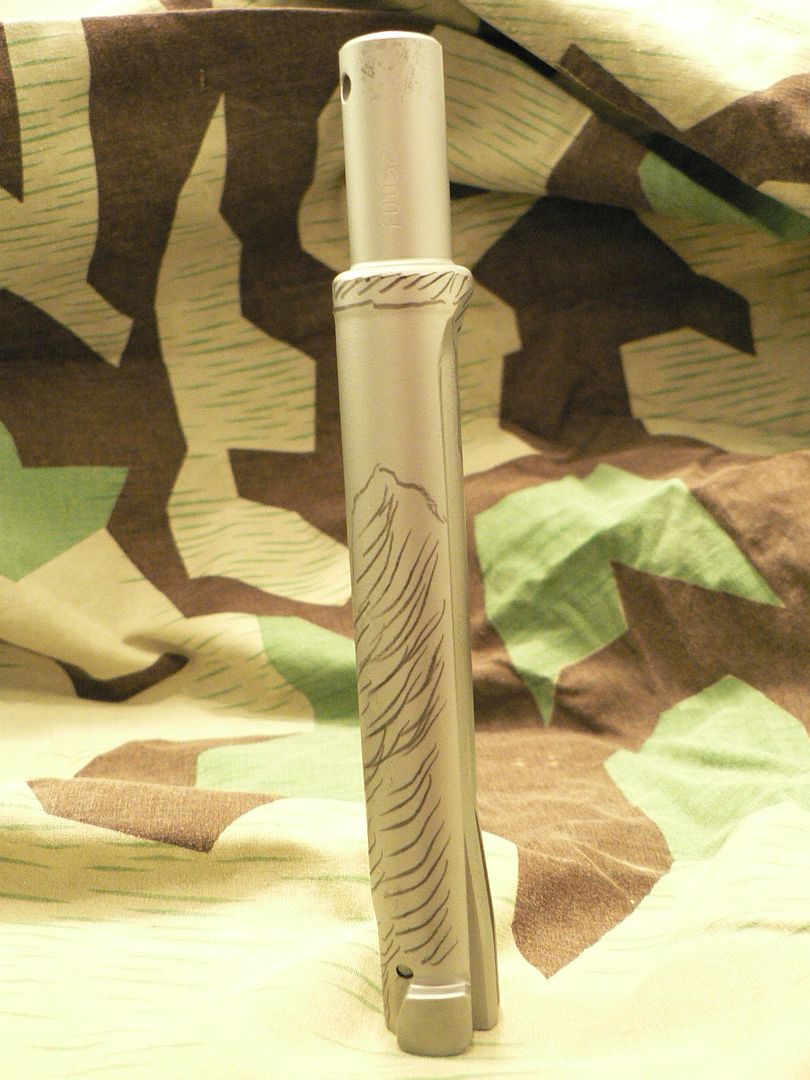 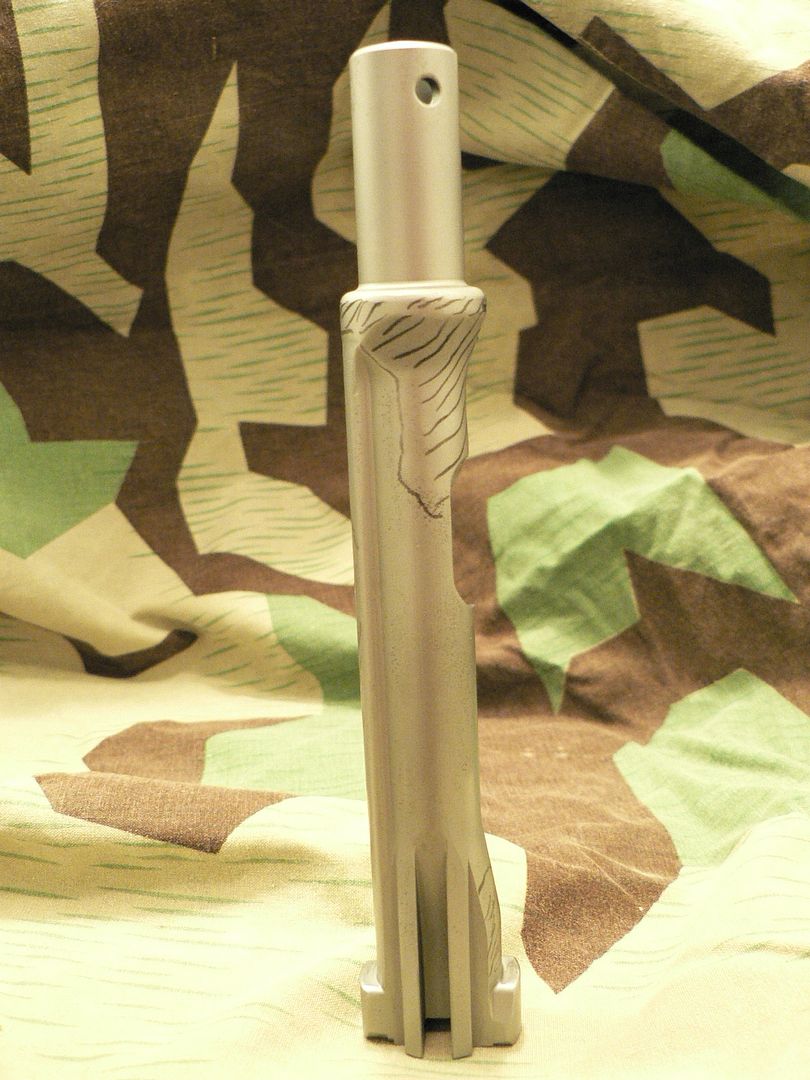 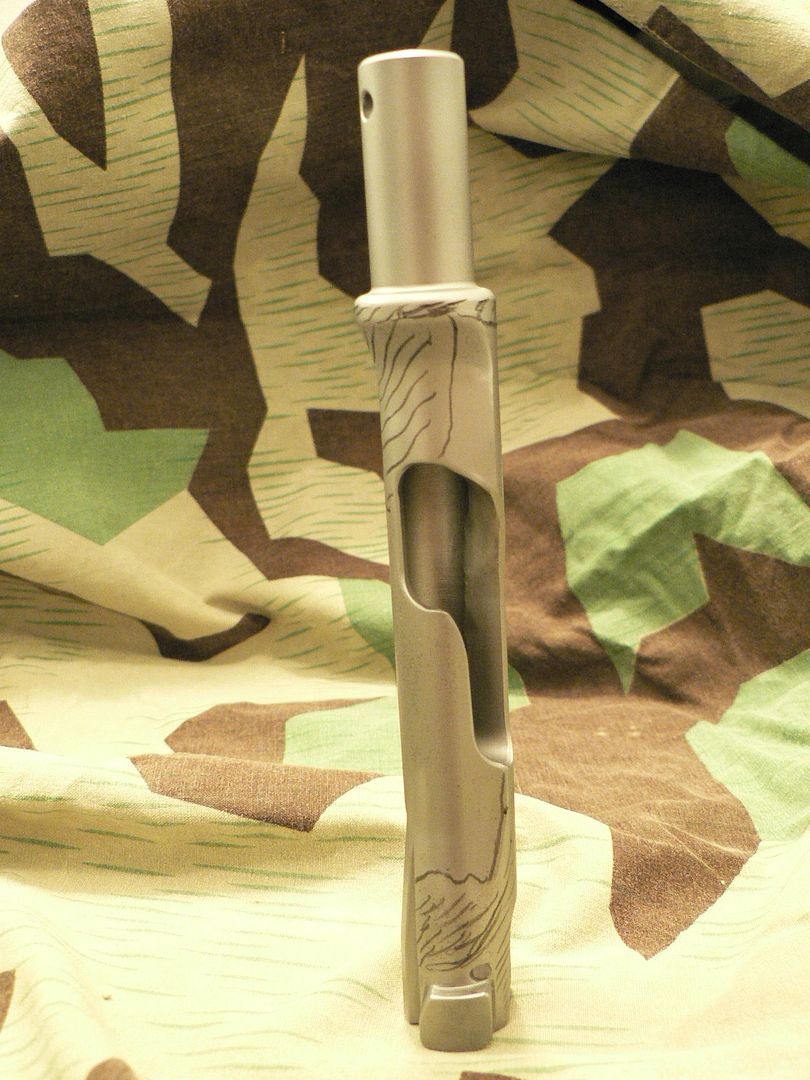 At least, that's my best guess. So thank you Rick Smith for standing behind your product! This kind of customer service and this level of Quality speaks volumes about your Integrity with a capital "I". This weekend, I plan on taking this thing back out to the range with another 100 rounds. Hopefully, the lock up problem is now gone. Of course, I'll post my findings. In the next post, I'll show you guys the new bipod leg.
__________________
I promise to be nice and play well with others |
|
|
|
|
03-14-2017, 10:45 AM
|
#38 |
|
User
Join Date: Oct 2007
Location: Maryland
Posts: 340
Thanks: 43
Thanked 107 Times in 51 Posts
|
09/21/16:
Now on to the new leg. not much to see really; it just looks like the old one: 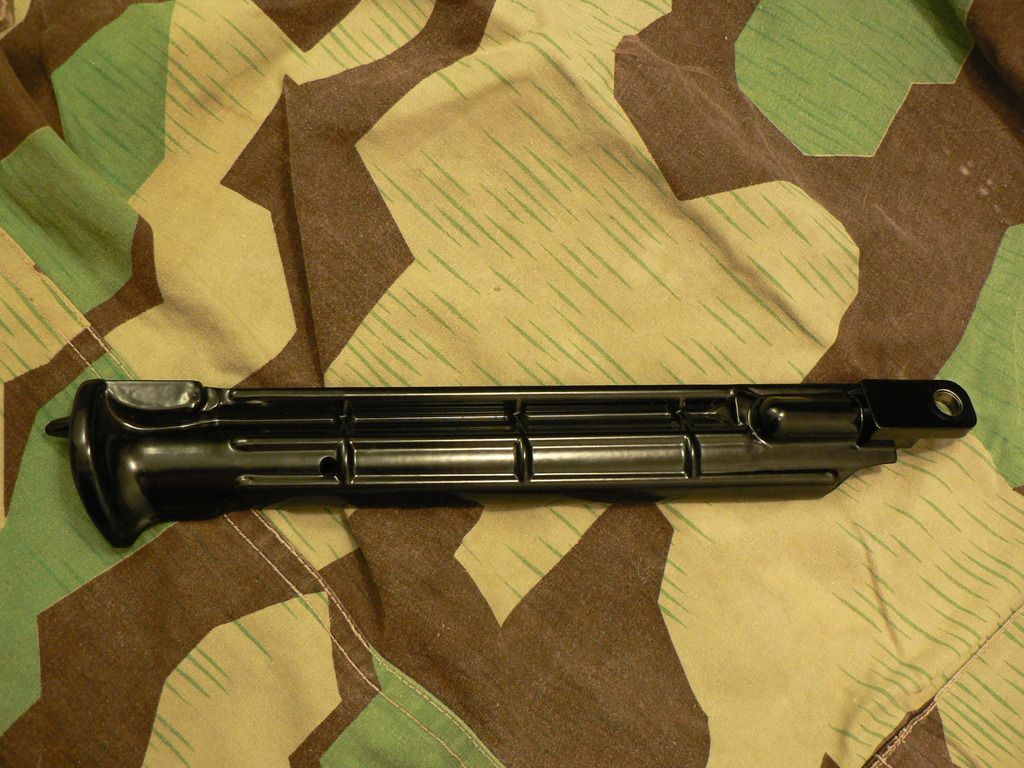 Here, we see the steel collar that SMG presses into the axle hole so that you don't have aluminum riding on steel as you pivot the leg: 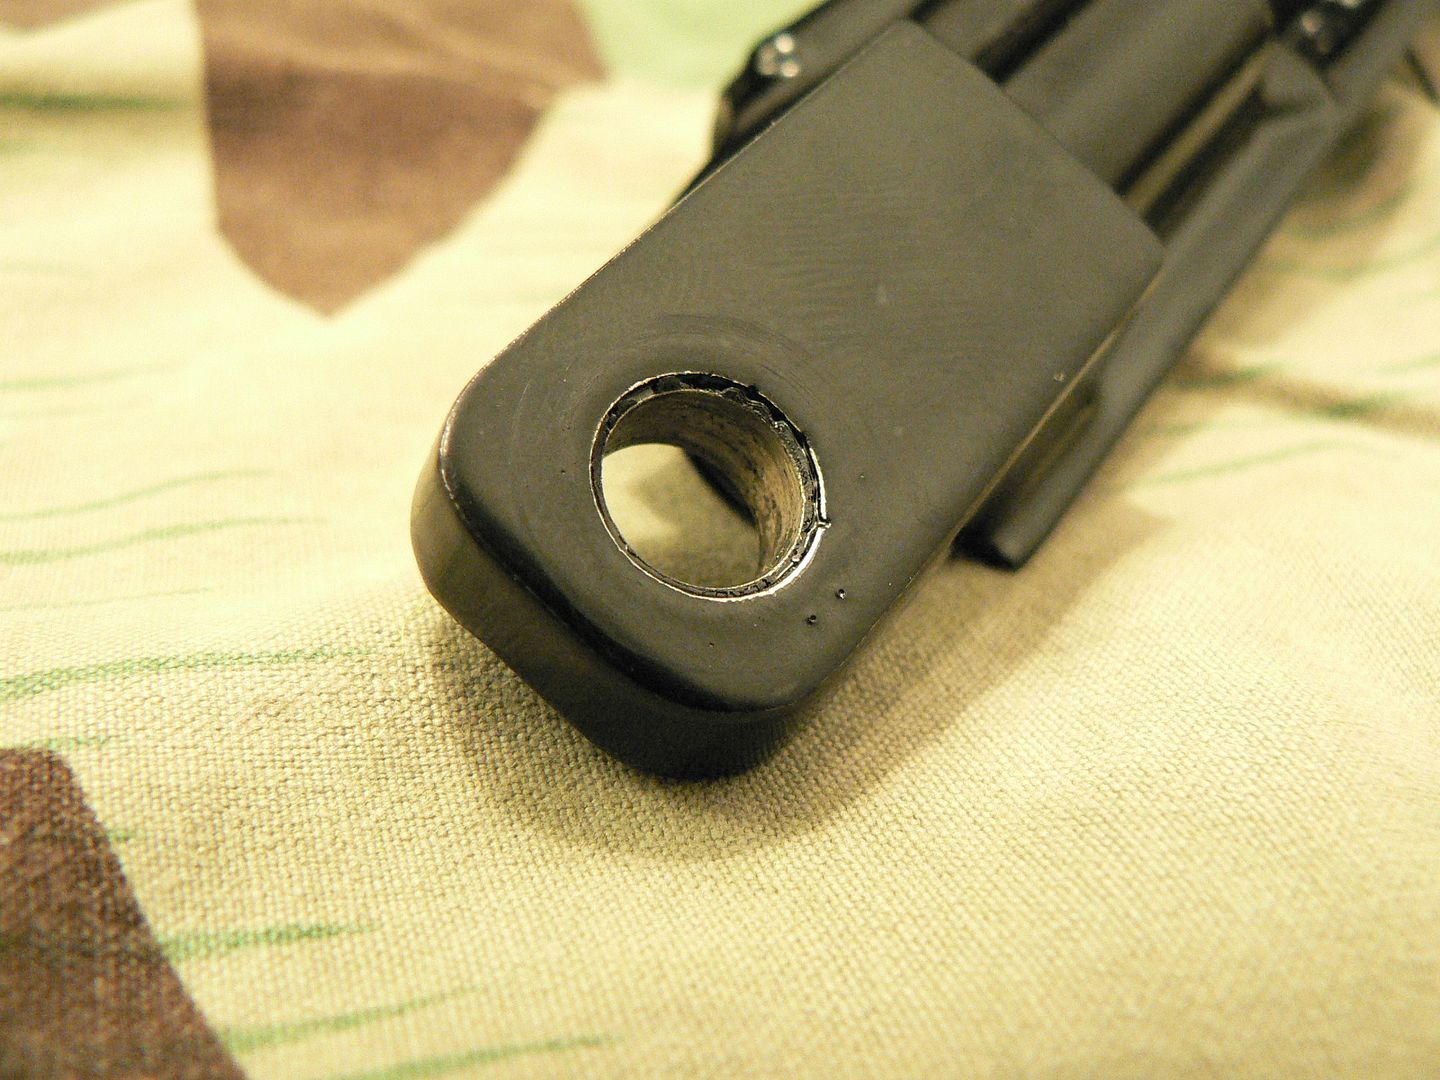 I inquired about buying a spare set of legs so that I have some on hand should this happen again. Rick told me that wile he's not opposed to selling me a pair, each leg is hand fitted so that they position where they should both stowed and extended. The reason he needed the old leg back was so that he could match the new one to the old one. That is evidenced in the pictures below. You can clearly see where the leg was ground to the right of the detent plunger hole: 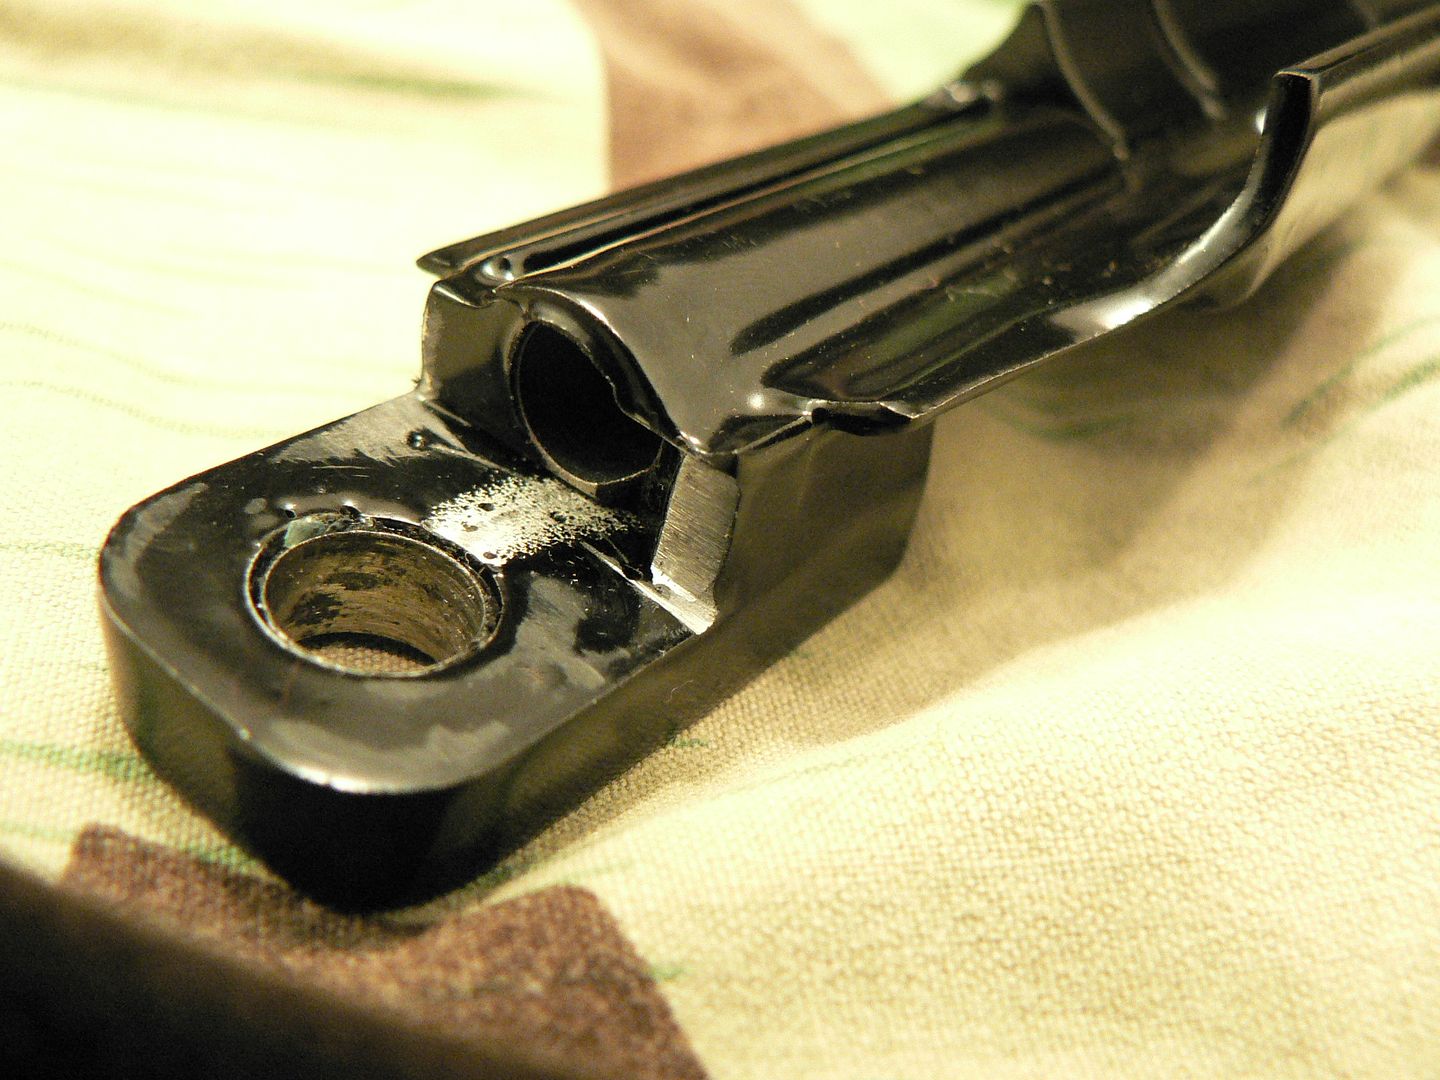 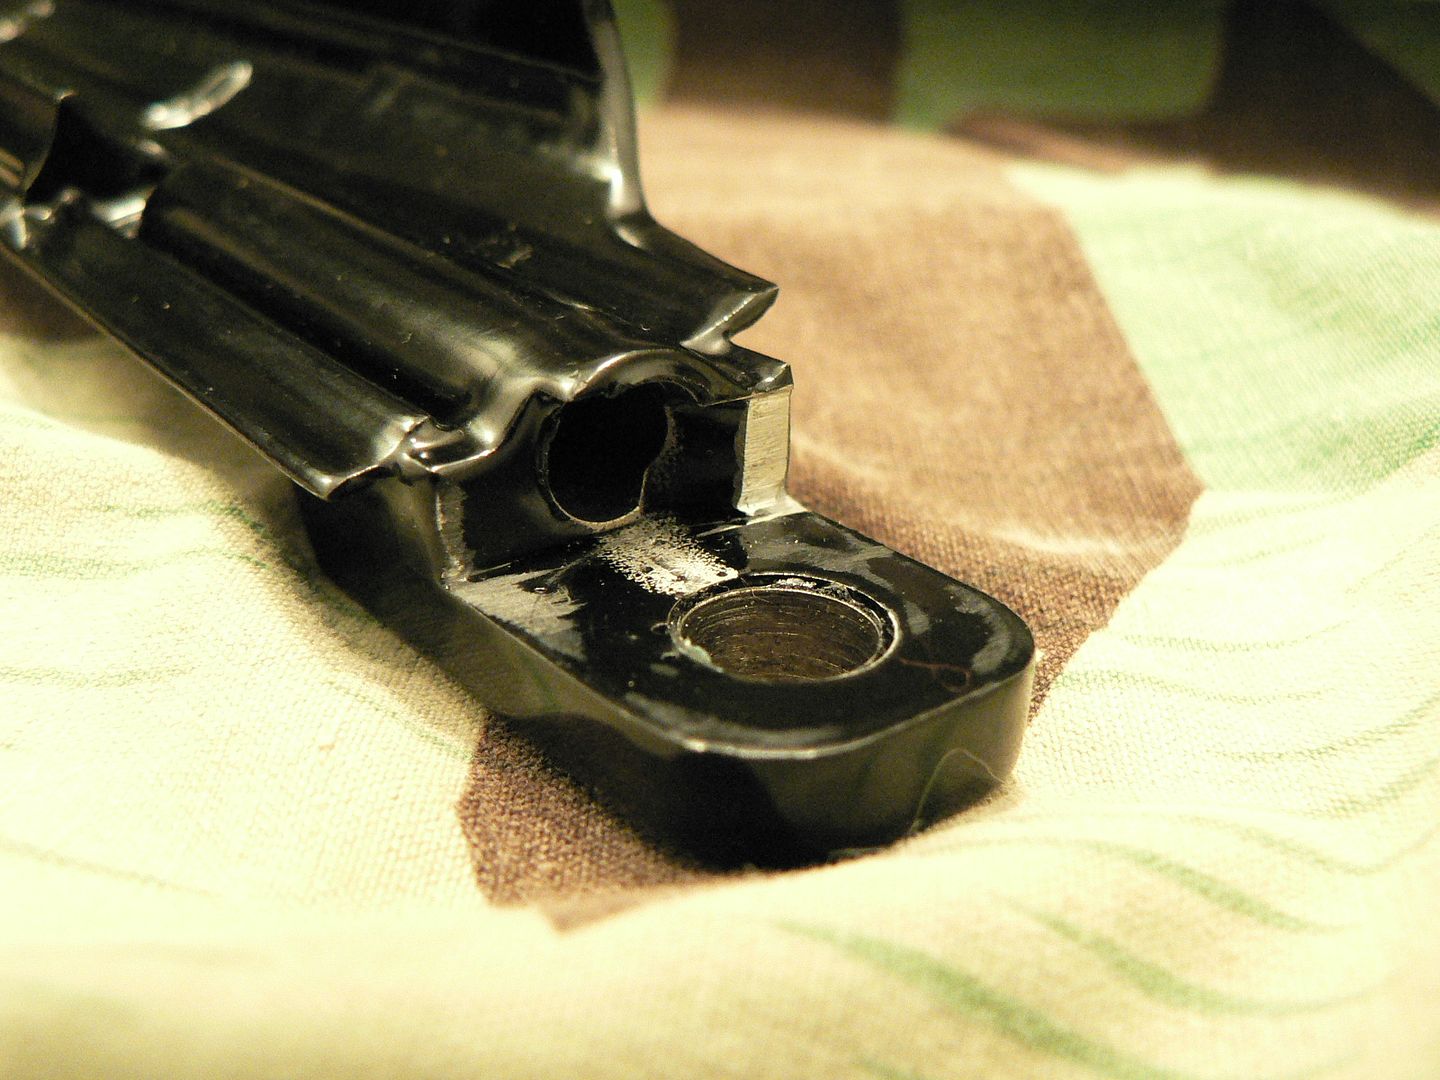 The bare aluminum between the detent plunger hole and the axle hole appears to just be a lack of paint. These legs are sourced from SHOEI. SMG is aware that they are a weak point in the design. As a matter of fact, even the original steel legs were prone to bending and breakage. Both war time trials by the Germans and post war testing by the United States cited how weak the legs were. I'm not making excuses for SMG. I wish these were made out of steel but, even if they were, they would be fragile. According to Rick, he tried to source stamped steel legs from multiple vendors but was quoted a price of $45,000 per 300 pair and that was the LOWEST quote! Stamped parts are cheap and cost effective.......if you making them by the millions. Otherwise, the price is horrendous. Someone suggested to me that I should only use them for static display and not range use. I asked Rick about that and he said, "They will not stand up to being pulled back under tension before firing or dropping prone on them but they will serve as a shooting barrel support for a long time from what users tell us. Please use it when you want to and we will fix it when it fails." I don't think a customer can ask for more fair treatment than that.
__________________
I promise to be nice and play well with others |
|
|
|
|
03-14-2017, 09:54 PM
|
#39 | |
|
Lifer
Lifetime Forum Patron
Join Date: Feb 2009
Location: ...on the 'ol Erie Canal...
Posts: 8,182
Thanks: 1,398
Thanked 4,440 Times in 2,328 Posts
|
Quote:
Even if it was just an enterprising accessory parts manufacturer it would still be better than an aluminum leg just waiting to break... ") Just my opinion. If I had one break on me I would machine a steel leg to replace it. Another idea would be to machine an 'ear' out of steel with a threaded shaft that the aluminum leg could be cut and tapped to accept. I like that idea better. Less work.
__________________
I like my coffee the way I like my women... ...Cold and bitter...
|
|
|
|
|
|
03-14-2017, 10:01 PM
|
#40 |
|
User
Join Date: Oct 2007
Location: Maryland
Posts: 340
Thanks: 43
Thanked 107 Times in 51 Posts
|
I contacted Estes Adams about doing exactly that. He didn't want to touch it. I guess he figured that the machining would be so labor intensive that the price would be unacceptable. I have the highest respect for him so, when he declined my inquiry, I left it at that. I would very much like to get steel legs made but I wouldn't know where to start and I would be very wary of shipping mine off to someone I don't know. I have heard far too many horror stories of parts shipped off never to be seen again.
__________________
I promise to be nice and play well with others |
|
|
|
 |
|
|


 Linear Mode

