
upload photo | donate | calendar
|
my profile |
register |
faq |
search upload photo | donate | calendar |
 09-30-2013, 12:07 PM
|
#1 |
|
User
Join Date: Sep 2007
Posts: 1,225
Thanks: 2,679
Thanked 930 Times in 509 Posts
|
My byf 41 shooter droppped to the ground, and the trigger guard got a flattish 1/4 inch area on it's right side approximately opposed to the trigger spring.
Is there an easy fix for this? Or am I to just suck it up? |

|

|
|
09-30-2013, 12:42 PM
|
#2 |
|
User

Join Date: Mar 2008
Location: Marco Island, Florida
Posts: 4,867
Thanks: 1,685
Thanked 1,916 Times in 1,192 Posts
|
One possibility is to have someone turn a gradual brass cone, (maybe even wood) which you can insert into the stripped trigger guard loop and press in until the trigger guard regains its shape.
You could do this on a drill press or in a pinch, in a shop vice. |
|
|
|
|
09-30-2013, 01:06 PM
|
#3 | |
|
User

Join Date: Feb 2009
Location: Cave Creek
Posts: 315
Thanks: 55
Thanked 242 Times in 92 Posts
|
Quote:

|
|
|
|
|
|
10-01-2013, 04:04 AM
|
#4 |
|
User
Join Date: Sep 2007
Posts: 1,225
Thanks: 2,679
Thanked 930 Times in 509 Posts
|
Thanks for the ideia. Will definetly give it a try.
|
|
|
|
|
10-04-2013, 09:13 AM
|
#5 |
|
Twice a Lifer
Lifetime Forum Patron 
Join Date: Mar 2011
Location: Atop the highest hill in Schuyler County NY
Posts: 3,336
Thanks: 7,246
Thanked 2,558 Times in 1,361 Posts
|
One could also use a dense hardwood. Less expensive?
Technically, you won't necessarily wind up with true roundness by pressing, as the edges/ends of the deformation will not totally conform due to "spring-back", but it will probably be close enough. It might save a lot of effort to use a hardwood internal mandrel and another piece of hardwood to tap down the apparent high areas from the outside. This lower-tech approach is an art, however, done by someone who can feel the progress.
__________________
"... Liberty is the seed and soil, the air and light, the dew and rain of progress, love and joy."-- Robert Greene Ingersoll 1894 |
|
|
|
|
10-04-2013, 09:47 AM
|
#6 |
|
Moderator
2010 LugerForum Patron 
Join Date: Jun 2002
Location: Santa Teresa New Mexico just outside of the West Texas town of El Paso
Posts: 7,017
Thanks: 1,089
Thanked 5,164 Times in 1,700 Posts
|
Once upon a time long ago (no, I'm not starting a fairy tale) I straightened a bent trigger guard on a Luger by clamping a piece of iron pipe in a vise to use as a mandrel/anvil and a rawhide mallet to make it round again. If you have ever done any auto body work you know the process...down it where it is up and up it where it is down. That is pretty much the same technique that David has suggested with the hardwood approach.
The rawhide mallet doesn't create any dents like a steel hammer would. The iron pipe is less "springy" than a wood dowel so it provides a firmer working base. If you are concerned about the pipe marring the trigger guard you can wrap it with electrical tape, but only one layer so it won't act as a cushion.
__________________
If it's made after 1918...it's a reproduction |
|
|
|
| The following 5 members says Thank You to Ron Wood for your post: |
|
10-04-2013, 10:58 AM
|
#7 |
|
Lifer
Lifetime Forum Patron 
Join Date: Jun 2002
Location: The Capital of the Free World
Posts: 10,153
Thanks: 3,003
Thanked 2,304 Times in 1,096 Posts
|
Kurusu,
Please post a photo of the damaged area... Depending upon the severity of the damage, some combination of the suggestions made so far may make it look better. The judicious application of an appropriate machinist's jack might also assist... A "REAL" gunsmith, master blacksmith, or machinist could re-bend and re-shape the guard for you... unfortunately, most shops that have a gunsmith today are really just "parts replacers" and they don't know much about metalworking... I would also suggest that you google "blacksmiths" in your area... and check out examples of their handiwork before you turn over your frame to them...
__________________
regards, -John S "...We hold these truths to be self-evident that ALL men are created EQUAL and are endowed by their Creator with certain UNALIENABLE rights, and among these are life, LIBERTY, and the pursuit of happiness..." |
|
|
|
|
10-04-2013, 12:12 PM
|
#8 |
|
Moderator
Lifetime Forum Patron 
Join Date: Jun 2002
Location: Arizona/Colorado
Posts: 7,771
Thanks: 4,922
Thanked 3,123 Times in 1,434 Posts
|
I agree with Ron's approach depending on the actual damage..Recently I was doing some work on a piclehaben German helmet and needed to expand a small 3" circle of steel. I went to Harbour Freight tools and bought a large size tail pipe expander for $12.00 It worked really slick! One good advantage was you could control what was happening... Most any approach has to be done with some caution. Too much whacking or expanding could cause unintended consequences.
__________________
Jerry Burney 11491 S. Guadalupe Drive Yuma AZ 85367-6182 lugerholsterrepair@earthlink.net 928 342-7583 (CO & AZ) Year Round 719 207-3331 (cell) 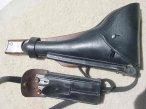 "For those who Fight For It, Life has a flavor the protected will never know." |
|
|
|
|
10-04-2013, 12:48 PM
|
#9 |
|
Lifer
Lifetime Forum Patron Join Date: Aug 2012
Location: East Berwick, Pennsylvania
Posts: 227
Thanks: 614
Thanked 100 Times in 81 Posts
|
I agree with Doug, the Delrin is the better choice here, Delrin is hard and will not damage as steel would. Also the Ron with the rawhide hammer. Work slowly, don't rush it.
|
|
|
|
|
10-05-2013, 06:00 AM
|
#10 |
|
User

Join Date: Feb 2013
Location: Somewhere in Northern Italy
Posts: 2,646
Thanks: 1,082
Thanked 1,783 Times in 1,007 Posts
|
If one of my Lugers "... dropped to the ground, and the trigger guard got a flattish 1/4 inch area on it's right side" I think I would be suicidal :-)
Jokes apart I think that I would: a) follow Ron's advice b) in alternative I would take it to a good gunsmith
__________________
"Originality can't be restored and should be at the top of any collector's priority list. |
|
|
|
|
10-05-2013, 12:25 PM
|
#11 |
|
Moderator
Lifetime Forum Patron
Join Date: Jun 2002
Location: Arizona/Colorado
Posts: 7,771
Thanks: 4,922
Thanked 3,123 Times in 1,434 Posts
|
Another thought comes to mind..A lanyard would prevent things like that!
__________________
Jerry Burney 11491 S. Guadalupe Drive Yuma AZ 85367-6182 lugerholsterrepair@earthlink.net 928 342-7583 (CO & AZ) Year Round 719 207-3331 (cell) "For those who Fight For It, Life has a flavor the protected will never know." |
|
|
|
|
10-13-2013, 03:13 PM
|
#12 |
|
Patron
LugerForum Patron 
Join Date: Jun 2002
Location: POB 398 St.Charles,MO. 63302
Posts: 5,089
Thanks: 6
Thanked 736 Times in 483 Posts
|
K, I've straighten a few mashed in tigger guards with a conical wodden mandrel, but none of them came out perfect, so hesitate to do it for anyone else. TH
|
|
|
|
|
10-24-2013, 09:44 AM
|
#13 |
|
User
Join Date: Sep 2007
Posts: 1,225
Thanks: 2,679
Thanked 930 Times in 509 Posts
|
Lots of food for thought in here. I'm not going to rush anything but think carefully on the best approach.
I've added a photo, but it's very hard to see what's wrong. The photo was taken in a competition by a fellow shooter and not to show the damage. I'll take a better photo on the weekend The lanyard ideia is not feasable. It's not casual shooting but official target shooting. And it does shoot  |
|
|
|
|
10-24-2013, 04:51 PM
|
#14 |
|
User
Join Date: Apr 2013
Posts: 25
Thanks: 1
Thanked 0 Times in 0 Posts
|
I hope it's not as bad as this one. LOL
|
|
|
|
|
10-28-2013, 03:46 AM
|
#15 |
|
User
Join Date: Sep 2007
Posts: 1,225
Thanks: 2,679
Thanked 930 Times in 509 Posts
|
As promised here are some photos of the affected area
Hope it helps. |
|
|
|
|
10-28-2013, 12:44 PM
|
#16 |
|
Lifer
Lifetime Forum Patron
Join Date: Jun 2002
Location: The Capital of the Free World
Posts: 10,153
Thanks: 3,003
Thanked 2,304 Times in 1,096 Posts
|
Okay, please forgive the crude drawing, but my only option for hand drawn graphics where I am is Microsoft Paint.
This is the tool I would create for straightening your trigger guard. It will never be like it came from the factory again, but it can look ALMOST like it did when it left the factory if you take your time and be careful. place thin aluminum or brass shims between the device and the inside of the trigger guard. The drawing is self explanatory, but if you have questions, fire away. I will be watching this thread for a while... -John
__________________
regards, -John S "...We hold these truths to be self-evident that ALL men are created EQUAL and are endowed by their Creator with certain UNALIENABLE rights, and among these are life, LIBERTY, and the pursuit of happiness..." |
|
|
|
| The following member says Thank You to John Sabato for your post: |
|
10-28-2013, 04:22 PM
|
#17 | |
|
User

Join Date: Jul 2013
Posts: 169
Thanks: 0
Thanked 21 Times in 14 Posts
|
25 yards? Dang good shooting.
Quote:
|
|
|
|
|
|
10-29-2013, 03:51 AM
|
#18 | |
|
User
Join Date: Sep 2007
Posts: 1,225
Thanks: 2,679
Thanked 930 Times in 509 Posts
|
Quote:
|
|
|
|
|
|
10-29-2013, 04:03 AM
|
#19 | |
|
User
Join Date: Sep 2007
Posts: 1,225
Thanks: 2,679
Thanked 930 Times in 509 Posts
|
Quote:
Your plan seems to be the best so far. My shooting mentor, and also the person who is going to help me fix it, has the same opinion. |
|
|
|
|
|
10-29-2013, 07:37 AM
|
#20 | |
|
Lifer
Lifetime Forum Patron
Join Date: Jun 2002
Location: The Capital of the Free World
Posts: 10,153
Thanks: 3,003
Thanked 2,304 Times in 1,096 Posts
|
Quote:
You can also probably use aluminum for everything except the threaded rod and the nuts... less chance of marring the inside of the trigger guard. I also recommend you use a fine thread on the rod (perhaps 28 TPI or more) to make it easier to use... Good luck and please take photos as you go along. I am sure many will find the process and the results interesting to watch. -John S.
|
|
|
|
|
 |
|
|


 Linear Mode

