upload photo | donate | calendar
 |
my profile |
register |
faq |
search upload photo | donate | calendar |
|
|
#1 |
|
User
Join Date: Apr 2003
Location: Near NYC
Posts: 428
Thanks: 30
Thanked 64 Times in 37 Posts
|
Here's another way to resize photos using Microsoft Paint. All Windows versions, including the ancient ones have Paint. The Paint icon looks like this and is usually found in the Accessories folder off the Start/All Programs menu:
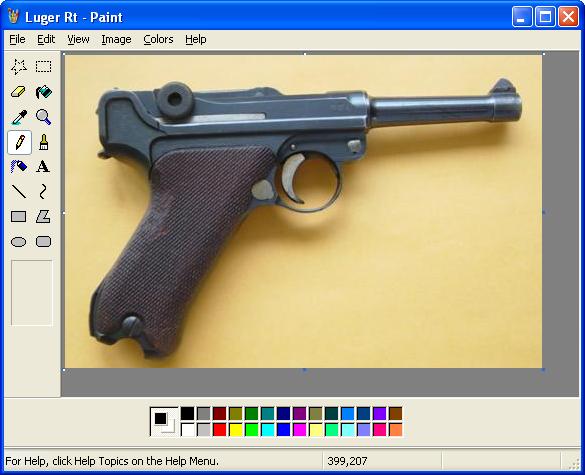
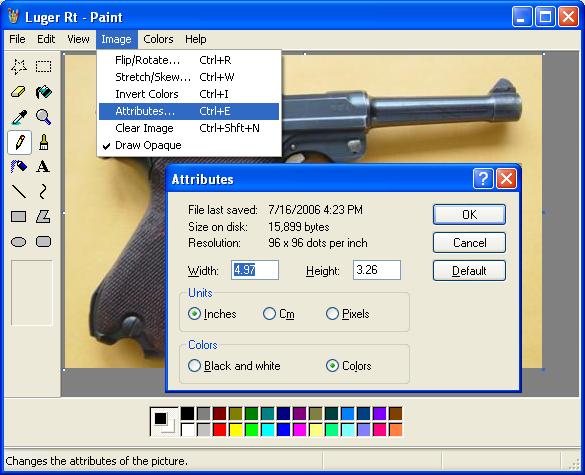
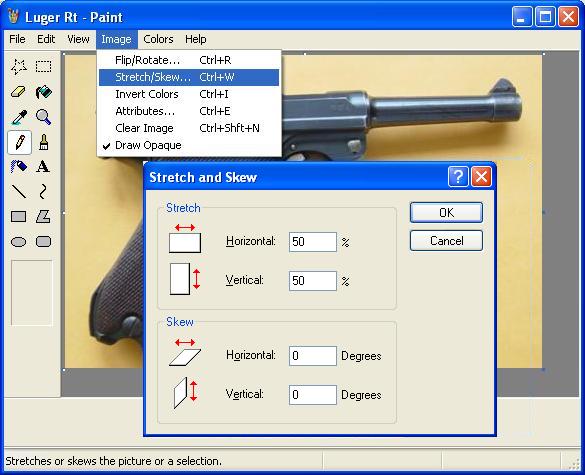
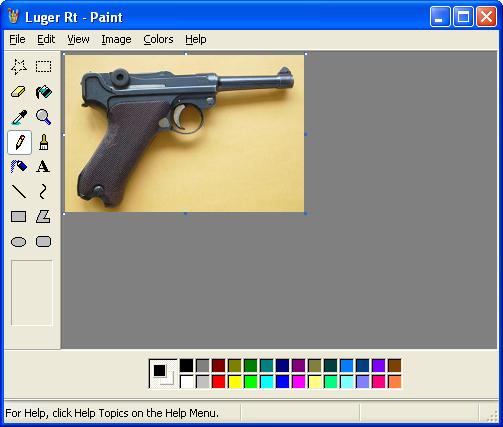
Open up your picture file into Paint... it will look like this:  Go to the Attributes tab... this will tell you how big your picture is in inches. The luger picture here is 4.97" x 3.26":  A picture with a width of about 5" is good for internet use. If you want to resize using Paint, just figure out how much smaller in percentage terms you need to shrink it and go to the Stretch/Skew function:  Here, I resized the image to 1/2 (or 50%). Make sure you do the height as well as the width:  You must rename the file if you want to save both large and small images. I usually take the original name and add "resized"... so the original large pic file would be named "luger", while the new smaller pic file would be "luger resized". Hope this helps, Jack
__________________
Why do you guys hate black circles so much? |
|
|

|
|
|
#2 |
|
Super Moderator
Eternal Lifer LugerForum Patron Join Date: Jun 2002
Location: North of Spokane, WA
Posts: 15,947
Thanks: 2,050
Thanked 4,557 Times in 2,105 Posts
|
This is good Jack, will make this a sticky.
Thanks, Ed
__________________
Edward Tinker ************ Co-Author of Police Lugers - Co-Author of Simson Lugers Author of Veteran Bring Backs Vol I, Vol II, Vol III and Vol IV |
|
|

|
|
|
#3 |
|
User
Join Date: Apr 2003
Location: Near NYC
Posts: 428
Thanks: 30
Thanked 64 Times in 37 Posts
|
Just did this for another forum but I figured I'd post it here. It's useful for beginning photographers:
 The top shows photographing a rifle at an angle. This is good when you can't get far enough away to fit the whole rifle in the frame. You can fit the whole rifle in this way, however, the picture does get a bit distorted as the end closest to the camera appears bigger. It also shows how to reduce (can't be eliminated) the flash generated "hotspot" (bright white blob in the middle of the picture). By taking the photo at an angle, a lot of the light bounces away from the camera lens. As seen on the bottom of the diagram, head on shots reflect much of the flash right back through the lens (cause of the hotspot). The best way to take object pics is in indirect sunlight. This angle technique is also good for taking pics through a window (like at a department store display)... make sure you angle the shot. Hope this helps, Jack
__________________
Why do you guys hate black circles so much? |
|
|

|
 |
|
|