This section is a continuation of the 'Full Length Guide Rod' fabrication that I left off on
page 2 post #38.
I had finished the guide rod itself, but still needed to fabricate a guide rod plug. Here's a 1911 plug being machined (same process as for the Commander).


1. Turning down a piece of CRS to the required diameter and length.
2. Drilling out the plug; two size holes. One for the recoil spring, the other for the guide rod.
3. Using a parting tool to cut the plug to the desired OAL.
4. Finished guide rod and plug.
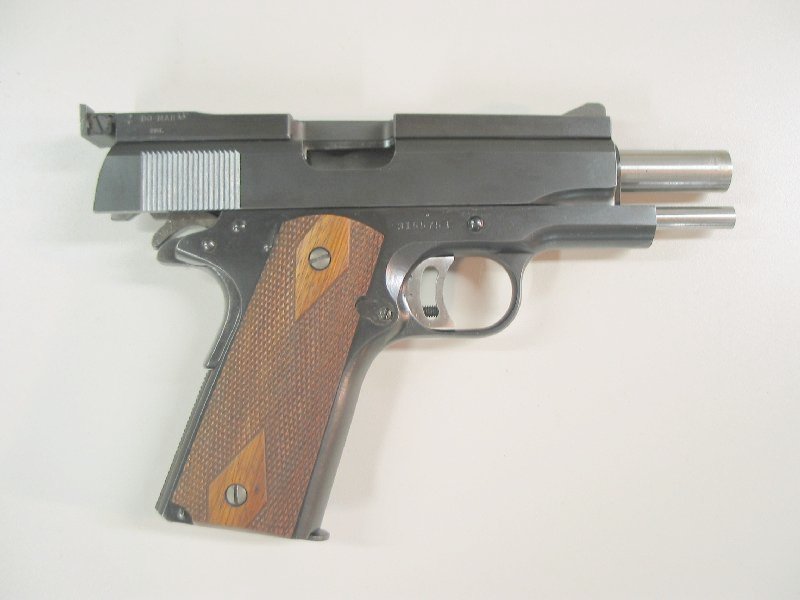
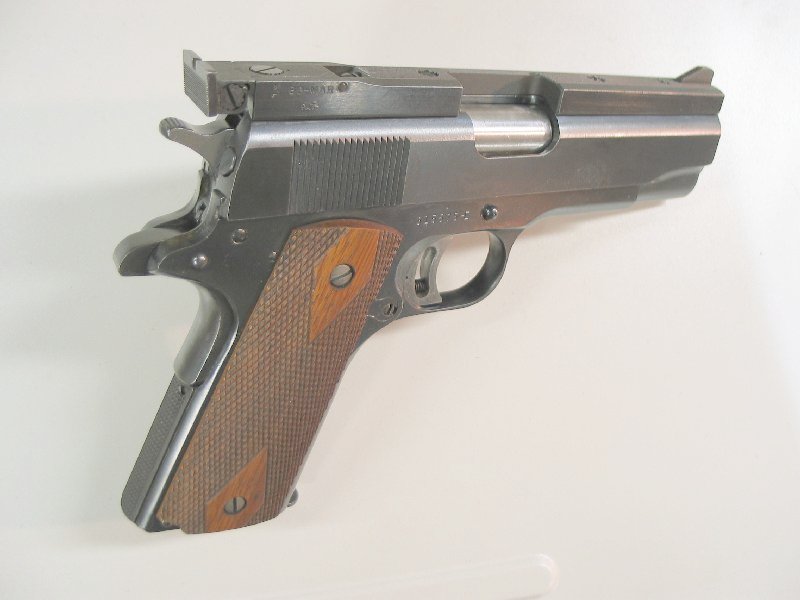
I've had a Colt Combat Commander slide and frame that I acquired 'in the white' back sometime in the 1980's. I finally decided to build it up with a Sarco 1911 'parts kit' a year or so ago, and Charles Danner blued the parts for me. I had been browsing eBay and noticed that a seller had an original Bo-Mar full-length rib for the Commander, so I acquired that and mounted it on the Combat Commander. I assume everyone here knows how to drill & tap holes in steel, so I didn't bother to take pics of that. I did substitute #6-48 screws instead of the supplied #6-40 screws. This gives me an extra thread in each hole plus a slightly larger base diameter for each screw. I changed a couple other parts, like one of my skeletonized triggers and a flat checkered mainspring housing. Just because I liked the looks.

It actually came out pretty well. I find it humorous that Bo-Mar actually made a rib for the Commander, incongruous as it may seem.


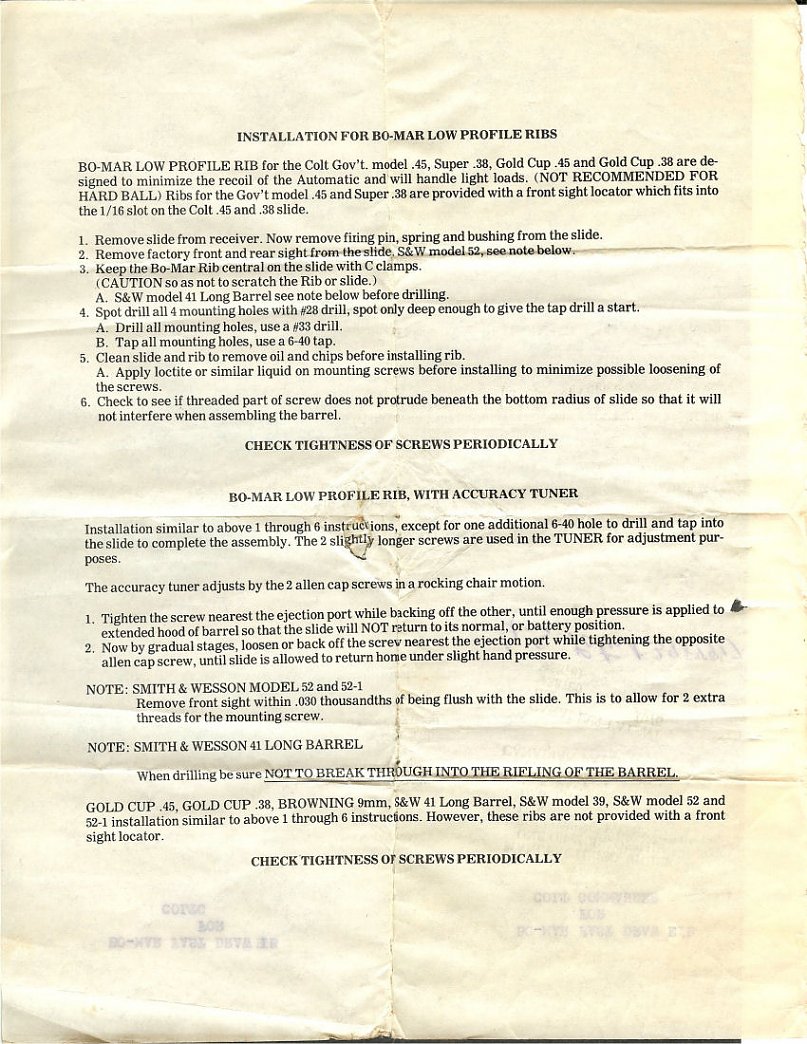
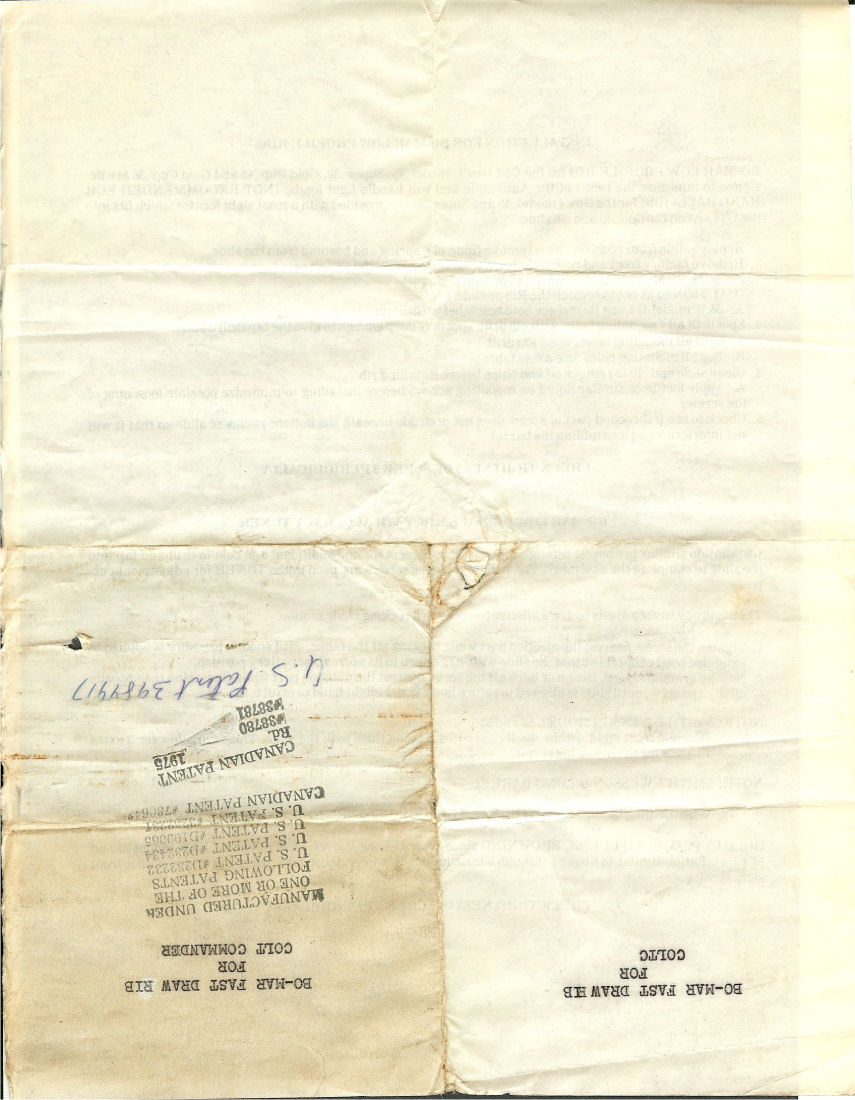
The rib seller included the original 40 year old instruction sheet, stored in the original plastic 'cigar tube' that Bo-Mar shipped the rib with. I'm including it here for any 1911 enthusiasts who contemplate attaching a rib to their 1911.

I have another 5" 1911 with an attached rib, I plan on taking both of these ribbed .45's to the range and see how well they shoot. I had taken the Combat Commander out and shot it before the rib and was once again surprised how well it grouped off a sandbag. It shot 4" low and 6" to the left, I'm hoping it's a bit closer with the rib.
")