First up is my favorite part of the FG42, the muzzle brake:

It is certainly NOT a flash hider because this thing make rather large balls of fire due to (I think) the short distance between the gas tap in the barrel and the end of the muzzle. There are 92 little holes drilled in this contraption in an effort to combat recoil.
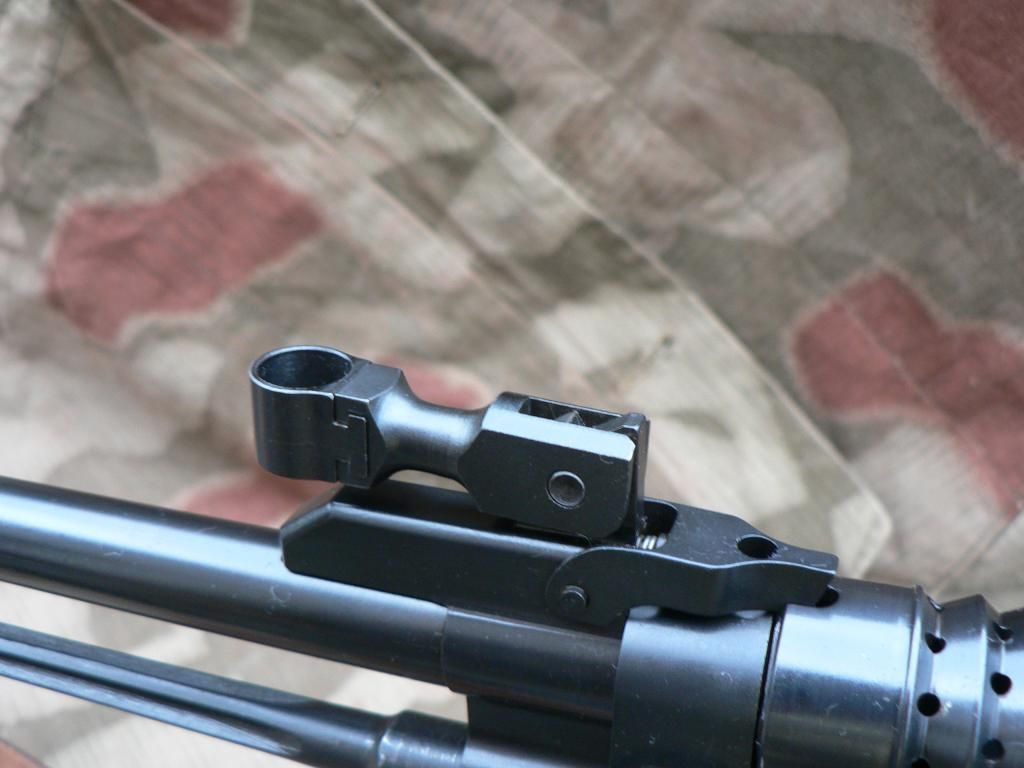
Sticking out forward from the base of the front sight is a sprung muzzle brake retaining latch that looks a little bit like a wishbone:
Notice how it fits into a notch cut into the rear of the brake. This holds the muzzle brake in place. To remove the brake, lift up on the front the wishbone retaining latch and turn the brake counter clockwise until it falls off the threads and into your hand.
Here's a view down inside:
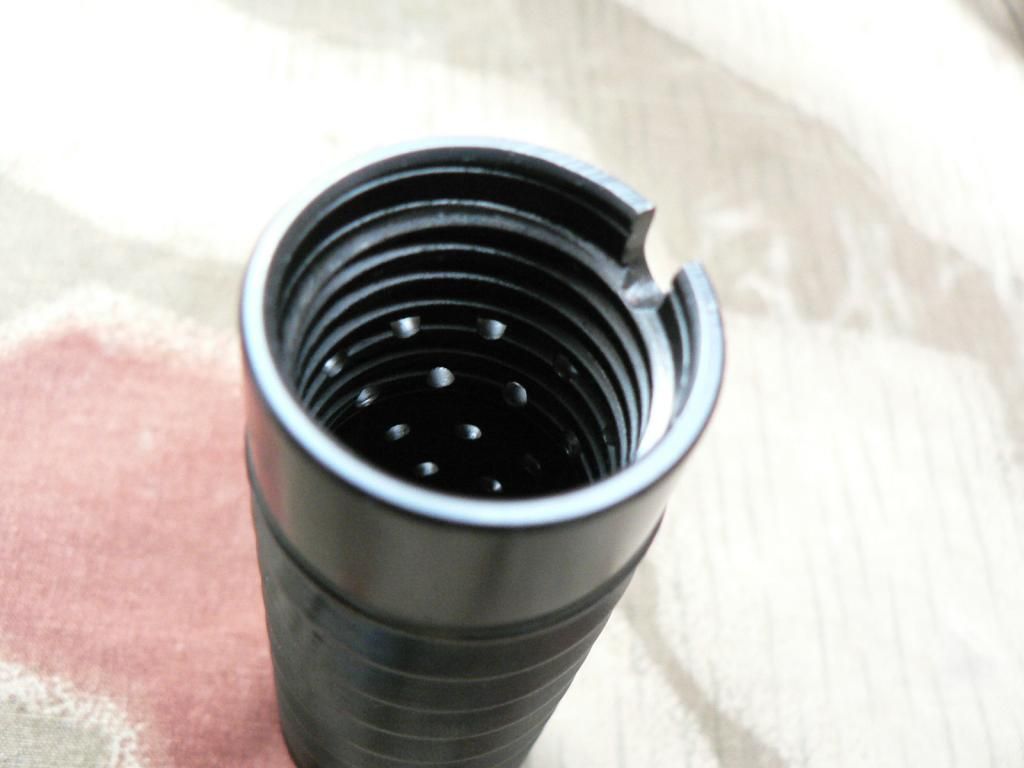
It's threaded partway down and then just smooth steel after that. The hole is plenty big enough to get your finger down inside for cleaning. If you're shooting corrosive ammo, just wash it out with water but make sure you dry it well before installation so as not to rust the threads. About reassembly....don't crank the muzzle brake down tight. Just snug it up until it stops and then back it off until the retaining latch engages the slot. The muzzle brake will wiggle on the threads just a little when properly locked on but this is normal.
Here's the muzzle with the brake removed:
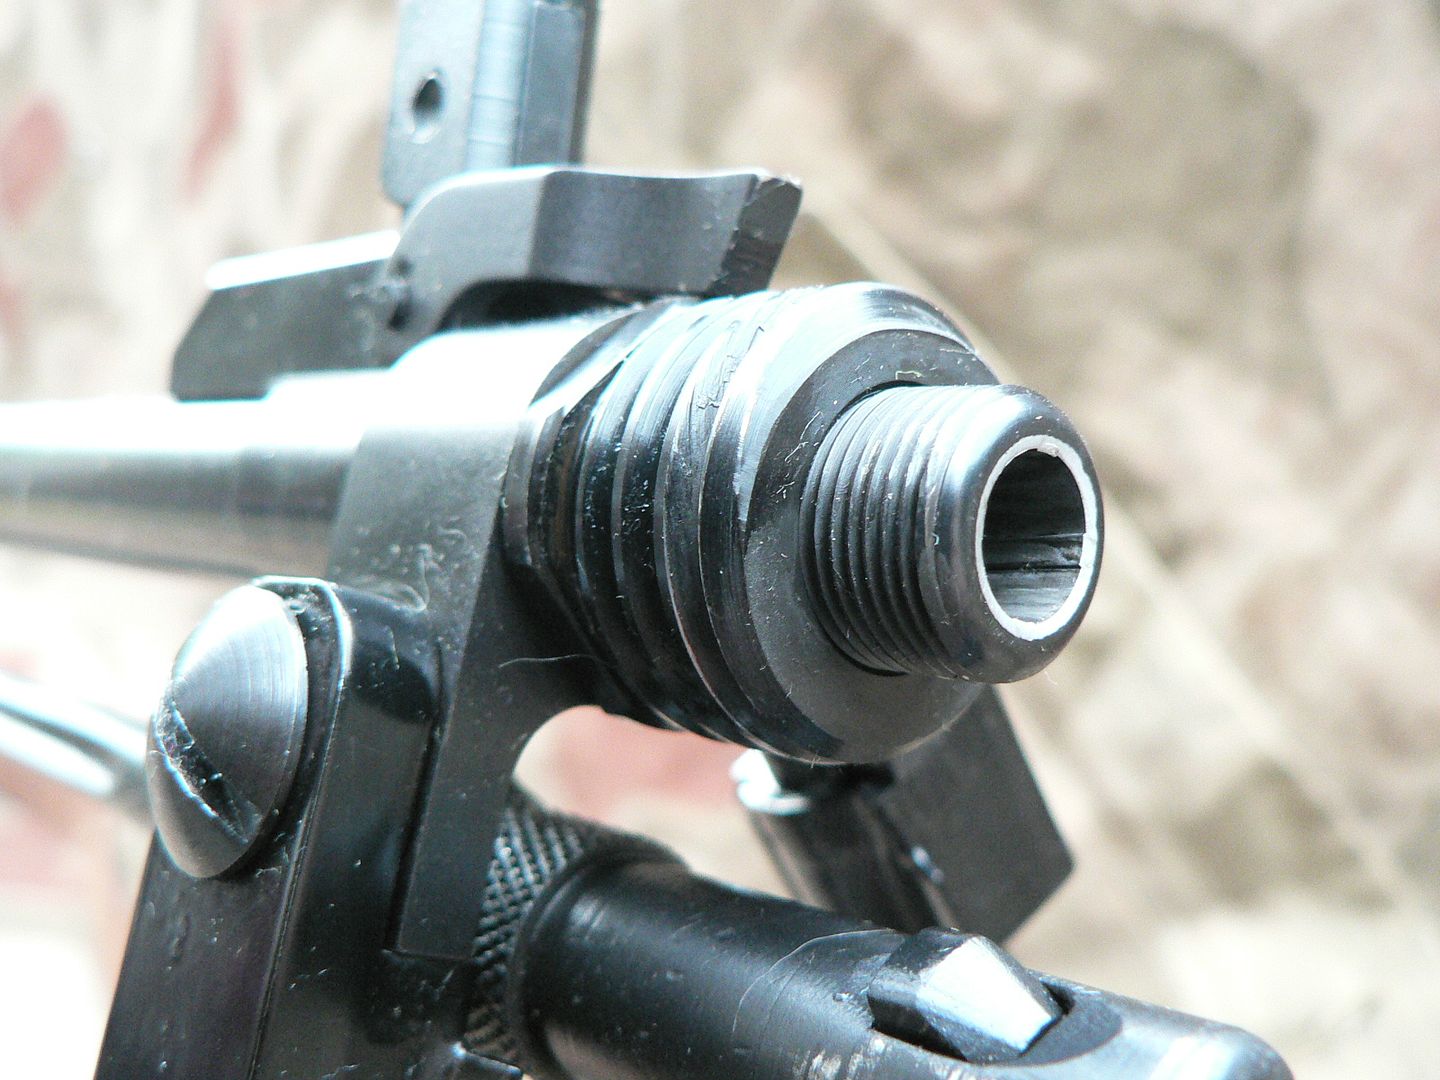
Hey! That barrel crown looks to be chromed! It is. Approximately the first 30 rifles had original MG42 barrels recontoured for this rifle. After that, production stopped for a bit while SMG looked for a manufacturer that suited them. They eventually selected Green Mountain as that manufacturer. The barrels are button rifled and chromed lined. While I am thrilled about the chrome lining since I am a huge fan of Combloc firearms which almost universally use chromed bores, I am far less enthusiastic about a button rifled barrel. IMO, hammer forging it THE way to go but I also know that is cost prohibitive to all but the largest of manufacturers. As much as I hate it, I just have to swallow my pride on that. I'm sure it'll outlast me as I don't plan on shooting 5 billion rounds out of this thing. Notice the large threads for the muzzle brake. This is an adapter screwed onto the barrel and held in place with locktite. Apparently, original adapters were peened in place but SMG felt more comfortable using locktite. Later, we'll look at the gas block retaining nut. It too uses locktite instead of being peened in place. SMG found that these two parts WILL disassemble themselves in use unless they are suitably locked. The muzzle brake adapter also holds the bipod and front sight assemble in place on the barrel. Hanging below the adapter is the bayonet. We'll look at that later. The big screw is holding the right bipod leg to the bipod mounting yoke. We'll look at that later too.
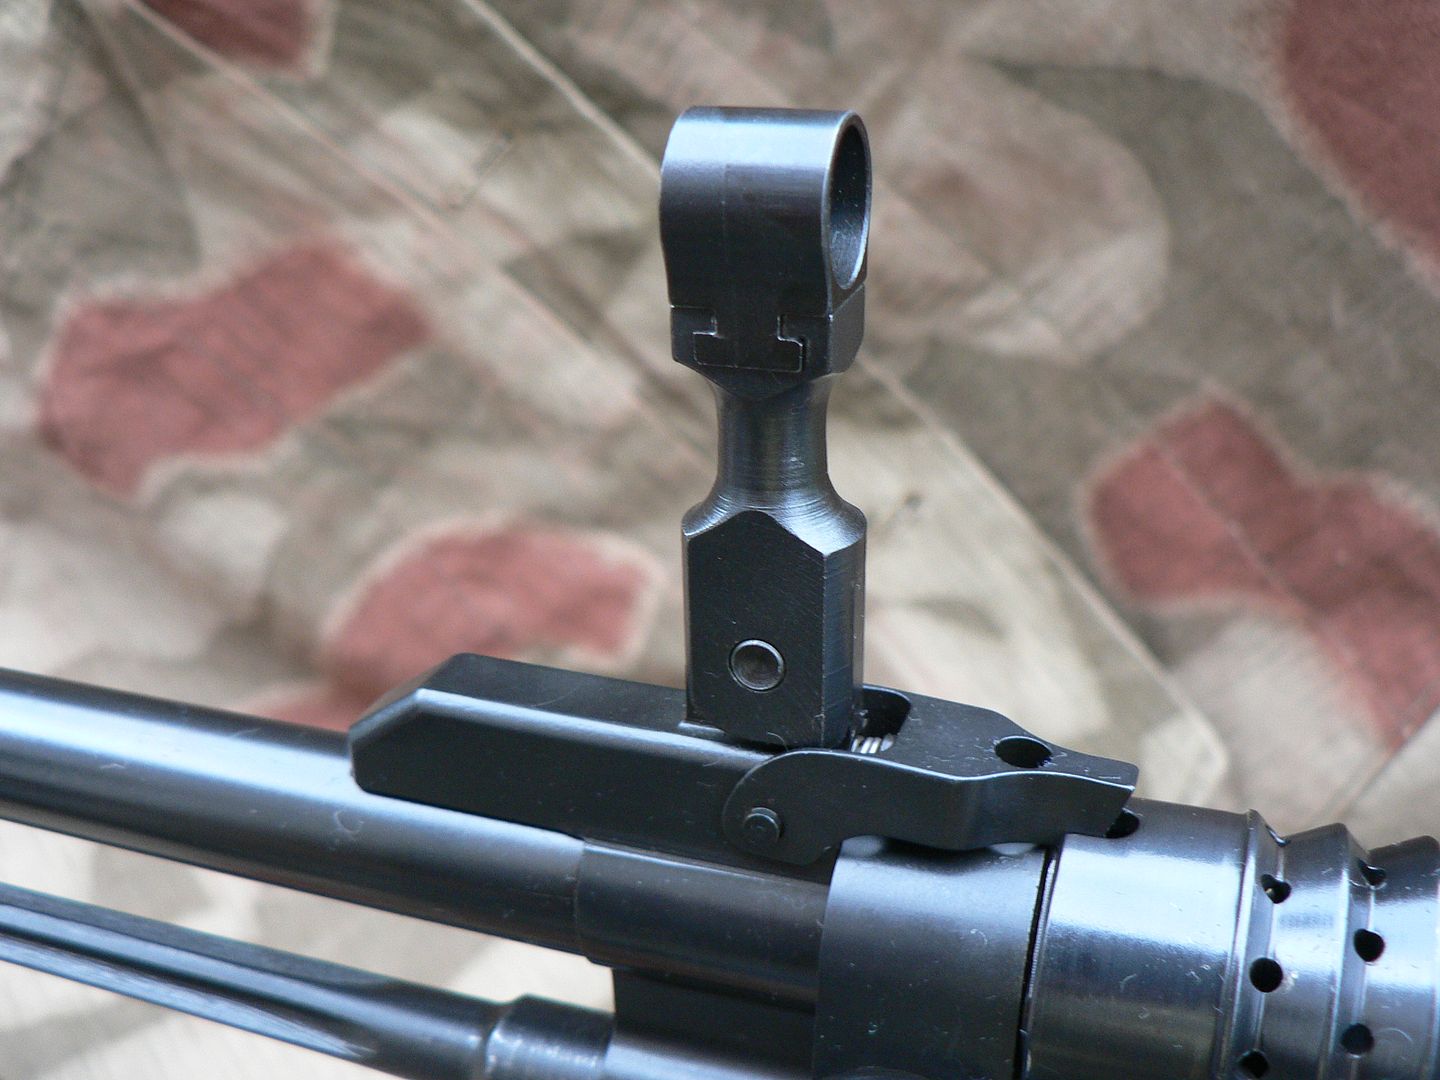
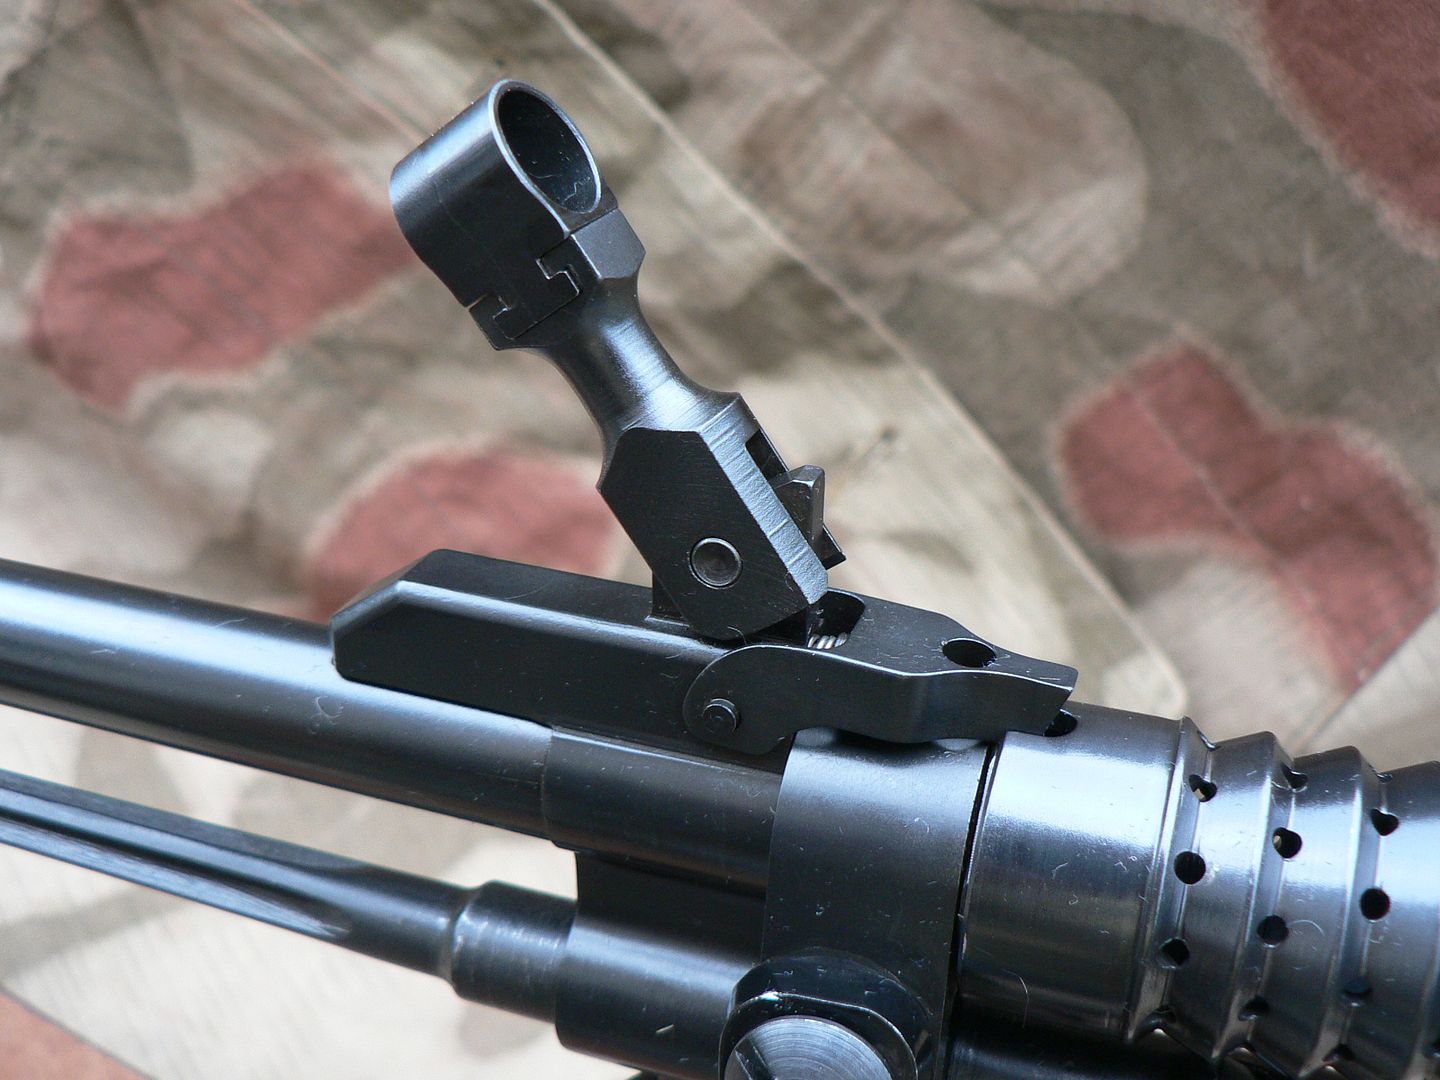
Next up it the front sight:
The little line seen running up the side of the sight hood is a machining mark, NOT a cast line. Remember, everything is machined; nothing is cast EXCEPT for the bipod legs which we will discuss a little later. At the base of the front sight is the muzzle brake retaining latch. If you look closely, you can see its spring and the pin that holds the latch to the sight base. Sticking out the back of the sight base is a square bar. This engages a flat area machined out of the barrel and keeps the sight from spinning on the barrel. Rising from the sight base is the six piece front sight assembly. At present, we can only see three of the six parts. Starting from the top, they are the sight hood, sight body and sight pivot pin. The unseen parts are the sight post, detent spring and detent plunger. Notice that the sight hood is dovetailed onto the sight body. On the original rifle, this was how you adjusted windage. You can do it that way on this rifle as well but it is NOT recommended because you run the risk of breaking the rather thin sight body. Rather, the rear sight has been modified from the original design to allow for windage adjustment. We'll look at that later too. (that's an awful lot of "later's" in there but I promise that we will get to it all.)
Just in case you plan to be jumping out of airplanes with this rifle, it folds down so as not to get caught on your gear during the jump:
Simply pull back on the sight and it folds down with the detent plunger and spring locking it in place. To unfold it, simply grab the sight hood and pull up. It then locks in the up position.
To adjust elevation, the front sight must be removed from the rifle. To do this, fold the front sight back slowly until it is resting at a 45 degree angle relative to the barrel:
Then push straight down (relative to the sight body) on the sight hood with the palm of your hand. You will feel the detent spring inside the sight compress. While holding it in this position, use the tip of a bullet or similar object and push the pivot pin all the way out to either side. Then release pressure off the sight hood and remove the assembly from the sight base. Here's the sight base with the sight assembly removed:

You can see the two notches that the detent plunger locks into to hold the sight in either the up or down position.
Here's the front sight assembly removed from the rifle:
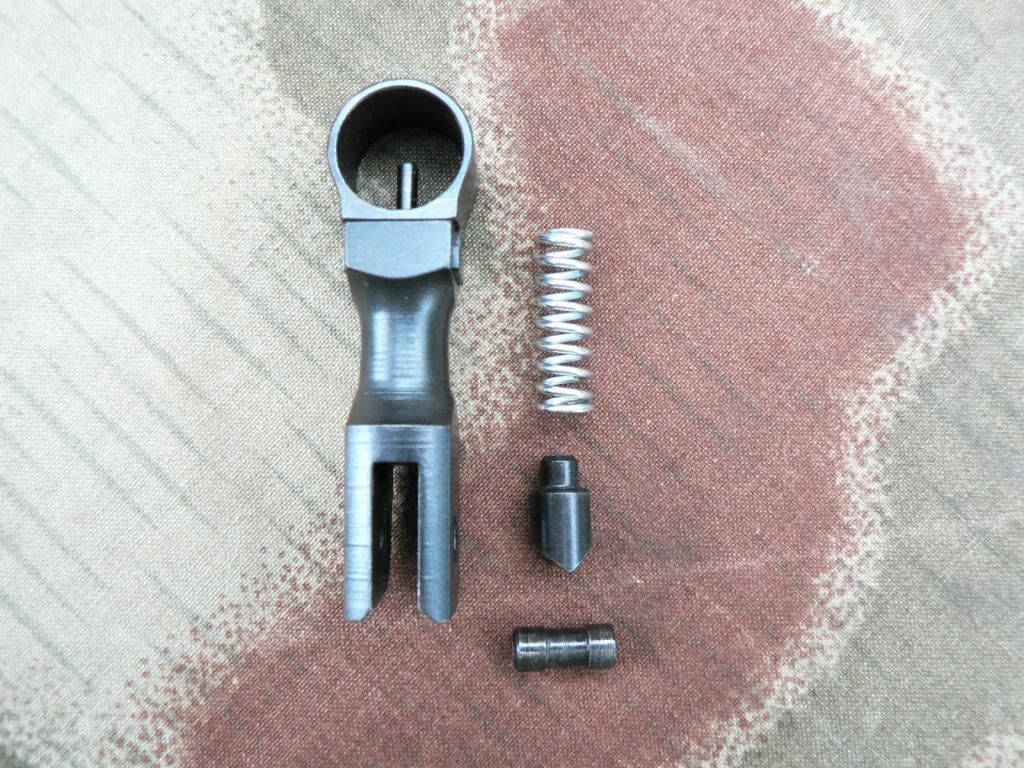
To adjust the elevation, a 1/16 hex wrench is inserted up through the sight body until it engages the bottom of the sight post. The front sight can then be screwed up or down. On the face of it, this way of adjustment seems like a big pain in the arse and it can be I'm sure. However, my rifle came perfectly zeroed for elevation at 100 yards so I had to do nothing. I can only assume that SMG zeros them before shipping them out... or maybe I just got lucky (unlikely).
Here is a shot showing the right side of the sight assembly:
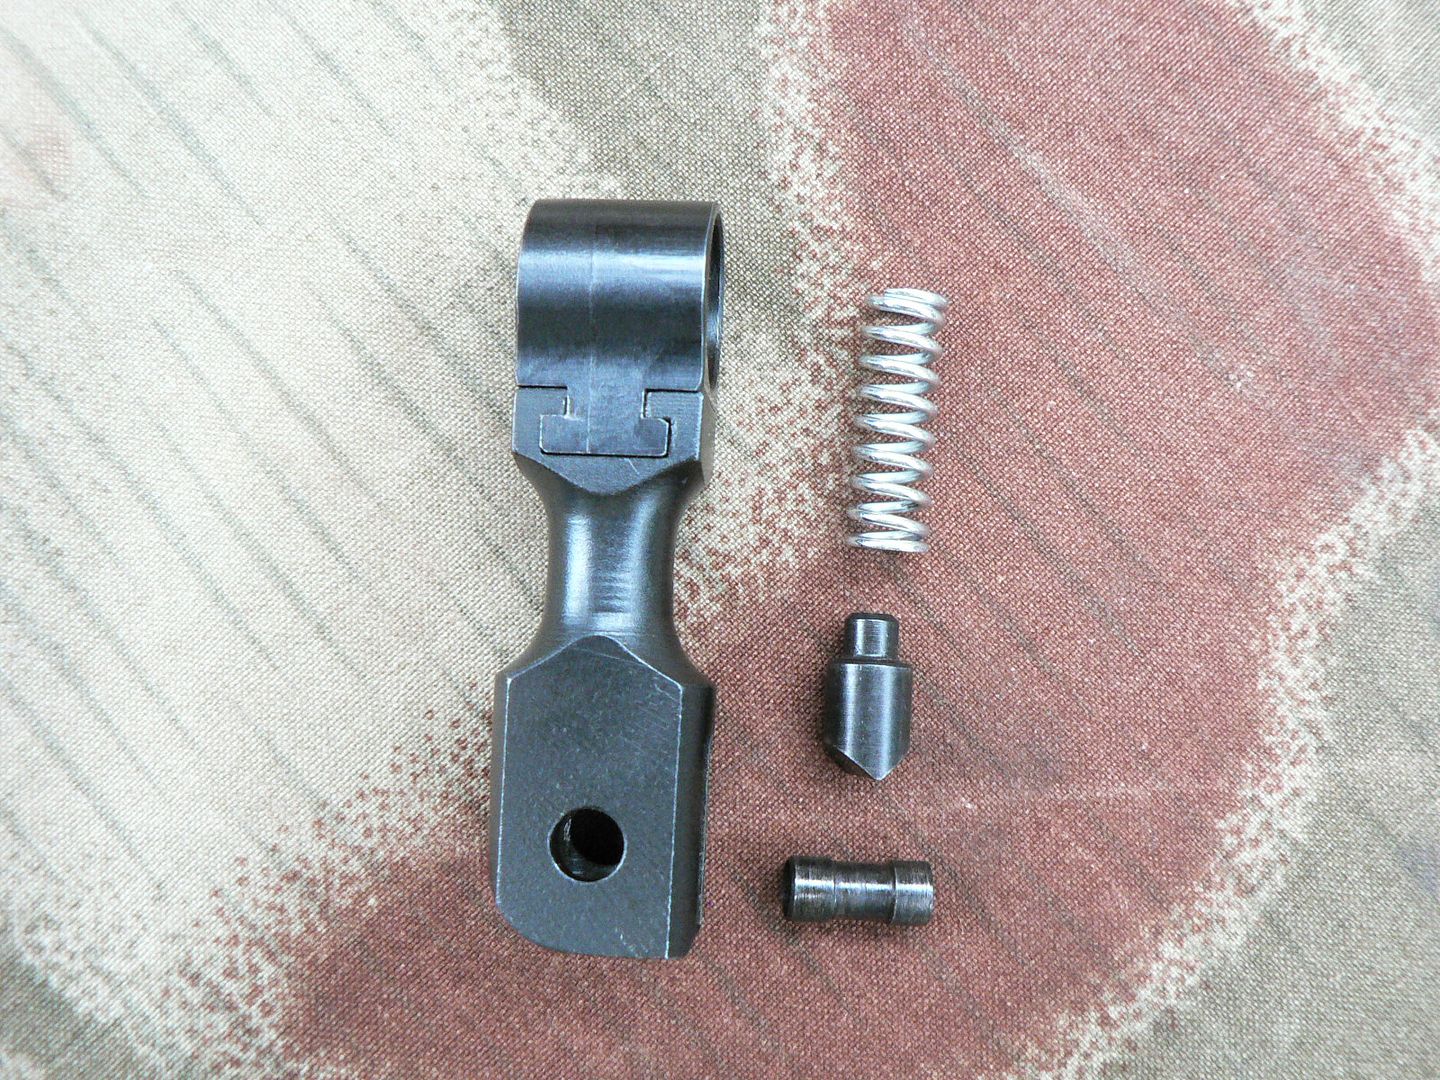
Notice that the lower rear of the sight body (lower left in the picture) is radiused while the lower front (lower right in the picture) is square. This radiused side MUST face to the rear upon reassembly or your sight will not fold. To the right of the sight assembly in the picture is the detent spring, detent plunger and pivot pin. The plunger has a "v" shape to it at the bottom. The way it is pictured is the way it must face when reassembled. Notice that the pivot pin is thinner in the center. This keeps it locked in place when assembled guaranteeing that it will not work its way out in use. The only way it can be removed is when the sight assembly is in the 45 degree position relative to the barrel and pressure downward pressure is applied to the sight hood. Assembly of the sight to the sight base is the reverse of removal. It all sounds very fidgety but it is actually very easy and natural in practice. The only thing that can get a little frustrating is keeping the holes lined up between the sight base and sight assembly while trying to insert the pivot pin. One you do it a time or two though, you get the hang of it.
Well, that's it for tonight. I've been at this for hours and I'm getting tired. Time to hit the hay! Yeehaaa!!!